How to Tell When Bread Dough Has Risen Enough
Some links in this post may be affiliate links. That means I might make a small commission on qualifying purchases if you click the link. There is no extra cost to you.
Bread recipes often give a rising time, but dough does not care about you enough to watch the clock. The temperature of your kitchen, strength of the yeast or sourdough starter, type of flour, humidity, and even the container you use can change how quickly the dough rises. You will have to learn to use your powers of observation.

Learning how to tell when bread dough has risen enough is more dependable than following a timer alone. Properly risen dough should look visibly larger, feel light and airy, and respond slowly when gently pressed with a fingertip. Dough that springs back immediately usually needs more time, while dough that collapses or does not spring back may have risen too long. It will take some trial and error to grow this skill, but eventually you will know exactly what to expect.
I live in a dry climate, so I also have to protect my dough from losing moisture while it rises. Covering it well and paying attention to its appearance and texture—not only the suggested rising time—has made my homemade bread much more consistent. In this guide, I’ll show you how to recognize properly risen dough during both the first and second rise, along with signs of underproofing and overproofing.
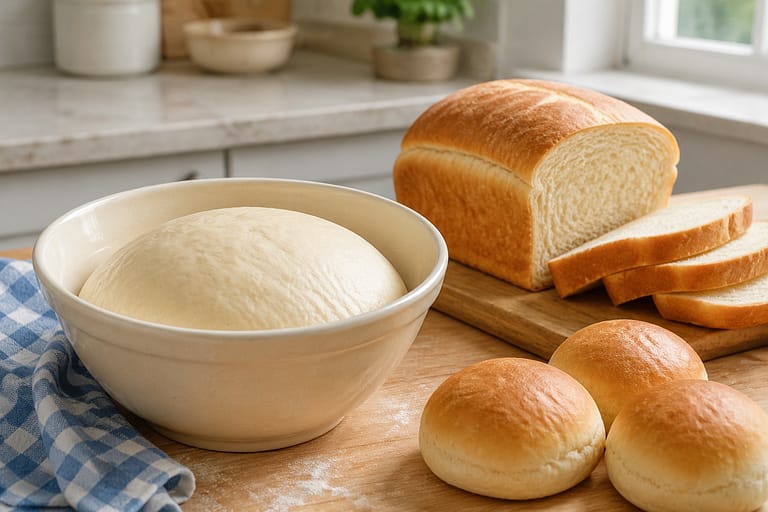
Quick answer: How do you know when bread dough has risen enough?
Bread dough has usually risen enough when it looks noticeably larger and feels lighter and airier. During the first rise, many doughs should expand to approximately twice their original size. During the final rise, gently press the dough about 1/2 inch with a lightly floured fingertip. If the indentation fills back slowly and remains slightly visible, the dough is generally ready to bake.
Table of contents
- The First Rise and Final Proof Are Different
- 5 Signs Bread Dough Has Risen Enough
- Underproofed vs. Overproofed Bread Dough
- What Changes How Long Bread Dough Takes to Rise?
- How Long Does Bread Dough Usually Take to Rise?
- Where Is the Best Place to Let Bread Dough Rise?
- Frequently Asked Questions About Bread Dough Rising
The First Rise and Final Proof Are Different
Most bread dough rises twice, and each rise serves a different purpose. Understanding the difference makes it easier to judge the dough correctly instead of depending entirely on the suggested time.
The First Rise: Bulk Fermentation
The first rise begins after the dough has been mixed and kneaded. During this stage, yeast or sourdough starter produces gas, the dough develops flavor, and the gluten structure becomes stronger.
For many yeast breads, the dough is ready to shape when it has approximately doubled in size. The surface may look slightly domed, and small bubbles may be visible along the sides or underneath the dough when it rises in a clear container.
The dough should feel softer, lighter, and more elastic than it did immediately after kneading. Exact doubling is a helpful guideline, but it is not a requirement for every recipe. Enriched doughs containing butter, eggs, milk, or sugar may rise more slowly, while some sourdough recipes, like bagels, call for less than a full doubling.
The Second Rise: Final Proof
The final proof happens after the dough has been shaped and placed in its loaf pan, banneton, or baking dish. This rise gives the shaped dough enough air and structure to expand properly in the oven.
During the final proof, watch for a loaf that looks visibly fuller, lighter, and slightly puffy. Pan bread will often rise above the rim of the loaf pan, although the exact height depends on the recipe and pan size.
The fingertip indentation test is most useful during this stage. Press the dough gently with a lightly floured finger. Dough that springs back immediately likely needs more time. Dough that returns slowly while leaving a shallow indentation is generally ready to bake.
If you are new to working with homemade dough, visit my Baking Basics for Beginners guide for help with measuring, mixing, kneading, and proofing.
5 Signs Bread Dough Has Risen Enough
Do not rely on only one test. Look at the dough’s size, shape, texture, bubbles, and response to a gentle press. When several of these signs appear together, you can be more confident that the dough is ready.
1. The Dough Has Grown Noticeably
During the first rise, many bread doughs should grow to approximately twice their original size. A straight-sided container makes this easier to judge. You can mark the starting height with a rubber band, piece of tape, or washable marker.
The dough does not always need to double perfectly. Some recipes only require an increase of 50–75 percent, especially when the dough will have a long final proof.
2. The Dough Looks Puffy and Rounded
Properly risen dough often develops a gently domed surface. It should look inflated rather than dense or flat. Shaped rolls and loaves may begin touching one another as they expand.
A dough that spreads outward without becoming fuller may have weak gluten, too much liquid, or insufficient shaping tension.
3. You Can See Bubbles
Small bubbles along the sides or bottom of the container show that the yeast or sourdough starter is producing gas. Larger bubbles may also appear beneath the surface.
You do not need to see dramatic bubbles in every dough. Stiff doughs and enriched doughs may hide them, even when fermentation is progressing normally.
4. The Dough Feels Lighter and Airier
Gently lift or touch the dough. Properly risen dough should feel lighter, softer, and more aerated than it did after kneading. Handle it carefully so you do not press out all the gas it has developed.
5. The Indentation Returns Slowly
During the final proof, lightly flour your finger and gently press the dough about 1/2 inch deep.
- If the indentation springs back immediately, the dough likely needs more time.
- If it returns slowly and leaves a shallow mark, the dough is generally ready to bake.
- If the indentation remains deeply sunken or the dough collapses, it may be overproofed.
The fingertip test is a useful clue, but it is not perfect for every recipe. Very wet dough, whole-grain dough, enriched dough, and sourdough may respond differently. Use the test together with the dough’s size, puffiness, and overall feel.
Underproofed vs. Overproofed Bread Dough
Learning to recognize underproofed and overproofed dough can help you correct it before baking. The differences become easier to see once you know what to watch for.
Signs of Underproofed Dough
Underproofed dough has not had enough time to produce and hold the gas needed for a light loaf. It may:
- Look dense, tight, or noticeably smaller than expected
- Spring back immediately when gently pressed
- Have very few visible bubbles
- Feel firm or heavy instead of light and airy
- Tear easily when stretched
- Produce a dense loaf with a tight crumb
- Split unpredictably during baking because the dough is still trying to expand
If the dough appears underproofed, cover it and allow it to continue rising. Check it again in 15–30 minutes instead of adding more flour or reshaping it immediately.
Signs of Properly Proofed Dough
Properly proofed dough should:
- Look visibly larger and puffy
- Feel soft, light, and aerated
- Hold its shape without appearing tight
- Return slowly after a gentle fingertip press
- Leave a shallow indentation that remains slightly visible
- Expand in the oven without collapsing
Signs of Overproofed Dough
Overproofed dough has risen beyond the point where its gluten structure can reliably hold the gas being produced. It may:
- Look extremely swollen, fragile, or flattened
- Feel very soft and weak
- Have a strong fermented or alcoholic smell
- Remain deeply indented when pressed
- Deflate when moved, scored, or touched
- Spread outward instead of holding its shape
- Bake into a flat loaf with little oven spring
Can Overproofed Dough Be Saved?
Slightly overproofed yeast dough can often be gently pressed down, reshaped, and allowed to rise again for a shorter period. This works best with ordinary sandwich bread, rolls, and other commercial-yeast doughs.
Handle sourdough and delicate enriched dough more carefully. If the dough is only slightly overproofed, bake it as soon as possible. Severely overproofed dough may not recover completely, but it can often be turned into focaccia, flatbread, pizza crust, or another recipe that does not require a tall final rise.
What Changes How Long Bread Dough Takes to Rise?
A recipe’s rising time is only an estimate. Dough may be ready much sooner or later depending on your ingredients and kitchen conditions.
Kitchen Temperature
Warm dough rises faster, while cool dough rises more slowly. A loaf that rises in one hour during summer may need considerably longer in a cool winter kitchen.
Place the dough in a comfortably warm location, but avoid intense heat. A hot oven, heating vent, or surface that feels hot to your hand can weaken or kill the yeast and cause the outside of the dough to dry out.

Yeast or Sourdough Starter Strength
Fresh, active yeast usually produces a quicker and more predictable rise. Old yeast may work slowly or fail to rise at all.
Sourdough timing depends heavily on the strength of the starter. A starter that has recently doubled, looks bubbly, and smells pleasantly fermented will generally raise dough more effectively than a starter that is weak, hungry, or newly established.
Type of Flour
Bread flour and hard wheat contain more gluten-forming protein, which helps dough trap gas and rise upward. Soft wheat and lower-protein flour may produce dough that spreads more and rises less dramatically.
Freshly milled flour continues absorbing moisture after mixing. Its bran can also interfere with gluten development, so fresh-milled dough may need additional resting or kneading time before it can hold a strong rise.
Sugar, Fat, Eggs, and Dairy
Enriched doughs containing butter, oil, eggs, milk, or large amounts of sugar often rise more slowly than basic flour-and-water dough. Cinnamon rolls, brioche, sweet breads, and dinner rolls may need patience even when the yeast is working properly.
Salt
Salt improves flavor and helps control fermentation, but too much can slow yeast activity. Direct contact between concentrated salt and yeast can also interfere with rising. Follow the recipe amount and distribute the salt evenly through the dough.
Humidity and Dry Air
Dry air can form a skin across the surface of rising dough. That dry layer restricts expansion and can make the dough look as though it has stopped rising.
This matters in my own dry climate. A damp towel alone can dry out surprisingly quickly, so I often cover the bowl with a fitted lid, reusable bowl cover, plastic wrap, or even place the entire bowl inside a clean grocery bag. Trapping moisture around the dough keeps the surface soft enough to expand.
Dough Consistency
Very stiff dough may rise slowly because it is harder for the expanding gas to stretch the gluten structure. Dough that is excessively wet may ferment normally but spread outward instead of rising upward.
Before changing the consistency, allow the flour time to absorb the liquid. This is especially important when baking with freshly milled flour.
How Long Does Bread Dough Usually Take to Rise?
Bread dough may take anywhere from about 30 minutes to several hours to rise. Sourdough can take even longer. The following times are general starting points—not deadlines.
Commercial Yeast Dough
A basic dough made with active dry or instant yeast commonly needs:
- First rise: Approximately 1–2 hours
- Final proof: Approximately 30–90 minutes
A warm kitchen and fresh yeast may shorten those times. A cool kitchen, small amount of yeast, or refrigerated ingredients may extend them.
Enriched Dough
Dough containing butter, eggs, milk, or sugar commonly needs:
- First rise: Approximately 1 1/2–3 hours
- Final proof: Approximately 45 minutes–2 hours
Cinnamon rolls, brioche, dinner rolls, and other rich doughs may rise slowly because fat and sugar make fermentation more difficult for the yeast.
Sourdough
Sourdough timing varies considerably with starter strength, dough temperature, flour, and the amount of starter used. A sourdough recipe may need:
- Bulk fermentation: Approximately 4–12 hours at room temperature
- Final proof: Approximately 1–4 hours at room temperature or an overnight refrigerated proof
A cold refrigerator proof may last 8–24 hours, depending on the recipe. Follow the recipe’s general schedule, but judge readiness by the dough’s expansion, bubbles, texture, and strength.
Fresh-Milled Flour Dough
Fresh-milled dough does not follow one universal rising schedule. Hard wheat with good gluten development may rise well, while dough made with lower-protein grains may spread instead of doubling upward.
Fresh flour can ferment actively because it contains the entire grain, but the bran may weaken the gluten structure. Give the flour enough time to absorb moisture, develop the gluten thoroughly, and watch the dough rather than expecting it to look exactly like white-flour dough.
When your dough reaches the physical signs of readiness before the suggested time, move to the next step. If the timer ends but the dough still looks dense and springs back quickly, give it more time.
You can practice these methods in my fresh milled sourdough sandwich bread recipe. It walks you through six bulk-fermentation signs, the poke test, room-temperature proofing, and refrigerated proofing.
Where Is the Best Place to Let Bread Dough Rise?
Bread dough does not require a special proofing appliance. It needs a draft-free location with a comfortable, steady temperature. For many doughs, a temperature around 75–80°F encourages steady fermentation without overheating the yeast.
On the Kitchen Counter
A covered bowl on the counter is usually sufficient when your kitchen is comfortably warm. Keep it away from an open window, exterior door, air conditioner, or heating vent where the temperature changes quickly.
Inside a Turned-Off Oven
A turned-off oven can provide a protected, draft-free space. The oven light may add gentle warmth, but some oven lights make the enclosed space surprisingly hot.
If you use this method, check the temperature and place a reminder over the oven controls so nobody preheats it while the dough is inside. The oven should remain turned off.
Inside a Microwave with Warm Water
Heat a mug of water in the microwave, then place the covered bowl of dough beside it after the microwave is turned off. The warm water creates a mild, humid environment that helps prevent the dough’s surface from drying.
Do not microwave the dough. Reheat the water separately if the space becomes cold during a long rise.
In a Proofing Box
A proofing box maintains a controlled temperature and can be helpful if you bake frequently or keep your home cool. It is convenient, but it is not necessary for successful homemade bread.
Protect the Dough From Drying Out
Wherever you place the dough, keep it covered. In a dry climate, a cloth may lose moisture before the rise is complete. Use a fitted lid, reusable bowl cover, plastic wrap, or a clean bag to trap moisture and keep the surface flexible.
Avoid setting dough directly on a hot heating pad, radiator, stove burner, or other intense heat source. Excessive heat can weaken the dough, melt butter in enriched recipes, or kill the yeast.
Frequently Asked Questions About Bread Dough Rising
No. Doubling is a useful guideline for many yeast breads, but it is not a universal rule. Some doughs are ready after increasing by 50–75 percent, while others may expand beyond double. Follow the recipe’s general instructions and also look for puffiness, bubbles, a lighter texture, and a slow response to the fingertip test.
Underproofed bread may have a dense or gummy crumb, uneven air pockets, and splits along the sides or top. It may rise rapidly in the oven but tear because the tight dough has not had enough time to expand evenly.
Yes. When dough rises too long, the gluten structure may become too weak to hold the gas produced during fermentation. The dough can become fragile, deflate when touched, spread outward, and bake into a flat loaf with little oven spring.
Common causes include weak or expired yeast, an inactive sourdough starter, a cold kitchen, too much salt, overly stiff dough, insufficient kneading, or dough that has dried across the surface. Move it to a comfortably warm location, keep it covered, and give it additional time before deciding it has failed.
Yes, if the recipe allows for a slow refrigerated rise. Cover the dough securely and place it in the refrigerator. Cold temperatures slow fermentation but do not stop it completely. The dough may need additional time at room temperature before shaping or baking, depending on the recipe.
Yes. Refrigerated fermentation develops flavor and makes many doughs easier to schedule. Commercial-yeast dough and sourdough can both rise in the refrigerator, although they may not visibly double while cold. Look for some expansion, bubbles, and a lighter texture.
The shaped dough should look fuller, softer, and visibly puffy. When gently pressed with a lightly floured fingertip, the indentation should return slowly and remain faintly visible. If it springs back immediately, allow more time. If it remains deeply sunken or the dough collapses, bake it promptly because it may be overproofed.
Follow the recipe’s instructions. Many yeast doughs are gently deflated after the first rise to redistribute gas and prepare them for shaping. You do not need to forcefully punch the dough. Pressing it down gently is usually enough. Sourdough is often handled more carefully to preserve its structure and bubbles.
Learning how to tell when bread dough has risen enough takes a little practice, but the dough will give you plenty of clues. Look for noticeable growth, a puffy shape, visible bubbles, a lighter texture, and an indentation that returns slowly during the final proof.
Use the recipe’s rising time as a guide, then adjust for your kitchen temperature, flour, starter or yeast strength, and humidity. Once you begin watching the dough instead of waiting only for a timer, homemade bread becomes much more consistent.
Continue building your bread-baking skills with these guides:
- Baking Basics for Beginners
- How to Knead Dough by Hand or With a Mixer
- How to Make and Maintain a Sourdough Starter
- Fresh Milled Flour Recipes for Beginners
If this guide helped you understand your dough, leave a comment and tell me what kind of bread you are making. Your question or experience may help another home baker too.

Kim is an adventurous mama of 5 who has been building new skills over 16 years of marriage. Over the past decade, she and her family have built a homestead from the ground up, starting with meat and egg chickens, growing into a large garden, and learning to preserve their harvest.
She taught herself to sew, crochet, and knit 13 years ago through books and early YouTube tutorials, and has been making handmade projects ever since.
Cooking from scratch became a necessity and a passion as her family learned to eat more nutritionally and live more frugally. She tests all of her sourdough and fresh milled flour recipes on the kids to ensure they’re delicious and nutritious.
At Plain Living, Kim shares what she’s actually lived — not theory, but the real skills she’s picked up through years of trial, error, and love for her family and home.