How to Make Fresh Milled Flour Sourdough Sandwich Bread
Some links in this post may be affiliate links. That means I might make a small commission on qualifying purchases if you click the link. There is no extra cost to you.
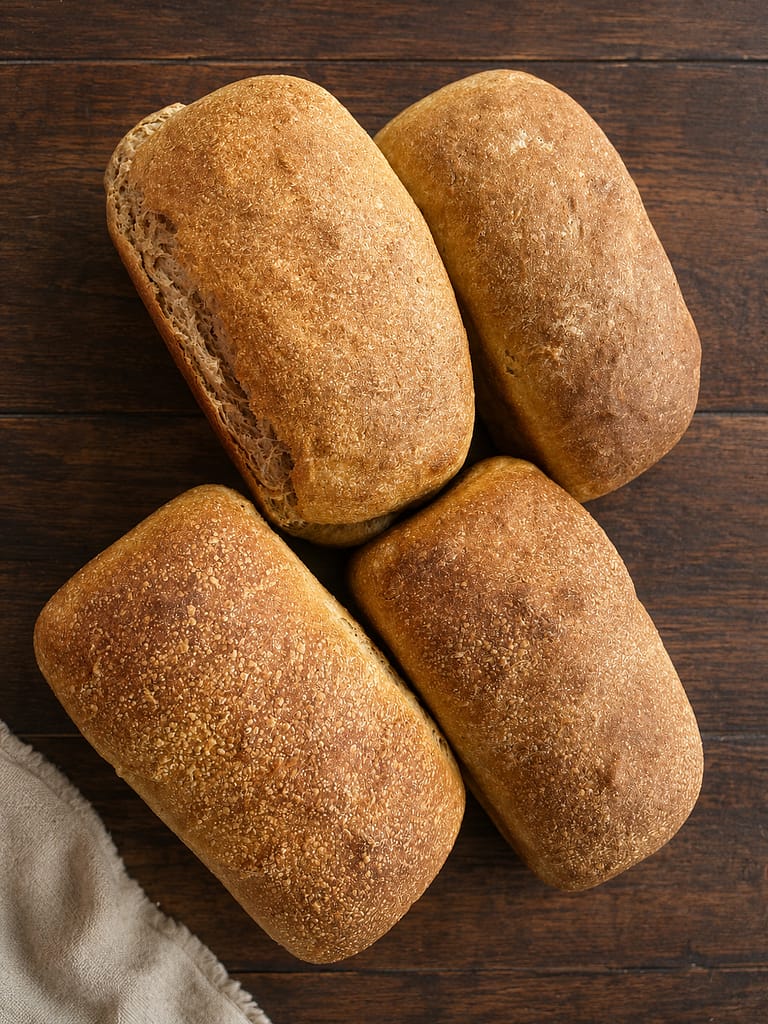
This fresh milled flour sourdough sandwich bread has a rich wheat flavor. All-purpose flour gives it enough strength for a good rise. You can shape the dough as sandwich bread or a bâtard. You can also bake it the same day or chill it for more sour flavor.
I created this recipe because I wanted one dough that used sourdough and fresh milled flour and could fit real family life. It had to work for sandwiches, but I also wanted the choice of an artisan-style loaf. I tested it with two pan sizes and several baking methods. It has stayed dependable even when my starter was not fed in one exact way.

I usually feed my starter with equal amounts of flour and water. Still, I am not perfectly exact every time. This loaf continues to work well in my kitchen. A very dry starter usually needs a few extra tablespoons of water.
The directions teach you to watch the dough instead of only watching the clock. You will check its rise, bubbles, feel, stretch, movement, and response to touch. These simple signs tell you how the dough is growing and changing.
I am a home baker who mills her own flour and makes this sourdough bread for my family. These directions come from repeated real-kitchen testing with my starter, different types of pans, and my personal, domestic oven. I also check trusted baking guides when I explain why the methods work.
Fresh Milled Sourdough Sandwich Bread at a Glance
Yield: One 9-by-5-inch or 8 1/2-by-4 1/2-inch sandwich loaf, or one bâtard
Bake: 400°F for 55 to 60 minutes
Fermentation: Variable; judge the dough rather than relying only on time
Table of contents
- Fresh Milled Sourdough Sandwich Bread at a Glance
- Why Fresh Milled Flour Sourdough Sandwich Bread Works
- Ingredients for Fresh Milled Flour Sourdough Sandwich Bread
- Ingredient notes
- Equipment Needed for Sourdough Bread
- How to Make Fresh Milled Flour Sourdough Bread
- Bulk Fermentation For Fresh Milled Flour Loaves
- Shape the Sourdough Sandwich Loaf
- The second Rise: Proofing Sourdough Loaves
- How to Tell When Fresh Milled Bread is Done Baking
- Cool the loaf completely
- Troubleshooting fresh milled sourdough bread
- Storing Sourdough Sandwich Bread Made with Freshly Milled Flour
- Frequently Asked Questions About Fresh Milled Flour, Sourdough, and Bread Making
- Related reading to Learn More About Milling Your Own Flour and Making Sourdough Breads
- Printable Recipe Card
- About the Author
Why Fresh Milled Flour Sourdough Sandwich Bread Works
- Fresh-milled hard red wheat adds rich flavor. It also gives the loaf its whole-grain taste and color.
- All-purpose flour helps the dough hold together. This gives you a stronger rise without hiding the fresh wheat flavor.
- A short rest lets the flour soak up the water. This makes the dough easier to mix or fold.
- Butter and honey make the loaf better for sandwiches. Salt keeps the flavor from tasting flat.
- Optional sunflower lecithin helps the dough stay strong. Lecithin is a natural mixing helper that lets dough hold more gas. The exact result changes with the flour and the amount you use.
- A cover traps steam. Steam keeps the crust soft so the loaf can rise. Uncover it later to brown.

Ingredients for Fresh Milled Flour Sourdough Sandwich Bread
- 1 1/4 cups water, plus a few tablespoons more if needed
- 1/2 cup active sourdough starter
- 1/4 cup butter, melted and allowed to cool until it is no longer hot
- 1 tablespoon honey
- 2 cups freshly milled hard red wheat flour
- 2 cups all-purpose flour
- 1/2 tablespoon salt
- 2 tablespoons sunflower lecithin, optional
Ingredient notes
Active sourdough starter
I usually feed my starter with equal amounts of flour and water. I am not perfectly exact about it, though. This recipe has still worked for me every time. Your starter should look active and bubbly, but it does not need one exact thickness.
If your starter is stiff or dry, begin with the listed water. Add another tablespoon when the dough feels tight. A very dry starter usually needs a few extra tablespoons when making fresh milled flour bread.
The starter float test gives you one clue, but it cannot give you a sure answer. A starter that sinks is probably not ready. A starter that floats has enough trapped gas to stay on top. Also check its rise, bubbles, smell, and last feeding.
Fresh-milled hard red wheat flour
Hard red wheat gives this bread a hearty wheat flavor. Use the flour soon after you mill it. Keep all the bran and germ unless you choose to sift it.
This blend makes hard red wheat sourdough bread easier to shape and slice. You still taste the fresh wheat, but the all-purpose flour adds strength.
Freshly milled flour does not soak up the same amount of water every time. That is normal in a home kitchen. The short rest helps you see what this batch needs. Trust the feel of your dough instead of forcing every batch to act alike.
Sunflower lecithin
The sunflower lecithin is optional, but it helps the dough stay strong. Strong dough can hold the gas made by your starter. This often gives fresh-milled sourdough bread a better rise. You can still make the loaf without it.
Spelt variation of fresh milled flour
I have made this recipe with freshly milled spelt and the same measurements. Replace the 2 cups of hard red wheat with 2 cups of fresh-milled spelt. Keep every other ingredient the same.
Spelt dough often stretches more and springs back less. Handle it gently and watch how it looks and feels. Do not expect it to act exactly like hard red wheat dough.
Equipment Needed for Sourdough Bread
- Grain mill
- Large mixing bowl or stand mixer with a dough hook
- Bowl cover, lid, or damp towel
- Dough scraper, optional
- 9-by-5-inch loaf pan, 8 1/2-by-4 1/2-inch loaf pan, or bâtard banneton
- Dutch oven, second loaf pan, or metal steam pan, depending on the baking method
- Cooling rack
- Instant-read thermometer, optional
I have baked this loaf in both pan sizes many times. Both work well. The 8 1/2-by-4 1/2-inch pan makes a slightly taller loaf. The finished bread is much the same in either pan. For this recipe, I use these Amazon Basics nonstick loaf pans (set of two). If you already have a loaf pan in one of the sizes listed above, you can use that instead.
How to Make Fresh Milled Flour Sourdough Bread
1. Mix the wet ingredients
Pour the water into a large mixing bowl. Whisk in the active starter, melted butter, and honey. Keep whisking until the starter is mostly mixed into the water.
The butter may look a little separate from the water. That is fine. Make sure the butter is not hot. Too much heat can harm your starter.
2. Mix dry ingredients into fresh milled flour
First, add the fresh-milled hard red wheat flour and all-purpose flour. Then add the salt and optional sunflower lecithin. Stir until all the flour is wet and no dry spots remain.
The dough does not need to look smooth yet.
3. Rest for 5 to 10 minutes
Cover the bowl and let the dough rest for 5 to 10 minutes. This gives the fresh flour time to soak up water. Check the dough after the rest before you add anything else.
The rested dough should be soft enough to stretch. Add more water if it feels thick, tight, or hard to move. Work in 1 tablespoon at a time. A very dry starter usually needs a few extra tablespoons.
4. Develop the dough
Choose either the mixer method or the stretch-and-fold method. Both build strength so your dough can hold the gas from the starter.

Mixer method for kneading loaves made from fresh milled flour
I prefer my stand mixer because it can work while I do other things. Fit your mixer with a dough hook. Mix on medium-low speed for about 10 minutes.
If the dough feels thick and tight, mix for 5 minutes. Let it rest for 5 minutes. Then mix for another 5 minutes. The pause gives the flour time to soak up more water.
The dough should become smoother, stronger, and more stretchy. Some bakers use a windowpane test—stretching a small piece to see if light shines through it. Fresh whole-grain dough does not need to become as thin as white bread dough. Look for visible improvement rather than demanding a perfect result.
Stretch-and-fold method for sourdough made with fresh milled flour
Wet your hands so the dough does not stick to them. This hand method is useful when you do not want to use a mixer.
- Lift one edge of the dough straight upward, gently wiggling it to encourage it to stretch.
- Stretch it approximately 6 to 8 inches above the dough ball without tearing it.
- Pull the stretched section across the bowl and tuck it into the opposite side.
- Turn the bowl one-quarter turn and repeat.
- Continue around the dough for approximately 4 to 9 stretches, stopping when the dough has tightened into a neater ball.
Complete three rounds. Cover and rest the dough for 30 minutes between each round. Then complete three more rounds. Cover and rest it for 15 minutes between those rounds.
The dough should slowly become smoother and stronger. Stop each round when the dough begins to fight your pull. Do not keep pulling until it tears.
Bulk Fermentation For Fresh Milled Flour Loaves
After you build the dough’s strength, cover it for the bulk ferment. Let it grow until it feels light, fluffy, and full of bubbles.
There is no single correct number of hours. Your starter, flour, dough temperature, and room temperature all change the timing. Warm dough grows faster. Cool dough takes longer.
I have learned not to trust the clock by itself. I use several of the signs below at the same time. These signs show you whether the dough has made enough gas and has enough strength to hold it.
1. Look at the rise—but do not require an exact doubling
A marked container with straight sides makes the rise easy to see. Look for the dough to grow by about one-half to almost double. The right amount depends on its temperature and your planned second rise.
Doubling is not a rule. Your dough can be ready before it doubles. Look for bubbles, a rounded top, a good stretch, and a lively feel. A full doubling can be too much before a long cold second rise.
2. Look for a smoother, slightly domed surface
Your dough should look smoother than it did after mixing. The top often becomes gently rounded. The dough may pull away from parts of the bowl. Look for small bubbles along the sides, under the surface, or on top.
3. Gently shake the bowl
Gently shake the bowl. Ready dough should jiggle instead of moving like one heavy lump. This wobble shows that gas has spread through the dough.
4. Feel the dough
Wet your fingers and gently lift one edge. The dough should feel lighter and stretchy. It should also push back a little. Tight dough that tears fast usually needs more time or water.
Very loose and weak dough has often fermented too long.
5. Use a comparison sample if you want a measurable marker
A comparison sample is a small piece of your dough kept in a narrow jar. Pinch it off right after mixing. Mark its starting height.
Keep the jar beside your main dough so both stay at about the same temperature. The jar makes the rise easier to measure. Still check the main dough for bubbles, strength, and a light feel.
6. Understand the dough float test
Drop a small piece of dough into water. Sinking means it probably needs more time. Floating means the dough has trapped some gas. It does not prove the dough is fully ready.
Dough can float before it has enough strength or flavor. Use the float test as one clue, not your final answer. King Arthur Baking’s float-test guidance gives the same advice.
King Arthur Baking tests bread methods and teaches bakers how dough works. That makes its guides useful for checking the signs I see in my own kitchen.
Shape the Sourdough Sandwich Loaf
Turn the dough onto a clean counter or cutting board. Use very little flour on the surface. A little sticking helps you pull the outside smooth and tight.
Cup your palms around the far side of the dough. Pull it toward you. Let the bottom stick lightly to the counter. You should see the outside begin to tighten.
Halfway through your pull, turn your hands about 90 degrees. Tuck the back edge under the dough ball. Push the dough away from you. Repeat the pull, turn, and tuck steps.
Continue until the dough looks smooth and tight. Stop before the outside tears.
For a sourdough sandwich loaf, gently make the dough longer. Place it seam-side down in a greased loaf pan. Use a 9-by-5-inch pan or an 8 1/2-by-4 1/2-inch pan.
For a fresh milled sourdough bâtard, shape the dough into an oval. Place it seam-side up in a bâtard banneton (a long proofing basket for artisan loaves).
The second Rise: Proofing Sourdough Loaves
Choose a room-temperature proof or a refrigerated proof.
Room-temperature proof for Sourdough Loaf
Cover the shaped loaf and let it rise until it looks light and puffy. It should also feel full of gas. Do not use a fixed time as your only guide.
For warm dough, lightly flour one finger. Press about 1 inch into the surface:
- The indentation springs back immediately: The loaf probably needs more time.
- The indentation rises slowly and remains slightly visible: The loaf is likely ready to bake.
- The indentation remains completely and the dough feels weak or begins deflating: The loaf may be overproofed. Bake it promptly and handle it gently.
Also look for a rounded and pillowy surface. Your dough should be much larger than it was after shaping. Dough in a loaf pan should look full and rounded. A bâtard should feel lighter but still hold its shape.
The poke test works less well on very wet or cold dough. Cold dough feels firm by nature. It can spring back fast even when it is ready.
Refrigerated proof for sourdough loaf
Cover the shaped loaf well and chill it overnight. This gives you an easy schedule and more sour flavor. An overnight cold rise gives you the most dependable oven spring.
I have left this dough in my refrigerator for a full week before baking it. It gets more sour each day. It slowly loses some of its rise, but the baked bread is still fluffy and delicious.
Use that full week as a flexible option, not a promise of one exact result. Your refrigerator and starter both make a difference. The first rise also changes the final height. Bake sooner for the tallest loaf, or wait longer for a stronger sour flavor.
Keep the dough covered so the top does not dry out. Cold bâtard dough is easier to move from the basket. It is also easier to score before baking.

Four ways to bake fresh milled sourdough bread
Preheat your oven to 400°F. Give a Dutch oven, baking stone, steel, or steam pan time to heat fully.
For a bâtard, turn the dough onto parchment or your baking surface. Score the top with a sharp blade. You can leave sandwich bread rounded. You can also cut one long slash down the top.
My usual timing is 30 minutes covered, followed by 25 to 30 minutes uncovered. The cover traps steam so the loaf can grow. The uncovered time finishes the inside and browns the crust.
I use whichever baking method fits my kitchen that day. Sometimes my Dutch oven is busy with another meal. On those days, I bake the bread in a loaf pan. Each method below can make good fresh milled flour sourdough sandwich bread.
Option 1: Covered Dutch oven
Place the bâtard in a hot Dutch oven. You can use parchment as a sling. Cover and bake for 30 minutes. Remove the lid and bake for another 25 to 30 minutes.
The closed pot traps water that leaves the dough as it heats. That water turns to steam. This method gives an artisan-style bâtard a strong rise and crisp crust.
Use heavy oven mitts when you lift the lid. Keep your face and hands away from the hot steam.
Option 2: Loaf pan covered with a second loaf pan
Place the shaped dough in its loaf pan. Turn a second oven-safe loaf pan upside down over it. This second pan acts as a lid. Make sure it leaves room for the loaf to grow.
Bake the covered loaf for 30 minutes. Carefully remove the top pan. Bake uncovered for another 25 to 30 minutes.
The two pans hold steam around your sourdough sandwich loaf. You get many benefits of a covered bread baker without using your Dutch oven.
Option 3: Open bake with a steam pan
Put a strong, empty metal pan on the lower rack while your oven heats. Place the bread on the center rack. Carefully pour hot or boiling water into the metal pan. Close the oven right away.
After 20 to 30 minutes, remove the steam pan if you can do so safely. You can also let the water dry up. Finish baking in a dry oven until the crust is brown.
Never use glass as your steam pan. Fast changes in heat can break glass. Keep your face and hands away from the burst of steam.
Option 4: Open bake with ice
Heat a strong metal pan on a lower rack. Load your bread into the oven. Put several ice cubes into the metal pan. Close the oven at once.
The melting ice makes steam during the early bake. Do not throw ice onto the oven floor or heating part. Keep it away from the oven light, glass door, baking stone, and hot glass cookware. Put ice only in a metal pan made for oven use.
King Arthur Baking’s home steam guide explains why each method works. Steam keeps the early crust soft enough to stretch. Removing the steam later lets the crust turn brown.
How to Tell When Fresh Milled Bread is Done Baking
Look for all of these signs:
- The crust is deeply golden brown.
- The loaf feels lighter than it did when it entered the oven.
- The bottom sounds hollow or drumlike when tapped.
- The sides feel set rather than soft and compressed.
- An instant-read thermometer inserted into the center reads approximately 195°F to 205°F.
Temperature is a useful check, but color and shape still matter. Bread can reach the right temperature before the crust is ready. Keep baking until the crust has the color and strength you want.
Cool the loaf completely
Remove sandwich bread from its pan and place it on a cooling rack. Move a bâtard from the Dutch oven to the rack too.
Let the loaf cool fully before you slice it. Several hours is best. Water keeps moving through the bread as it cools. The soft inside, called the crumb, also needs time to set.
Cutting too soon can press the crumb flat. It can also make good bread seem gummy. I know this because my family loves this loaf hot from the oven.
I usually make two loaves so my family can eat one hot. One recipe makes one loaf, so I make two batches. That gives the second loaf time to cool for sandwiches. If you cannot wait, add butter and honey to a warm slice.
The hot crumb may not be fully set, but it will be delicious.
Troubleshooting fresh milled sourdough bread
The dough is thick and tight
Let the dough rest for 5 to 10 minutes before you change anything. If it stays tight, add water 1 tablespoon at a time. Dry starter or thirsty fresh flour usually needs a few extra tablespoons.
The dough tears during stretching
Stop pulling and let the dough rest. Tearing means it needs more rest, more water, or both. Stretch only until you feel it push back.
The loaf is dense
Your starter may not have been active and bubbly enough. The dough may also have needed a longer first or second rise. Dough that is too dry can become dense too. Next time, check the rise, bubbles, smooth feel, stretch, and jiggle.
The loaf spreads instead of rising
The dough may have risen too long. You may also need to pull the outside tighter while shaping. A long cold rise can also weaken the dough. Expect week-old dough to taste more sour and bake a little shorter.
The inside seems gummy
First, let the loaf cool all the way. Warm bread has not finished setting. A fully cooled gummy loaf needed more baking or more rise time.
The crust sets before the loaf expands
Use one of the covered or steam methods. Steam keeps the outside soft during the early bake. This gives your loaf time to grow before the crust becomes firm.

Storing Sourdough Sandwich Bread Made with Freshly Milled Flour
Let the loaf cool before you wrap it or place it in a bread bag. Keep it at room temperature. For longer storage, slice and freeze it. You can toast frozen slices or thaw them on the counter.
Do not keep baked bread in the refrigerator for daily storage. Cold air makes bread go stale faster. Use the refrigerator to slow unbaked dough, not to protect the finished texture.
Frequently Asked Questions About Fresh Milled Flour, Sourdough, and Bread Making
No. Doubling can be helpful, but it is not a rule for every loaf. Check for a good rise, bubbles, a smooth top, stretch, and a lively jiggle. These signs tell you more than size alone.
Yes, but use it only as one clue. Sinking dough probably needs more time. Floating dough contains trapped gas. It can still need more strength, flavor, or rise time.
Room-temperature dough should look puffy. A gentle poke should slowly fill while leaving a small dent. Cold dough is naturally firmer. Check a cold loaf’s growth, bubbles, past rise, and overall feel.
I have kept this dough in my refrigerator for a full week. It grows more sour and slowly loses some rise. It still bakes into fluffy and delicious bread. An overnight rise gives you more height, while a week gives you more sour flavor.
Yes. The lecithin is optional. It helps your dough stay strong, but you can make the loaf without it.
Yes. I have replaced the hard red wheat with freshly milled spelt. I use the same measurements. Spelt stretches more and springs back less, so handle it gently.
A 9-by-5-inch pan and an 8 1/2-by-4 1/2-inch pan both work. I use both in my kitchen. The smaller pan makes a slightly taller loaf. The other results are much the same.
Related reading to Learn More About Milling Your Own Flour and Making Sourdough Breads
- If you are just getting started with fresh milled flour, you’ll want easy recipes that are all figured out for you. Be sure to use the mail signup form to get my most popular recipes straight to your inbox.
- You can bake fresh milled bread with sourdough instead of yeast, so learn about keeping an active starter.
- Get started with a delicious and versatile recipe. Make Fresh Milled Cinnamon Rolls for breakfast, snack, or dessert.
You will soon learn how ready dough looks and feels in your own kitchen. Then this sandwich loaf recipe will stop feeling tied to the clock. Make it as sandwich bread or shape it into a bâtard. Bake it today, or let the refrigerator build more flavor.
Printable Recipe Card

Fresh Milled Flour Sourdough Sandwich Bread
Equipment
- or 8 1/2-by-4 1/2-inch loaf pan optional
- or bâtard banneton optional
Ingredients
- 1 1/4 cups water plus a few tablespoons more if needed
- 1/2 cup active sourdough starter
- 1/4 cup butter melted and cooled until no longer hot
- 1 tablespoon honey
- 2 cups freshly milled hard red wheat flour
- 2 cups all-purpose flour
- 1/2 tablespoon salt
- 2 tablespoons sunflower lecithin optional
Instructions
Mix the Dough
- Add the water to a large bowl. Whisk in the starter, melted butter, and honey.
- Add the fresh-milled flour, all-purpose flour, salt, and optional sunflower lecithin. Stir until all the flour is wet.
- Cover and rest for 5 to 10 minutes. If the dough is still thick and tight, add water 1 tablespoon at a time. A very dry starter usually needs a few extra tablespoons.
Knead/Develop the Dough
- Mixer method: Knead with a dough hook on medium-low speed for 10 minutes. If the dough tightens, mix 5 minutes, rest 5 minutes, and mix another 5 minutes.
- Stretch-and-fold method: Wet your hands. Stretch one edge of dough 6 to 8 inches upward. Fold it across the bowl and tuck it into the other side. Turn the bowl one-quarter turn and repeat for 4 to 9 sides. Complete 3 rounds with 30-minute rests. Then complete 3 rounds with 15-minute rests.
Ferment and Shape the Dough
- Cover and bulk ferment until the dough is light, fluffy, bubbly, smooth, stretchy, and much larger.
- Turn the dough onto a clean counter. Pull, rotate, and tuck the dough against the counter until its outer surface is smooth and tight.
- Place it seam-side down in a greased loaf pan. Use a 9-by-5-inch or 8 1/2-by-4 1/2-inch pan. For a bâtard, place it seam-side up in a prepared banneton.
- Cover and let it rise at room temperature until puffy and full of gas. You can also refrigerate it overnight. Refrigerate longer for more sour flavor. I have tested it for one week, although it slowly loses rise.
Bake the Loaf
- Preheat the oven to 400°F. Cover the loaf with a second loaf pan or bake a bâtard in a covered Dutch oven. Alternatively, open-bake with steam from hot water or ice placed in a dedicated metal pan.
- Bake covered for 30 minutes. Uncover and bake for another 25 to 30 minutes, until deeply golden and fully baked.
- Remove the loaf from the pan or baking vessel and cool completely on a rack for several hours before slicing.
Notes
- Both loaf-pan sizes work; the smaller pan produces a slightly taller loaf.
- A typical 1:1-fed starter works, but the recipe is forgiving of variation in starter consistency. If the starter is unusually dry, add water 1 tablespoon at a time.
- Sunflower lecithin is optional but helps strengthen the dough.
- Freshly milled spelt can replace the hard red wheat using the same measurement.
- A longer cold proof produces more sour flavor but gradually reduces the loaf’s rise.
- If sliced hot, the crumb may not be completely set.
Nutrition
About the Author

Kim is an adventurous mama of 5 who has been building new skills over 16 years of marriage. Over the past decade, she and her family have built a homestead from the ground up, starting with meat and egg chickens, growing into a large garden, and learning to preserve their harvest.
She taught herself to sew, crochet, and knit 13 years ago through books and early YouTube tutorials, and has been making handmade projects ever since.
Cooking from scratch became a necessity and a passion as her family learned to eat more nutritionally and live more frugally. She tests all of her sourdough and fresh milled flour recipes on the kids to ensure they’re delicious and nutritious.
At Plain Living, Kim shares what she’s actually lived — not theory, but the real skills she’s picked up through years of trial, error, and love for her family and home.
