How to Make a Sourdough Starter: A Complete Beginner’s Guide
Some links in this post may be affiliate links. That means I might make a small commission on qualifying purchases if you click the link. There is no extra cost to you.
Making a sourdough starter may sound complicated, but it begins with only two ingredients: flour and water. With regular feedings and a little patience, that simple mixture captures wild yeast and beneficial bacteria from its environment and becomes strong enough to raise bread naturally.I have kept sourdough starters in different kitchens, climates, and seasons.
The exact timing may change, but the basic process remains the same. You do not need expensive equipment or a perfectly controlled kitchen. You need a clean jar, flour, water, and a willingness to watch how your starter changes.In this beginner’s guide, I will walk you through how to make a sourdough starter from scratch, how to feed it, how to know when it is ready for baking, and what to do when it looks or smells unusual.
I will also explain sourdough discard and show you how to maintain your starter without wasting large amounts of flour.If you are learning more than sourdough, visit my baking basics for beginners hub for fresh-milled flour guides, homemade bread recipes, and easy baking projects.

Sourdough Starter At a glance
- Ingredients: Flour and water
- Best beginner flour: Whole wheat or rye flour
- Typical starting time: About 7–14 days
- Feeding schedule: Approximately every 24 hours while establishing the starter
- Best temperature: Around 70–78°F
- Ready to bake: When it reliably doubles within 4–8 hours after feeding
- Healthy aroma: Mildly yeasty, tangy, fruity, or pleasantly sour
- Discard immediately: If you see fuzzy mold or pink, orange, or red discoloration
Get my favorite recipes, right to your inbox!
Table of contents
- Sourdough Starter At a glance
- What is a Sourdough Starter?
- What You Need to Make a Sourdough Starter
- How to Make a Sourdough Starter From Scratch
- How to Know When Your Sourdough Starter is Ready
- How to Feed and Maintain an Established Starter
- Frequently Asked Questions About Making a Sourdough Starter
- Start Baking With Your Sourdough Starter
What is a Sourdough Starter?
A sourdough starter is a living culture made from flour and water. As the mixture ferments, wild yeast and lactic acid bacteria multiply inside it.
The yeast produces carbon dioxide, which helps bread dough rise. The bacteria create acids that give sourdough its familiar flavor and help influence fermentation, texture, and keeping quality.
A healthy starter must be fed regularly with fresh flour and water. After feeding, it should become bubbly, expand inside the jar, and eventually begin to fall again as it runs out of food.
You may see two sourdough terms used throughout recipes:
- Active starter: Starter that has recently been fed and is bubbly, rising, and strong enough to leaven bread.
- Sourdough discard: Starter removed before a feeding. It may still contain living yeast, but it is generally not at peak strength and is commonly used in recipes that rely on baking soda or baking powder for additional lift.
What You Need to Make a Sourdough Starter
You do not need a special sourdough kit to make a starter. A few basic kitchen tools and dependable ingredients are enough.
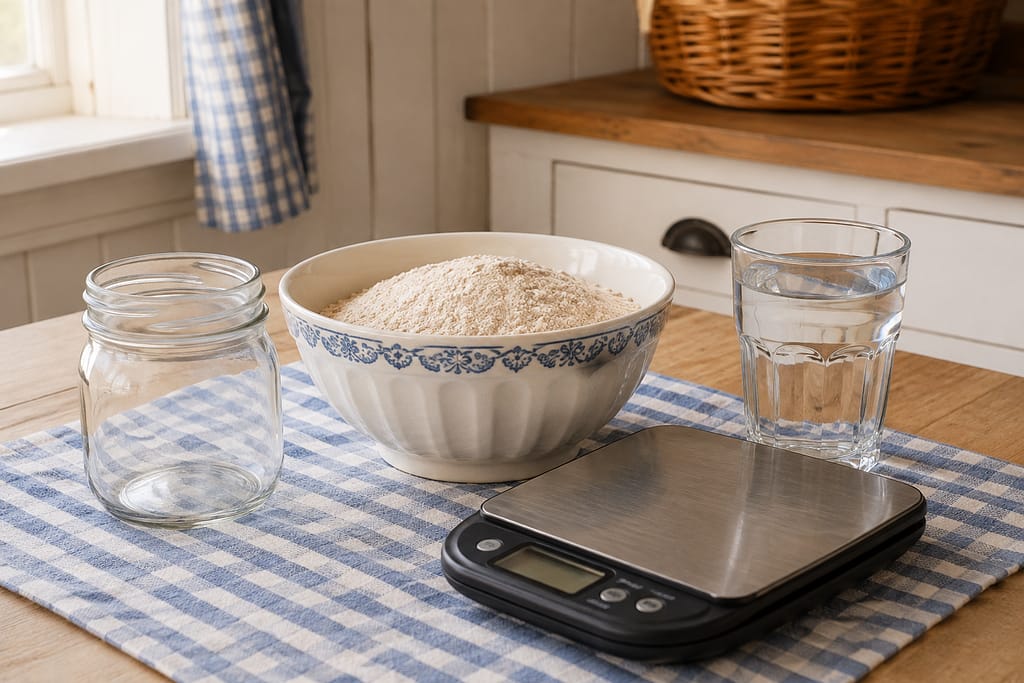
Flour
Whole wheat or rye flour is often the easiest choice for beginning a starter because whole-grain flour provides plenty of nutrients for fermentation. After the starter becomes established, you can continue using whole-grain flour or gradually transition it to unbleached all-purpose or bread flour.
Water
Most tap water works well. If your water is heavily chlorinated or your starter repeatedly struggles, try filtered water. Use room-temperature water rather than very hot or ice-cold water.
A Clean Jar
Choose a clear glass jar large enough for the starter to at least double without overflowing. A straight-sided jar makes it easier to see how much the starter has risen.
A Kitchen Scale
A digital kitchen scale makes sourdough feeding easier and more consistent because you can measure flour, water, and starter by weight directly inside the jar.
How to Make a Sourdough Starter From Scratch
This method uses small feedings to reduce flour waste. For each feeding, keep 30 grams of starter and feed it with 30 grams of water and 30 grams of flour.
Day One: Mix the Starter
Place a clean jar on your kitchen scale and reset the scale to zero. Add 30 grams of whole wheat or rye flour and 30 grams of room-temperature water.
Stir until no dry flour remains. The mixture should resemble a thick batter or soft paste. Scrape down the sides, cover the jar loosely, and leave it at room temperature for 24 hours. If you live in a dry climate, it’s helpful to cover it with a damp kitchen towel to keep the moisture in.
Day Two: Complete the First Feeding
You most likely will not see bubbles yet. Keep 30 grams of the mixture and remove the rest. Add 30 grams of water and stir to loosen the starter. Add 30 grams of flour and mix thoroughly.
Mark the starter’s height with a rubber band or washable marker. Cover loosely and leave it for another 24 hours.
Days Three- Seven: Daily Feedings Until the Starter is Active
Every 24 hours, keep 30 grams of starter and discard the remainder. Feed the starter with 30 grams of water and 30 grams of flour.
During these days, you may notice bubbles, rising, falling, and changing aromas. A sudden burst of activity followed by a quiet period is normal. Continue feeding consistently even if the starter appears inactive for several days.
Days 8-14: Watch for Activity
Continue the same daily feeding schedule until the starter reliably doubles within 4–8 hours after feeding. It should have bubbles throughout the mixture, a pleasantly tangy or yeasty aroma, and a predictable pattern of rising and falling.
Some starters are ready near day seven, while others need two weeks or longer. Readiness depends on flour, temperature, water, and feeding consistency—not a specific date on the calendar. As your starter becomes more active, you can help strengthen it with a larger feeding. Keep 30 grams of starter and feed it 60 grams of water and 60 grams of flour. This gives the developing culture more food without creating an unnecessarily large starter.

If Your Starter Peaks Before Next Feeding
If your starter repeatedly rises and falls long before 24 hours have passed, it is becoming more active. You can begin feeding it every 12 hours or increase the feeding to 30 grams starter, 60 grams water, and 60 grams flour.
How to Know When Your Sourdough Starter is Ready
A starter is not ready simply because it has produced a few bubbles. It needs enough strength and consistency to raise bread dough predictably.
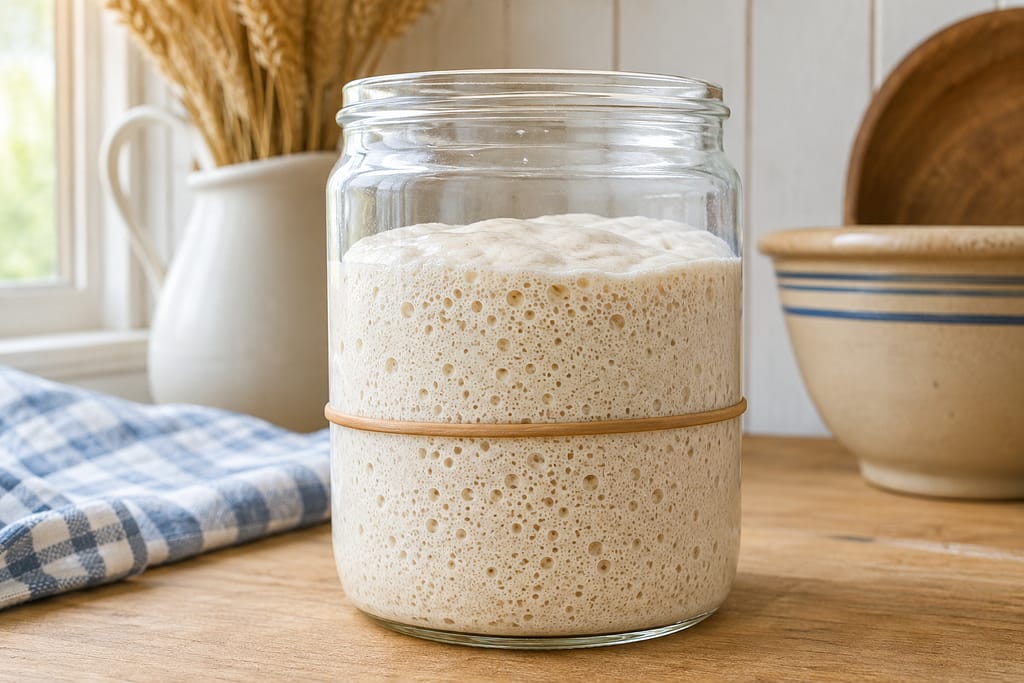
Your sourdough starter is ready to use when it:
- Reliably doubles or more within 4–8 hours after feeding
- Repeats that rise for several consecutive feedings
- Has bubbles distributed throughout the jar, not only across the surface
- Develops a rounded or slightly domed top as it approaches its peak
- Smells pleasantly yeasty, fruity, tangy, or mildly sour
- Has a light, airy texture when stirred
The popular float test can provide additional information, but it is not always reliable. Some healthy starters sink because of the flour used, hydration level, or because air escaped while the sample was handled. Consistent rise time and visible fermentation are better indicators of starter strength.
How to Feed and Maintain an Established Starter
Once your starter reliably doubles after feeding, you can choose a maintenance schedule based on how often you bake.
Keeping a Starter at Room Temperature
Keep the starter at room temperature if you bake several times each week. Feed it approximately every 24 hours using equal weights of starter, water, and flour.
For a small starter, keep 30 grams of starter and feed it 30 grams of water and 30 grams of flour. If it peaks and falls too quickly, feed it more often or use a larger feeding ratio.
Keeping a Starter in the Refrigerator
Refrigeration is convenient if you bake less frequently. Feed the starter, allow it to begin fermenting at room temperature for one or two hours, and then place it in the refrigerator with a lid.
Feed a refrigerated starter approximately once a week. If it remains healthy but goes longer between feedings, it may develop liquid on top or smell strongly acidic. This usually means it is hungry.
Preparing a Refrigerated Starter for Baking
Remove the starter from the refrigerator one or two days before you plan to bake. Keep a small portion and feed it at room temperature.
Continue feeding until it reliably doubles within 4–8 hours. Use the starter in your recipe when it is near its peak—expanded, bubbly, and slightly domed on top.
What Is Sourdough Discard?
Sourdough discard is the portion of starter removed before each feeding. Removing some starter keeps it from growing too large and allows the remaining yeast and bacteria to receive enough fresh flour and water.
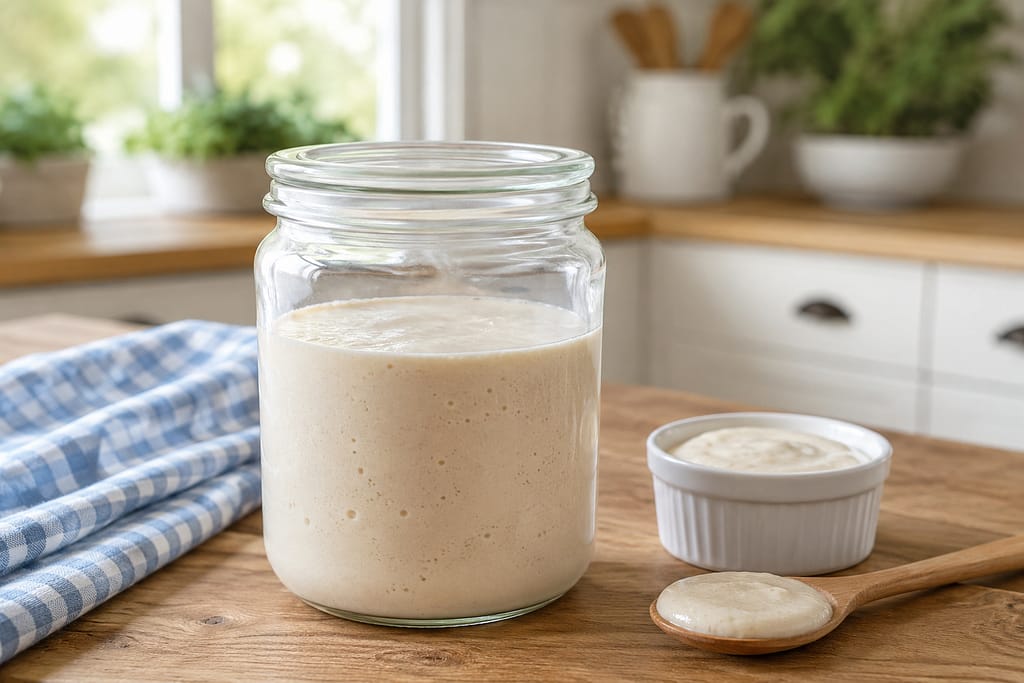
Discard is not the same as an active, recently fed starter. Active starter provides dependable leavening for bread, while discard is commonly used for flavor in recipes that rely on baking soda, baking powder, or another leavening method.
When Can You Start Saving Sourdough Discard?
During the first week, throw away or compost the discard rather than cooking with it. Once your starter has developed a consistently pleasant, tangy aroma and shows no mold or unusual discoloration, you can begin collecting the discard in a covered container in the refrigerator.
Never use discard that has fuzzy mold or pink, orange, or red discoloration. When in doubt, throw it away and begin a new starter.
How to Store Sourdough Discard
Keep discard in a clean, covered jar in the refrigerator. Add newly removed discard to the jar as you feed your starter. For the best flavor and quality, use it regularly rather than allowing the jar to accumulate indefinitely.
Label the jar with the date you began collecting it. If the discard develops mold, colored streaks, or a truly rotten odor, dispose of the entire jar.
Ways to Use Sourdough Discard
Sourdough discard adds flavor and tenderness to both sweet and savory recipes. Try it in:
- Pancakes and waffles
- Muffins and quick breads
- Crackers
- Biscuits
- Pie crust
- Granola bars
- Cookies and brownies
Explore my sourdough recipes and discard ideas, make these simple sourdough granola bars, or try my flaky all-butter sourdough pie crust.
Sourdough Starter Troubleshooting
Sourdough starters rarely follow an exact schedule. Temperature, flour, water, and feeding frequency can all affect how quickly your starter develops. Here are solutions to the most common problems.
My Starter Rose and Then Stopped Growing
A burst of activity during the first few days is common and does not mean the starter is ready. This early rise is caused by changing microorganisms in the mixture. The starter may then appear inactive for several days while the desired yeast and bacteria become established.
Continue feeding it every 24 hours. Most starters begin showing more dependable activity within 7–14 days.
My Starter Has No Bubbles
Move the starter to a warmer location, ideally around 70–78°F. Continue feeding it every 24 hours and consider using whole wheat or rye flour, which can encourage activity.
Avoid placing the jar directly on a heating pad or hot appliance. Excessive heat can damage the developing culture.
My Starter Is Not Doubling
A young starter may bubble without doubling because it has not developed enough strength yet. Continue the feeding schedule and mark the starter’s level on the jar so small changes are easier to see.
If the starter becomes runny long before its next feeding, it may be consuming its food too quickly. Feed it sooner or use a larger feeding, such as:
- 30 grams starter
- 60 grams water
- 60 grams flour
My Starter Smells Like Acetone or Nail Polish Remover
An acetone-like smell usually means the starter is hungry. Feed it more frequently or increase the amount of flour and water used at each feeding.
A hungry starter is generally recoverable as long as it has no mold or unusual pink, orange, or red discoloration.
What Is the Liquid on Top of My Starter?
A grayish or brown liquid is commonly called hooch. It usually appears when a starter has gone too long without feeding. You can pour it off or stir it into the starter before feeding, although stirring it in may create a stronger sour flavor.
Feed the starter and adjust its schedule if the liquid repeatedly returns.
My Starter Is Too Thick or Too Thin
A starter’s consistency can vary depending on the flour used. Whole-grain flour generally absorbs more water than all-purpose flour.
A freshly fed starter should resemble a thick batter. If you are weighing equal amounts of flour and water, slight variations in consistency are normal and usually do not require correction.
When Should I Throw Away My Starter?
Discard the entire starter if you see:
- Fuzzy mold
- Pink, orange, or red streaks
- Unusual colored patches
- A truly rotten or putrid odor
Do not scrape mold from the surface and continue using the starter. Wash the container thoroughly and begin again with fresh flour and water.
How to Make a Sourdough Starter
Ingredients
- * 30 grams whole wheat or rye flour
- * 30 grams room-temperature filtered water
- * Additional flour and water for daily feedings
Instructions
- On the first day, combine 30 grams of whole wheat or rye flour with 30 grams of room-temperature water in a clean glass jar. Stir until no dry flour remains.
- Cover the jar loosely with a lid and leave it at room temperature for approximately 24 hours.
- On the second day, keep 30 grams of the starter and discard the remainder. Add 30 grams of water and stir. Add 30 grams of flour and mix thoroughly.
- Repeat this feeding every 24 hours. Keep 30 grams of starter, then add 30 grams each of water and flour.
- Continue feeding the starter for 7–14 days. A temporary burst of activity followed by several quiet days is normal.
- Mark the starter’s level immediately after feeding. Your starter is ready to bake with when it reliably doubles within 4–8 hours after feeding for several consecutive days.
- Once established, continue feeding the starter at room temperature or store it in the refrigerator between baking days.
Notes
Frequently Asked Questions About Making a Sourdough Starter
Most sourdough starters take approximately 7–14 days to become strong enough for baking. Some may take longer, especially in a cool kitchen. Follow the starter’s activity rather than relying only on the number of days.
A starter is ready when it reliably doubles within 4–8 hours after feeding for several consecutive days. It should contain plenty of bubbles, have an airy texture, and smell pleasantly yeasty or tangy.
Whole wheat and rye flour are excellent choices because they contain nutrients and microorganisms that encourage fermentation. After the starter is established, you can continue using whole-grain flour or gradually transition it to all-purpose flour.
Yes. Freshly milled whole wheat or rye flour works very well for creating and feeding a sourdough starter. Because freshly milled flour may absorb more water, your starter might have a thicker consistency. This is normal.
Tap water often works, but heavily chlorinated water may slow fermentation. If your starter is struggling, try filtered water or allow a container of tap water to sit uncovered before using it.
During the early development stage, cover the jar loosely with a lid. The cover should protect the starter from dust and insects while allowing fermentation gases to escape. Once refrigerated, the jar can be covered more securely, but it should not be overfilled.
Yes. Brief contact with a stainless-steel spoon will not harm your starter. Avoid storing the starter in a reactive metal container, such as aluminum or copper.
Rising and falling is a normal part of the feeding cycle. The starter rises as the microorganisms consume fresh flour and produce gas. It falls after reaching its peak and beginning to run out of food. A fallen starter usually needs another feeding.
Wait until the starter is established and reliably doubling before moving it to the refrigerator. A young starter develops more consistently when it is fed regularly and kept at room temperature.
Technically, yes, but the amount of starter will grow rapidly and require increasingly large feedings. Discarding keeps the starter manageable and ensures that the remaining culture receives enough fresh flour and water.
Start Baking With Your Sourdough Starter
Learning how to make a sourdough starter takes patience, but the daily process is simple: keep a small portion, add fresh flour and water, and watch how it responds. Don’t worry if your starter has quiet days or takes longer than expected. Consistent feeding is more important than following an exact timeline.
Once your starter reliably doubles after feeding, you can begin using it for bread and other naturally leavened recipes. The discard you remove during maintenance can also add flavor and tenderness to pancakes, muffins, crackers, pie crusts, and other baked goods.
If you are new to homemade bread, visit my Baking Basics for Beginners page for more step-by-step help.
Once your starter is active and reliably rising, use it to make fresh milled flour sourdough sandwich bread. The recipe teaches you how to judge the dough instead of depending only on the clock.
Sourdough Recipes to Try Next
- Explore the Ultimate Sourdough Recipe Roundup
- Make Simple Sourdough Granola Bars
- Try this Flaky All-Butter Sourdough Pie Crust
Have you started your first sourdough starter? Leave a comment and tell me which day you’re on, what flour you’re using, or what problem you’re trying to solve. I’m happy to help you troubleshoot it.

Kim is an adventurous mama of 5 who has been building new skills over 16 years of marriage. Over the past decade, she and her family have built a homestead from the ground up, starting with meat and egg chickens, growing into a large garden, and learning to preserve their harvest.
She taught herself to sew, crochet, and knit 13 years ago through books and early YouTube tutorials, and has been making handmade projects ever since.
Cooking from scratch became a necessity and a passion as her family learned to eat more nutritionally and live more frugally. She tests all of her sourdough and fresh milled flour recipes on the kids to ensure they’re delicious and nutritious.
At Plain Living, Kim shares what she’s actually lived — not theory, but the real skills she’s picked up through years of trial, error, and love for her family and home.
