How to Sew the Viral Book Sleeve: Free Quilted Pattern
Some links in this post may be affiliate links. That means I might make a small commission on qualifying purchases if you click the link. There is no extra cost to you.
If you’ve spent any time on BookTok, Pinterest, or YouTube lately, you’ve probably seen them everywhere—handmade book sleeves. This project has become a viral favorite, and for good reason.


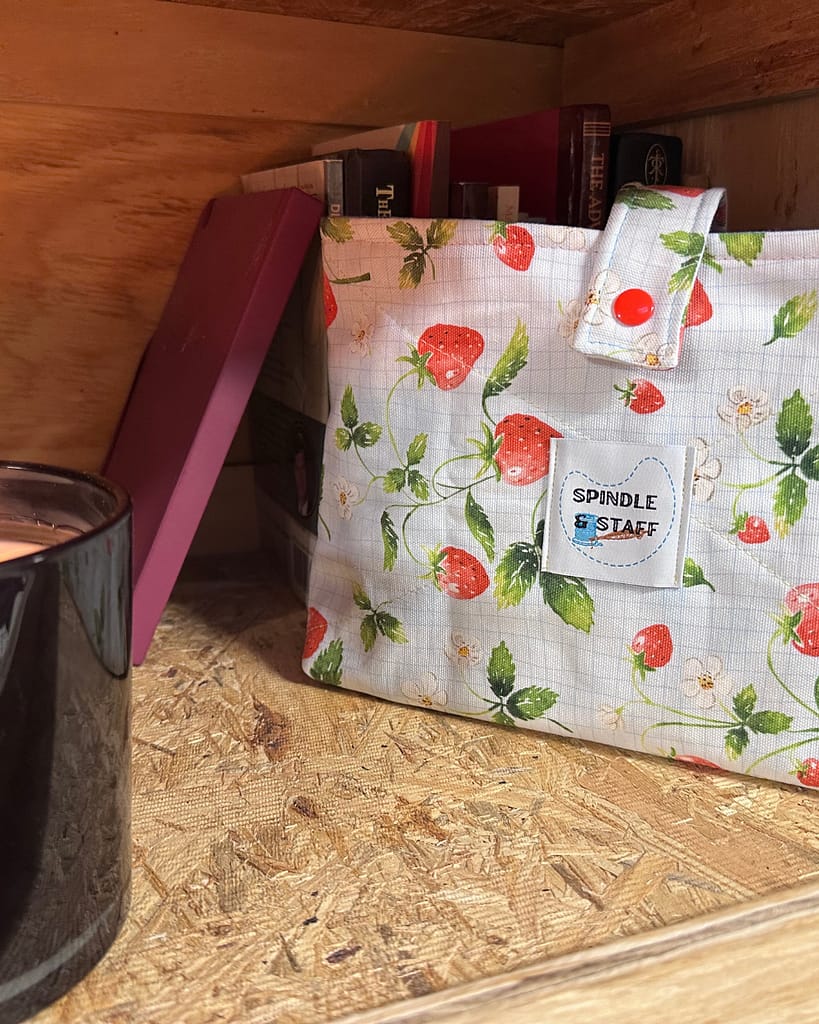
A handmade quilted book sleeve is an easy way to protect your favorite books from bent corners, scuffed covers, and spills while carrying them in a tote bag or backpack. In this beginner-friendly tutorial, I’ll show you how to sew a book sleeve with padding, a secure snap closure, and a convenient carrying strap.
This project takes about 30–45 minutes and uses simple straight stitches. You’ll find exact measurements, step-by-step photos, customization ideas, and a free printable book sleeve sewing pattern below. It also makes a thoughtful handmade gift for readers, students, teachers, and book-club friends.
Quick Answer: How Do You Sew a Book Sleeve?
To sew a quilted book sleeve, quilt the exterior fabric to batting, then cut the quilted exterior and lining into 17″ × 12″ rectangles. Add the fabric closure strap, sew the side seams, and box the bottom corners. Attach the lining, turn the sleeve right side out, topstitch the opening, and install the KAM snap. The finished padded sleeve fits most standard paperbacks and average hardcover books.
Table of contents
- What About Sewing a Bible Cover?
- What Is a Book Sleeve and Why Use One?
- Can You Sell Handmade Book Sleeves?
- Ways to Customize a Handmade Fabric Book Sleeve
- A Simple Sewing Project with Only Straight Stitches
- Handmade Book Sleeve Gift Ideas
- Supplies You’ll Need to Sew a Quilted Book Sleeve
- How to Sew a Book Sleeve (Step-by-Step Tutorial)
- Your Quilted Book Sleeve Is Finished!
- What Size Book Fits This Book Sleeve Pattern?
- Can This Pattern Be Used as a Bible Sleeve?
- Is This Book Sleeve Pattern Beginner-Friendly?
- Add a Handmade Book Sleeve to a Hope Chest
- More Beginner Sewing Projects
What About Sewing a Bible Cover?
If you’re here looking for how to sew a Bible cover, you’re in the right place. A Bible is simply a special kind of book, and this book sleeve method works beautifully as a fabric Bible cover. The steps below will show you how to create a simple, protective cover that can be customized to fit your Bible perfectly. You can easily adjust the measurements and choose meaningful fabrics to create something both practical and personal.
This is one of my favorite projects to recommend to a confident beginner. It is not hard, it does not take long, and the finished result feels like a “real” handmade item you will be proud to use or give. If you have never sewn before, begin with my beginner sewing guide to learn the basic skills and follow the lessons in order.

What Is a Book Sleeve and Why Use One?
A book sleeve is a padded fabric pouch designed to protect a book while it is stored or carried. Unlike a fitted book cover, the entire book slides inside the sleeve and can be removed when you are ready to read.
Book sleeves help protect:
- Paperback covers from curling
- Hardcover corners from dents and scuffs
- Pages from bending inside a crowded bag
- Journals and planners from everyday wear
- Books from light spills and loose items inside a backpack or tote
Handmade book sleeves are popular because they are useful, washable, easy to personalize, and small enough to make in an afternoon. The fabric can match a favorite color, reading genre, season, or gift theme, while the batting adds cushioning without making the sleeve excessively bulky.
They are especially useful for students, travelers, commuters, homeschool families, and anyone who regularly carries books outside the home.

Can You Sell Handmade Book Sleeves?
Yes. Handmade fabric book sleeves can be sold at craft fairs, farmers markets, church bazaars, local bookstores, or through an online shop. They are lightweight, useful, easy to customize, and can be made in batches from coordinated fabric collections.
When pricing a handmade book sleeve, include:
- Exterior and lining fabric
- Batting or bag-making foam
- Thread, snaps, and other notions
- Packaging and selling fees
- Time spent cutting, quilting, sewing, and finishing
- A reasonable profit for your work
Offer several sizes for paperbacks, hardcovers, journals, and Bibles, and clearly list the finished interior measurements. You can also create themed gift sets by pairing a sleeve with a handmade bookmark, reading journal, book page holder, or gift card.
Use caution with licensed character, sports-team, and designer fabrics. Fabric ownership does not automatically provide permission to market products using protected names, logos, or characters. Review the fabric manufacturer’s terms and marketplace policies before selling finished items.
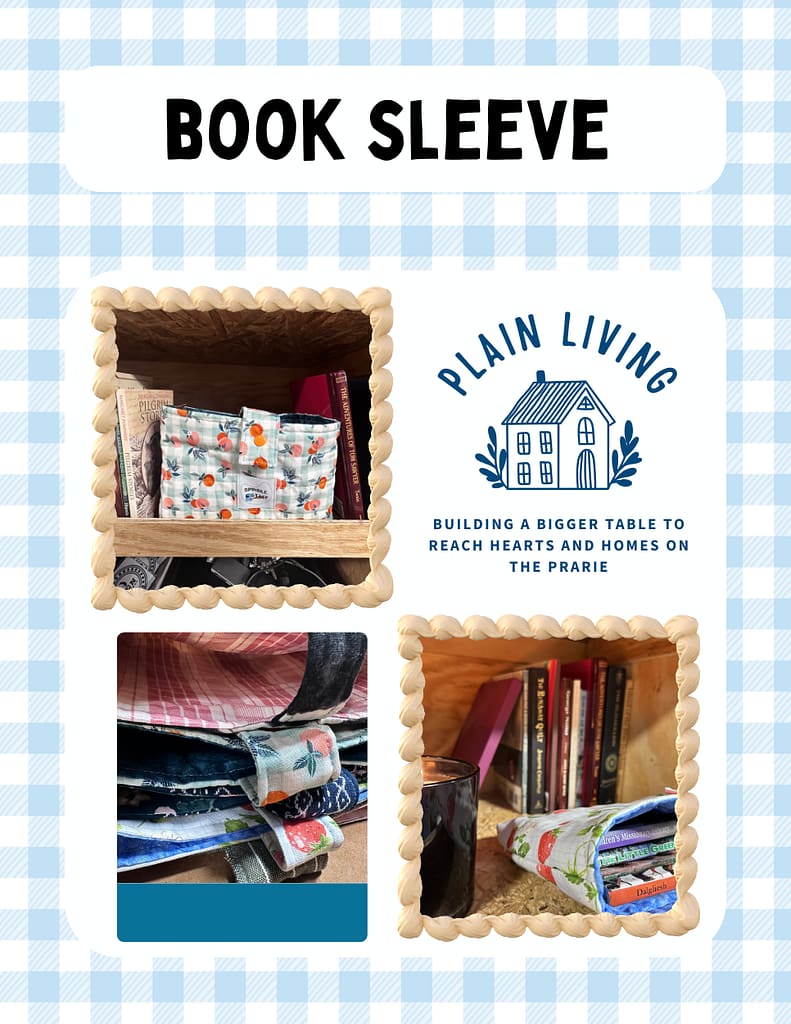
Sew a beautiful, padded book sleeve with confidence—perfect for beginners and experienced sewists alike.
Free Printable Quilted Book Sleeve Sewing Tutorial
Want to make a cozy, handmade sleeve to protect your favorite books?
This free printable tutorial walks you through each step of sewing a quilted book sleeve, from cutting to boxing the corners—without stress or guesswork.
I designed this project to be practical, sturdy, and easy to follow, even if you’re newer to sewing.
Ways to Customize a Handmade Fabric Book Sleeve
One of the best parts of sewing a book sleeve is choosing the fabric, padding, quilting, and finishing details. You can make the same basic pattern look completely different simply by changing the materials and design.
Try these customization ideas:
- Use floral quilting cotton for a cottage-style book sleeve
- Pair gingham or ticking stripes with a solid lining for a country look
- Choose tweed, plaid, or darker colors for a traditional library aesthetic
- Combine several coordinating scraps for a patchwork exterior
- Use duck cloth or canvas when you want extra durability
- Add bag-making foam for a structured sleeve or batting for a softer finish
- Quilt straight lines, diamonds, waves, or decorative machine stitches
- Use contrasting thread to make the quilting more noticeable
- Add a fabric label, monogram, appliqué, or embroidered name
- Coordinate the strap, lining, and KAM snap with the exterior fabric
- Adjust the dimensions for a journal, planner, tablet, Bible, or textbook
- Add an exterior pocket for a bookmark, pen, or reading notes
Prewash washable cotton fabrics before cutting if you expect the finished sleeve to be laundered. Whatever materials you choose, keep the exterior and lining similar in weight so the finished sleeve remains balanced and easy to sew.

No two book sleeves ever look the same—and that’s part of the fun.
Get the Free Printable Book Sleeve Pattern and Tutorial
Want to keep the measurements and instructions beside your sewing machine? Enter your email below and I’ll send you the free printable quilted book sleeve pattern and tutorial.
The printable includes:
- Complete supply list
- Exact cutting measurements
- Step-by-step sewing instructions
- Closure-strap measurements
- Corner-boxing directions
- Finished sizing information
Print it now or save it for your next sewing day.
A Simple Sewing Project with Only Straight Stitches
This tutorial uses only straight stitches and 1/4″ seam allowance, which makes it perfect if you’re:
- New to sewing
- Getting comfortable with your machine
- Teaching a teen to sew
- Looking for a calm, relaxing project
- looking for a project to sew to sell- would be super fast on an industrial machine.
There’s no complicated shaping, no curves to stress over, and no advanced techniques required.
If you can sew a straight line, you can sew this book sleeve.
Handmade Book Sleeve Gift Ideas
A quilted book sleeve is a thoughtful handmade gift because it is practical, personal, and easy to customize for the recipient. Choose fabric that reflects the person’s favorite colors, hobbies, reading genre, school, or decorating style.
Book sleeves make useful gifts for:
- Teachers and librarians
- Teens and college students
- Homeschool families
- Bible-study friends
- Book-club members
- Travelers and commuters
- Journal and planner users
- Birthdays, Christmas, graduations, or teacher-appreciation gifts
Create a Book Lover Gift Set
Place one or more of these items inside the finished sleeve:
- A favorite book or new release
- A handmade fabric bookmark
- A clip on book light
- A wooden book page holder
- A reading journal or notebook
- Pens, highlighters, or page flags
- A bookstore gift card
- Tea, cocoa, or a small coffee-shop gift card
- A handwritten note or personalized bookplate
For Christmas, make several sleeves assembly-line style using coordinated seasonal fabrics. Quilt and cut all the panels first, then sew the straps, linings, and exteriors in batches.

Supplies You’ll Need to Sew a Quilted Book Sleeve
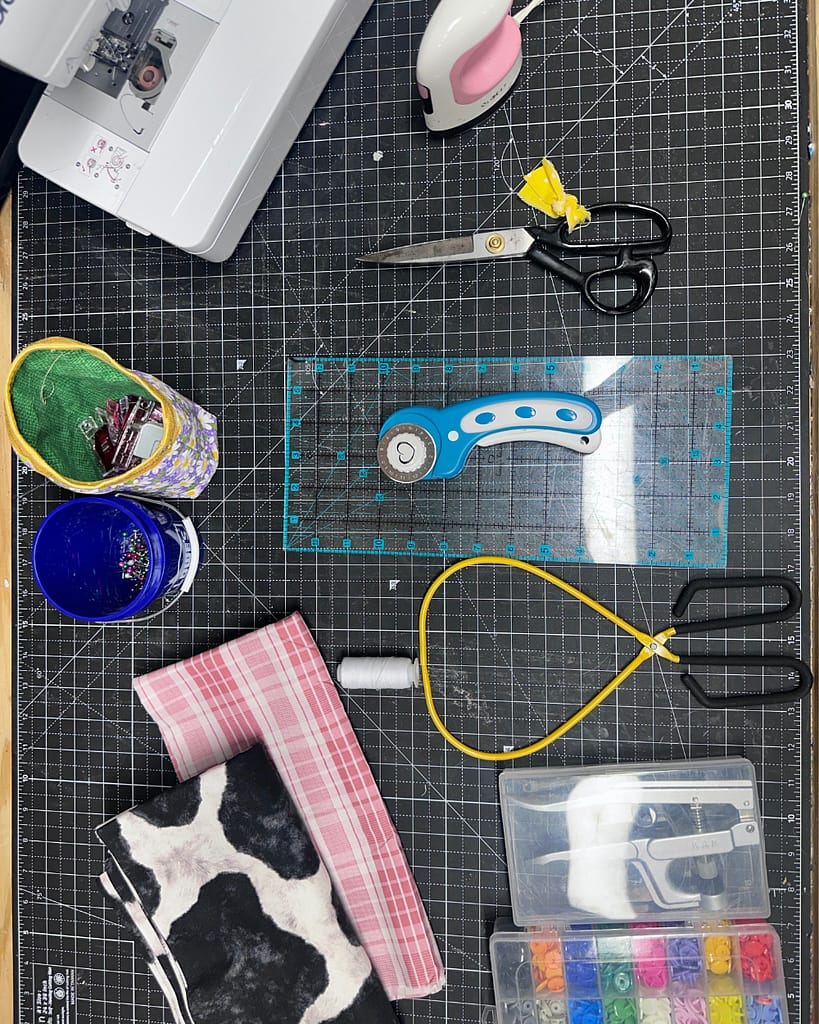
Fabric and Notions
- 1 fat quarter of quilting cotton or duck cloth for the exterior
- 1 fat quarter of quilting cotton for the lining
- One 18″ × 22″ piece of low-loft quilt batting or bag-making foam
- Coordinating or contrasting thread
- 1 set of KAM snaps with snap pliers
- Fabric basting spray, pins, or sewing clips
Equipment
- Sewing machine—I use a Brother SE600 sewing and embroidery machine
- Good-quality fabric scissors or a rotary cutter and cutting mat
- Quilting ruler or straightedge
- Iron and ironing surface—I like this mini iron for pressing small seams
- Basic point turner or my new favorite, the EZ Point Turner
- Removable fabric marker
How to Sew a Book Sleeve (Step-by-Step Tutorial)
Cut and prep pattern pieces
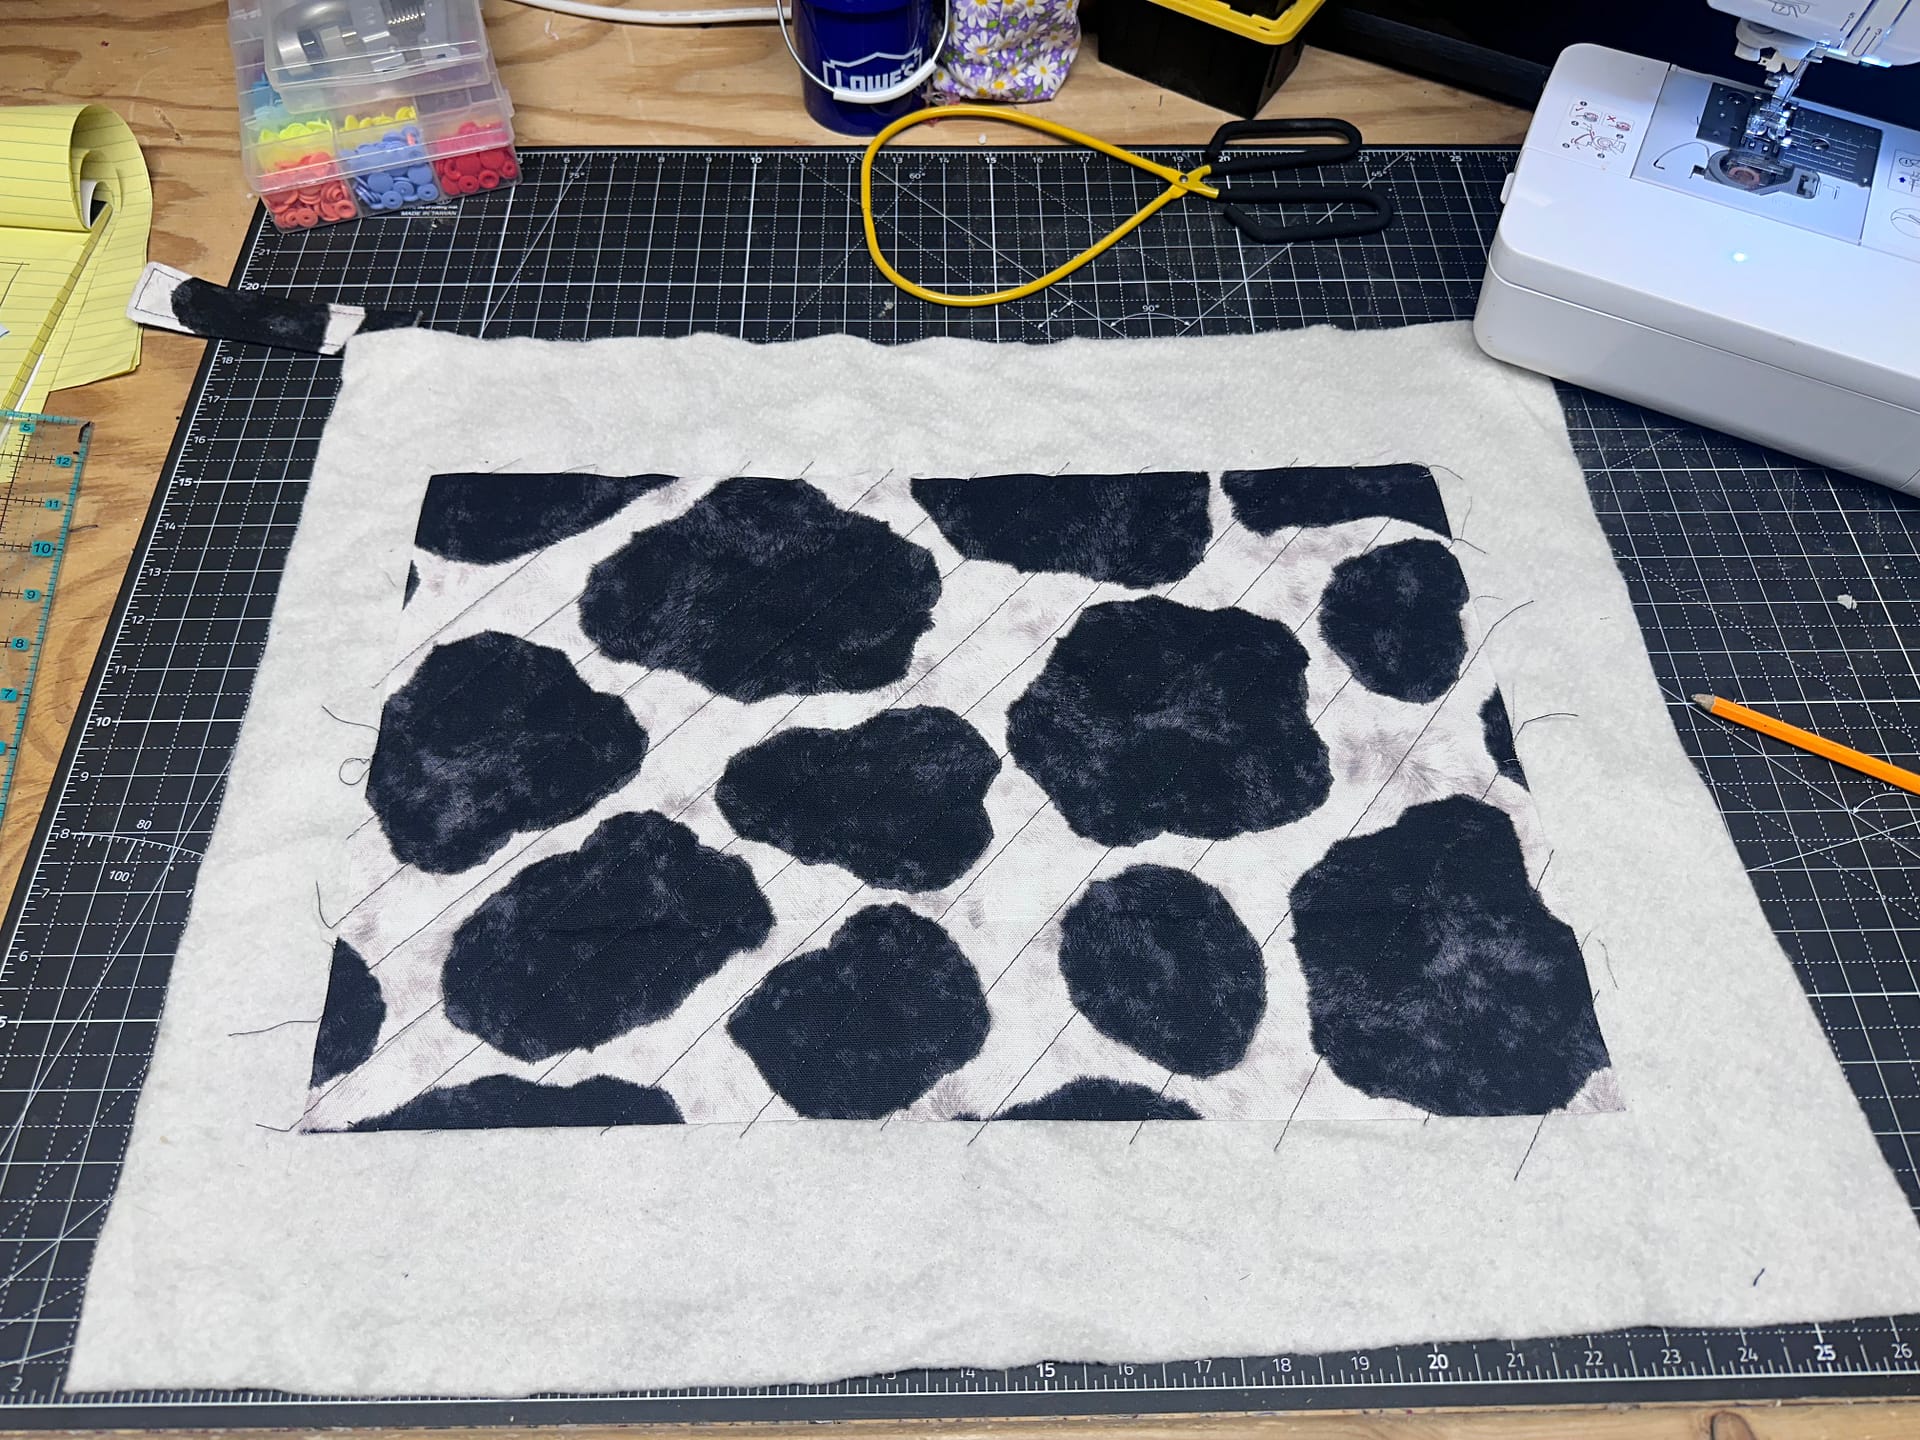
- Place the exterior fabric right side up on top of the quilt batting or bag-making foam. Smooth the layers and secure them with fabric basting spray, pins, or sewing clips.
- Quilt the two layers together using straight lines, a decorative machine stitch, or free-motion quilting. Space the quilting closely enough to keep the fabric and batting securely attached.
- Trim the finished quilted panel into one 17″ × 12″ rectangle. This will become the exterior of the book sleeve.
- Cut one 17″ × 12″ rectangle from the lining fabric.
- For the closure strap, cut two 6.65″ × 2″ rectangles from the exterior fabric and one 6.65″ × 2″ rectangle from the batting.
- Fold each exterior and lining rectangle in half to locate the center of all four edges. Mark each center point with a removable fabric marker or a small crease.
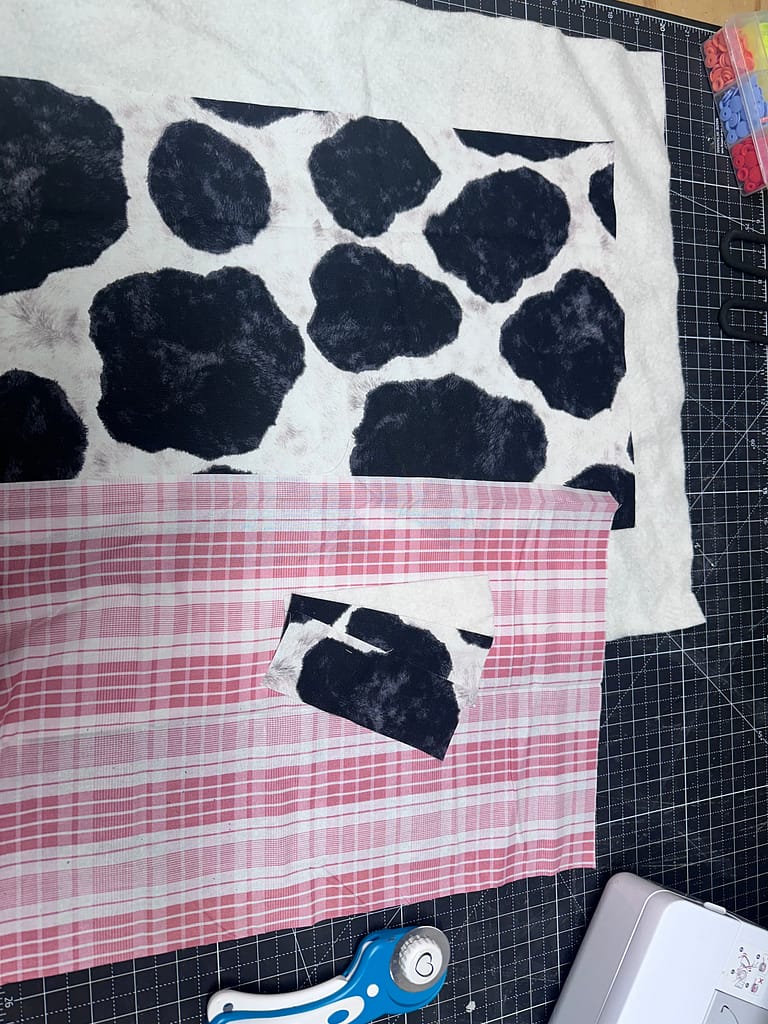
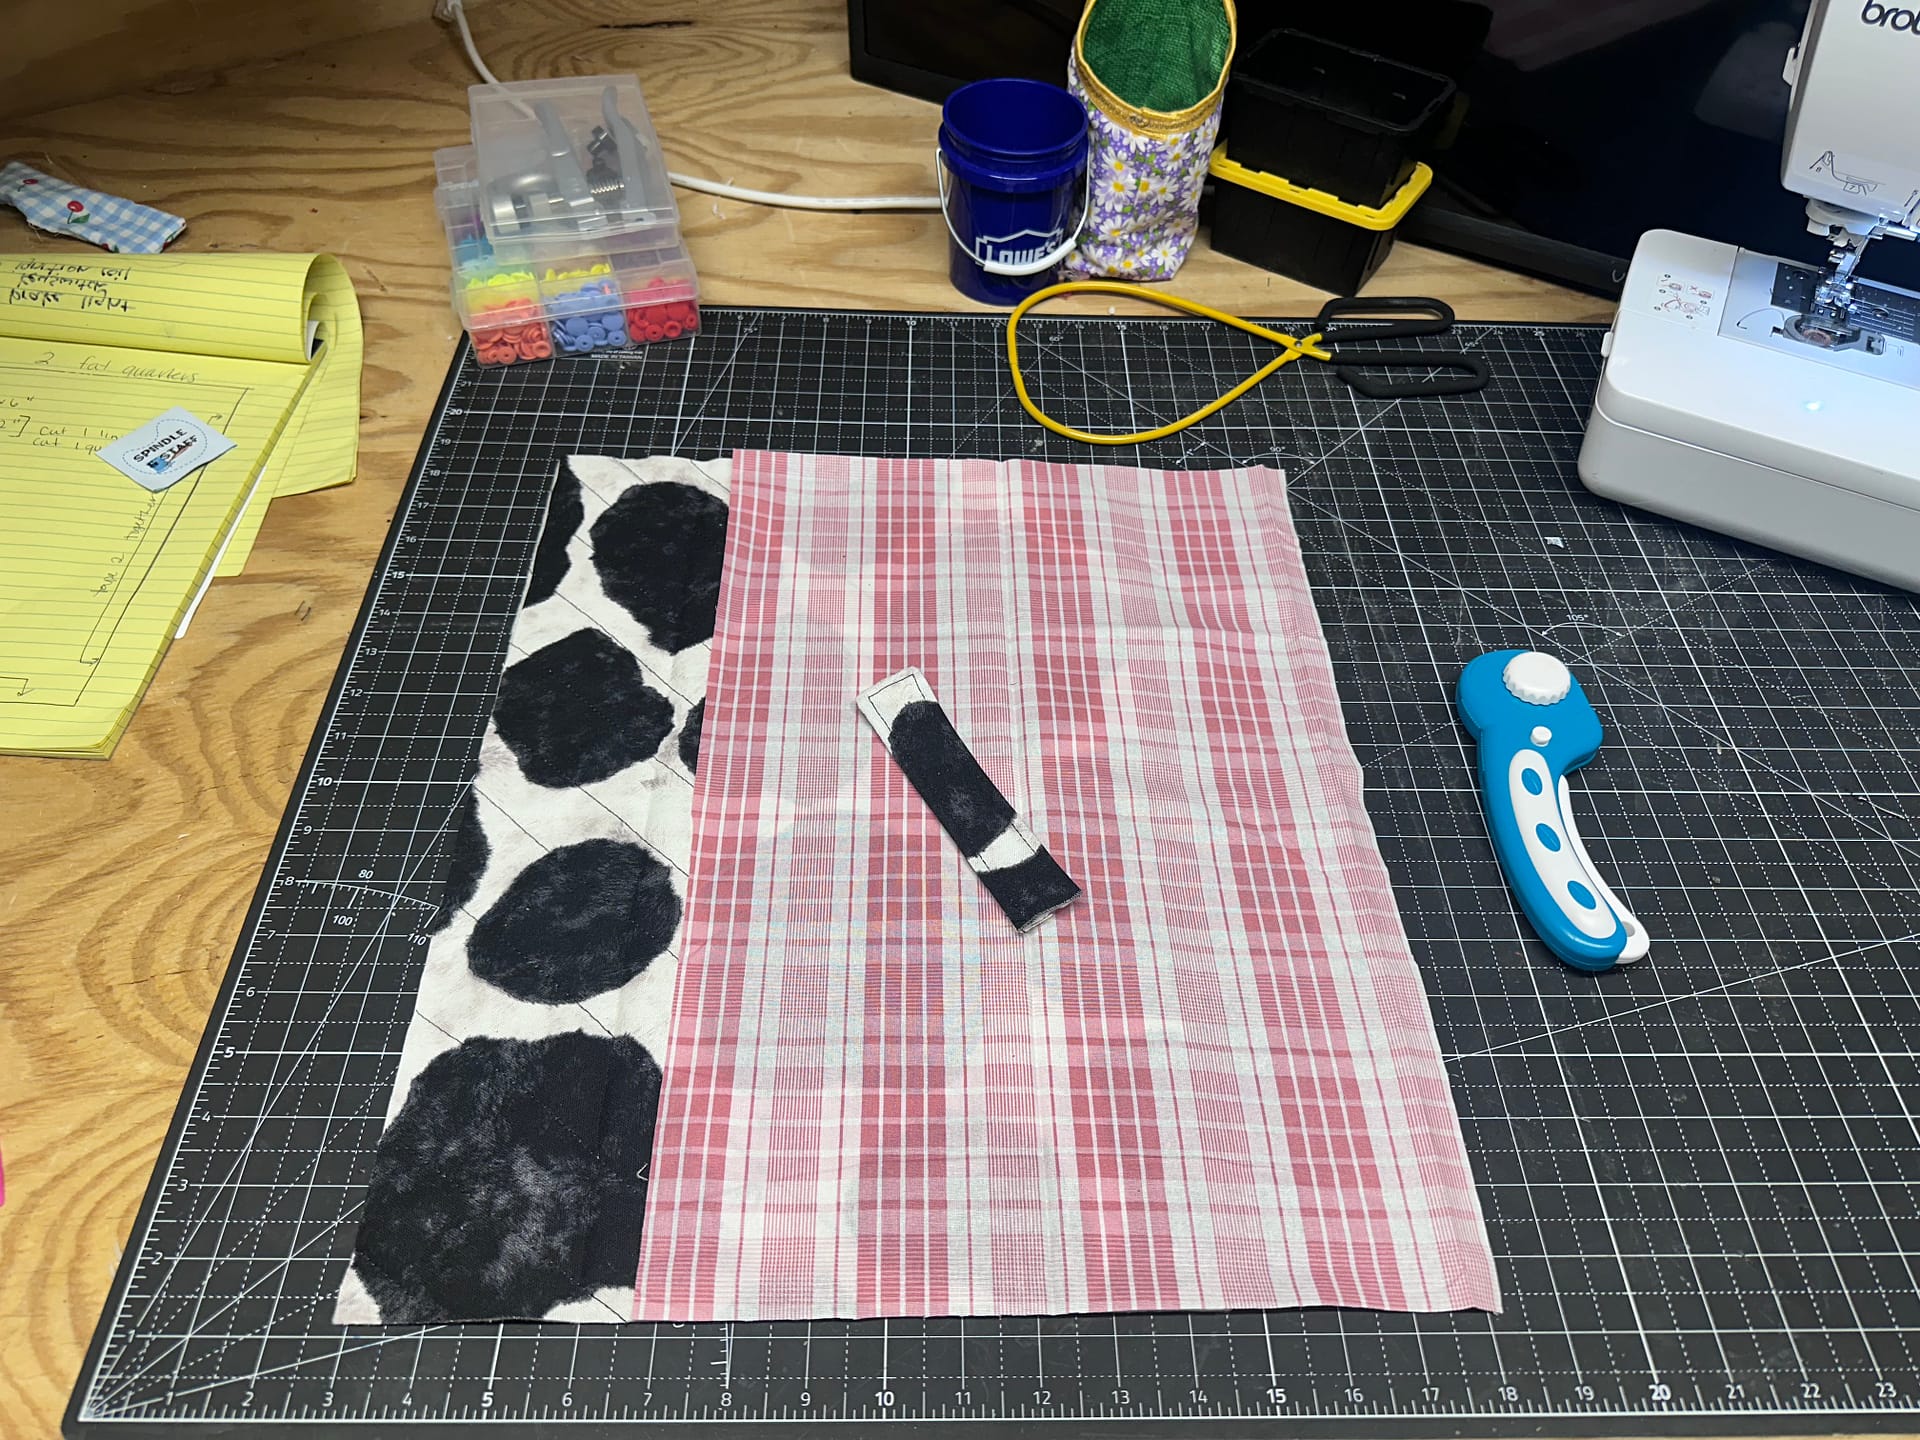
cut to correct sizes.

mark centers, layer lining and main panel
Sew the Fabric strap
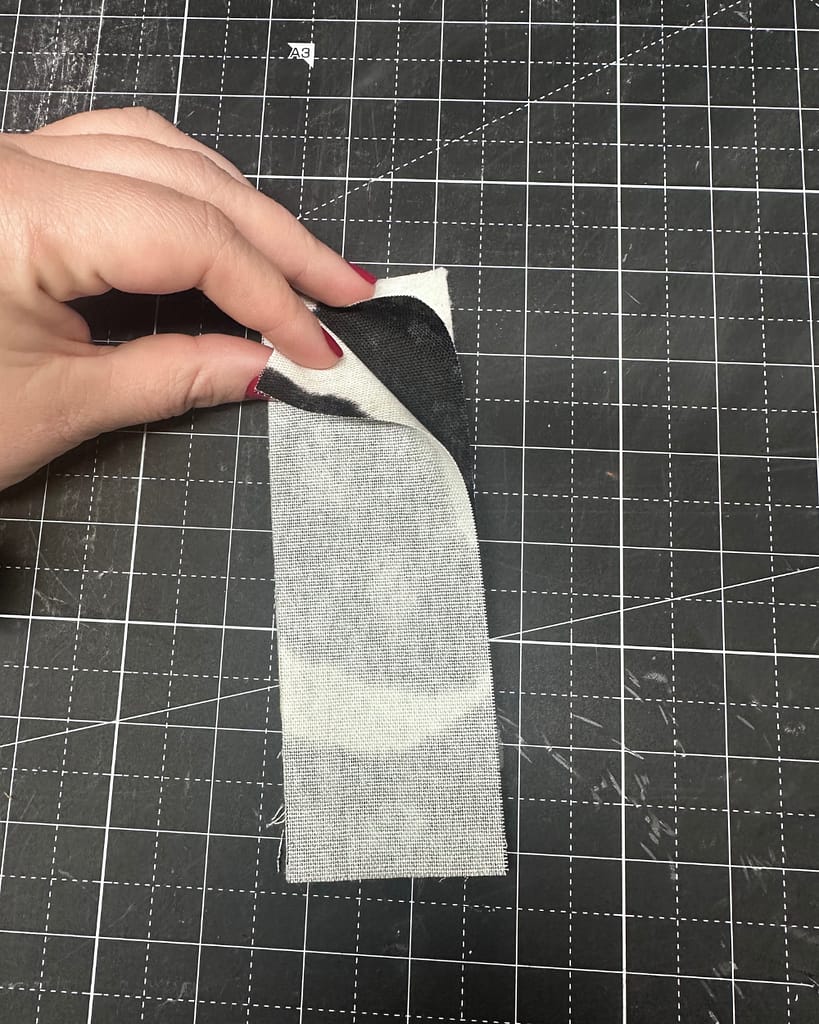
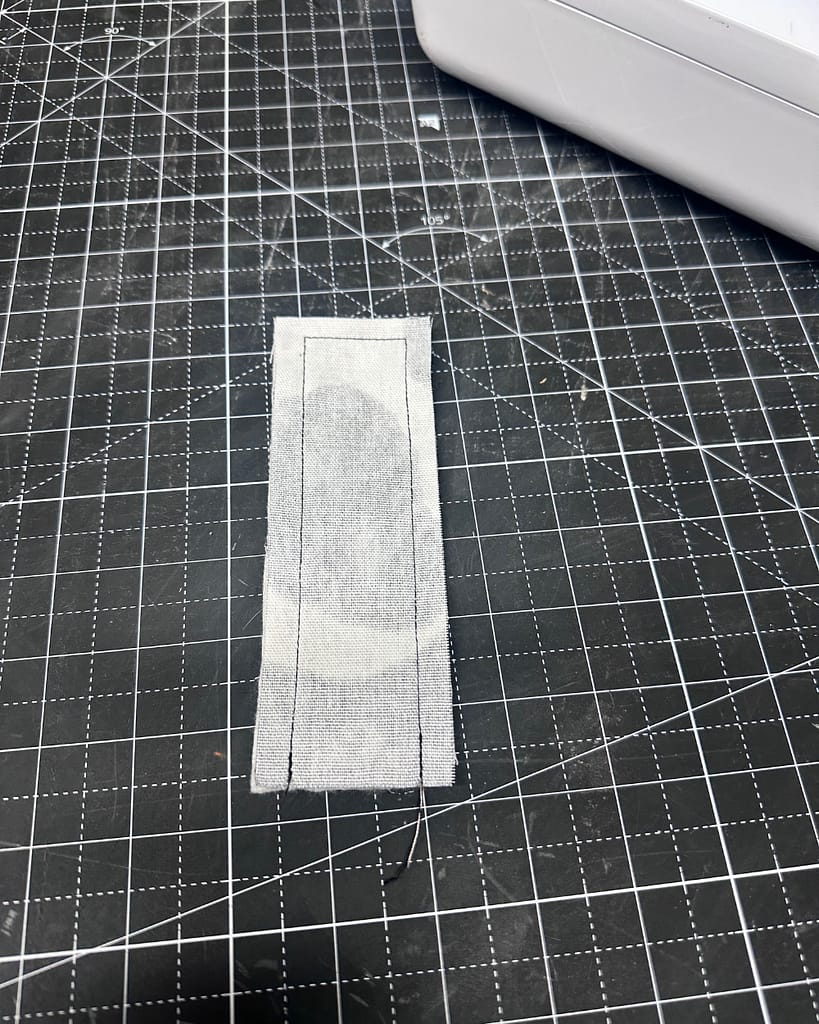
- Layer the strap pieces in this order: batting on the bottom, one fabric rectangle right side up, and the second fabric rectangle right side down. The right sides of the two fabric pieces should be touching. Pin or clip the layers together.
- Using a ¼″ seam allowance, sew down one long side, across one short end, and back up the other long side. Backstitch at the beginning and end, leaving the second short end open for turning.
- Trim the two sewn corners to reduce bulk, being careful not to cut through the stitching. Turn the strap right side out and gently shape the corners with a point turner.
- Press the strap flat. Topstitch approximately ⅛″ from the edge along the two long sides and the finished short end, using a 4.0 mm stitch length. Leave the raw short end open.
- Set the finished strap aside until you are ready to attach it to the exterior panel.

Sew the lining for the book sleeve
- Fold the 17″ × 12″ lining rectangle in half with the right sides together, bringing the two 12″ edges together. The folded piece should measure 8½″ × 12″, with the fold forming the bottom of the sleeve.
- Using a ¼″ seam allowance, sew down the entire left side. Backstitch at the beginning and end.
- On the right side, sew approximately 3″ down from the top edge and backstitch. Leave a 2½″ opening for turning, then begin sewing again and continue to the folded bottom edge. Backstitch securely on both sides of the opening.
- Leave the upper edge unsewn. Set the lining aside until you are ready to box its corners.


Sew the main body of the sleeve
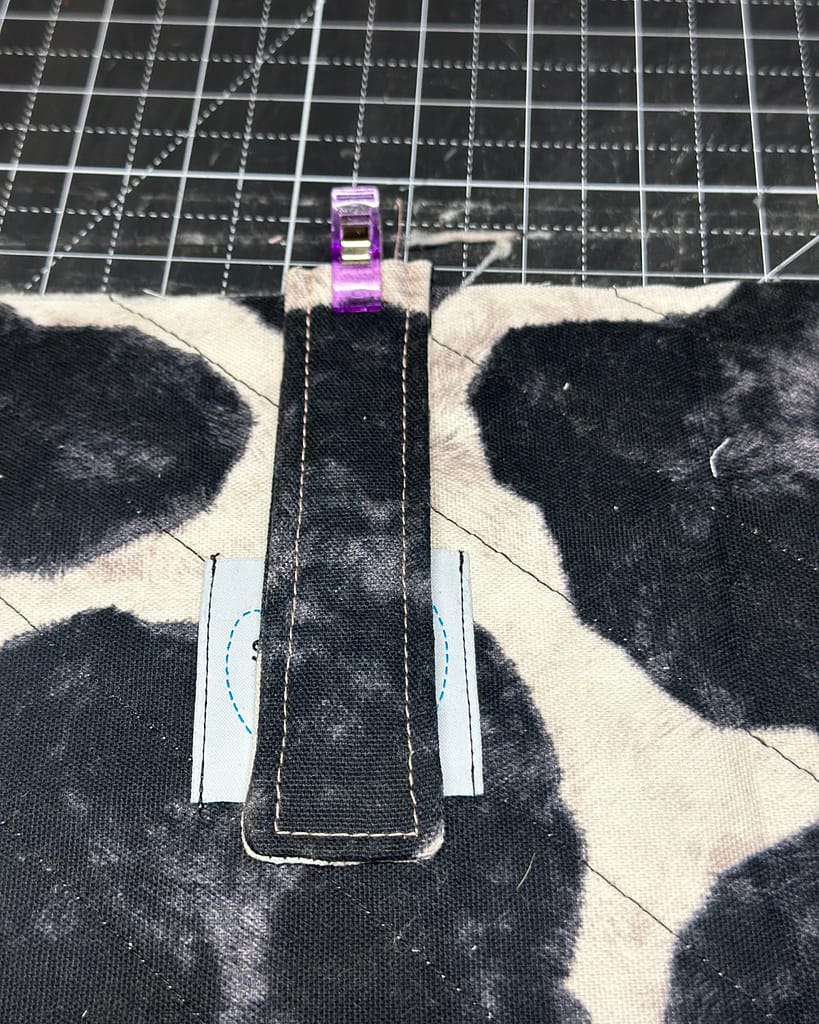
- Place the raw end of the finished strap at the center mark on one 12″ edge of the quilted exterior panel. The strap should extend over the right side of the fabric toward the center of the panel.
- Baste the strap in place approximately ⅛″ from the raw edge, using a 3.0 mm stitch length. Basting stitches are temporary holding stitches, so you do not need to backstitch.
- Fold the 17″ × 12″ quilted panel in half with the right sides together, bringing the two 12″ edges together. The folded piece should measure 8½″ × 12″, with the strap enclosed inside and the fold forming the bottom.
- Pin or clip the two side edges. Make sure the loose portion of the strap remains tucked inside and away from the side seams.
- Using a ¼″ seam allowance, sew down both sides. Backstitch at the beginning and end of each seam. Leave the upper edge open.


How to Box the Corners of a Book Sleeve for a Flat Bottom
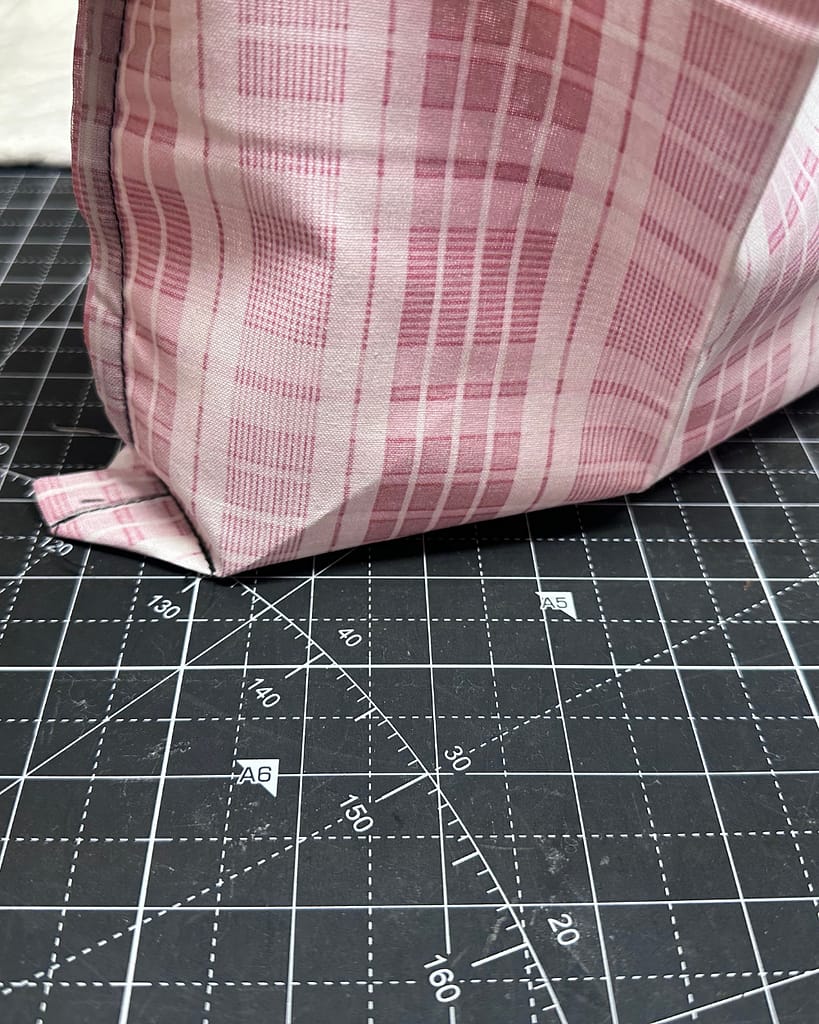
Boxed corners create a flat bottom, add structure, and give the finished book sleeve enough depth to hold thicker books. Complete these steps on both lower corners of the exterior and both lower corners of the lining.
You may trim each triangle approximately ¼″ beyond the stitching to reduce bulk. I prefer to leave the triangles attached because the extra fabric adds structure to the bottom of the book sleeve. If you leave them attached, fold them toward the bottom and press them flat.

With the piece still wrong side out, place one hand between the fabric layers at a lower corner and gently pull them apart.
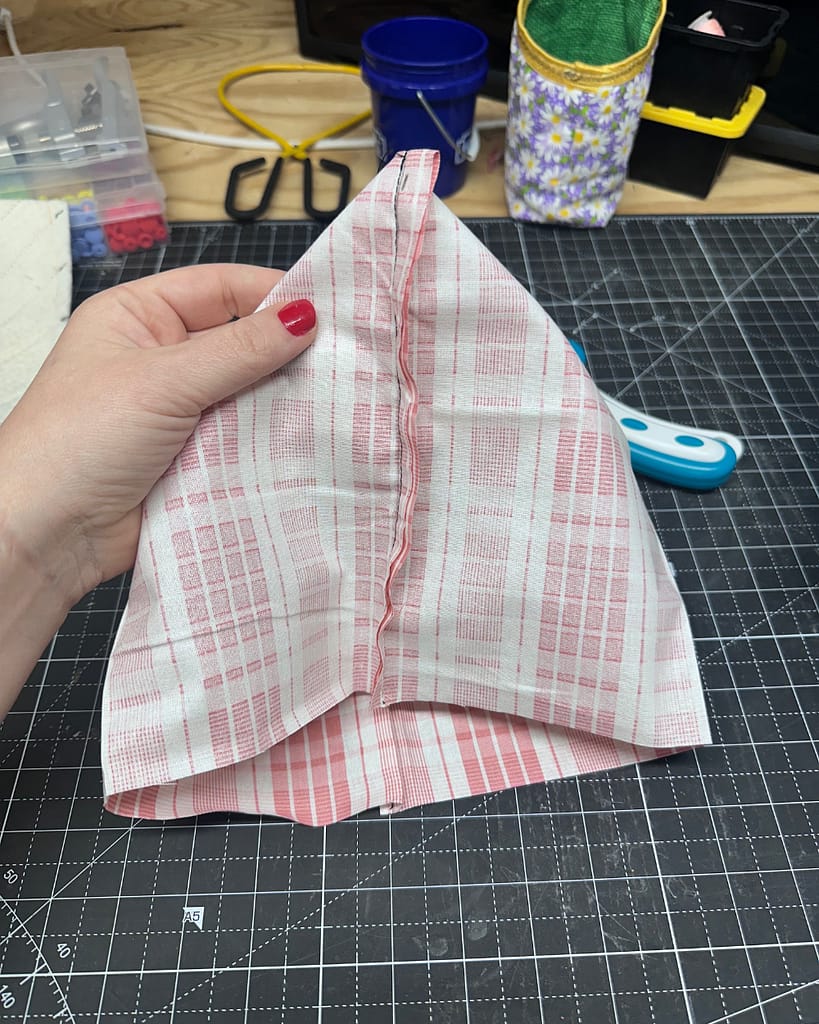
Flatten the corner into a triangle by matching the bottom fold directly to the side seam. Make sure the fold and seam are centered on top of one another.
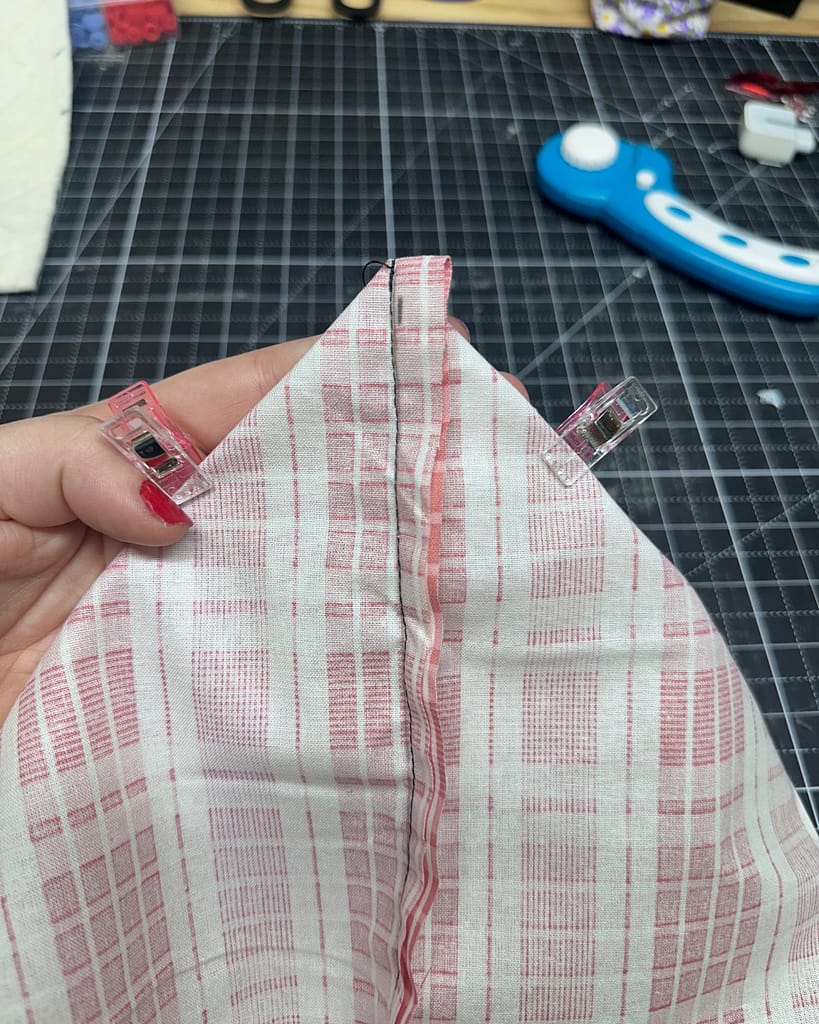
Measure 1″ inward from the point of the triangle along the side seam. Draw a straight line across the triangle, perpendicular to the seam.

Sew directly across the marked line. Backstitch at the beginning and end.
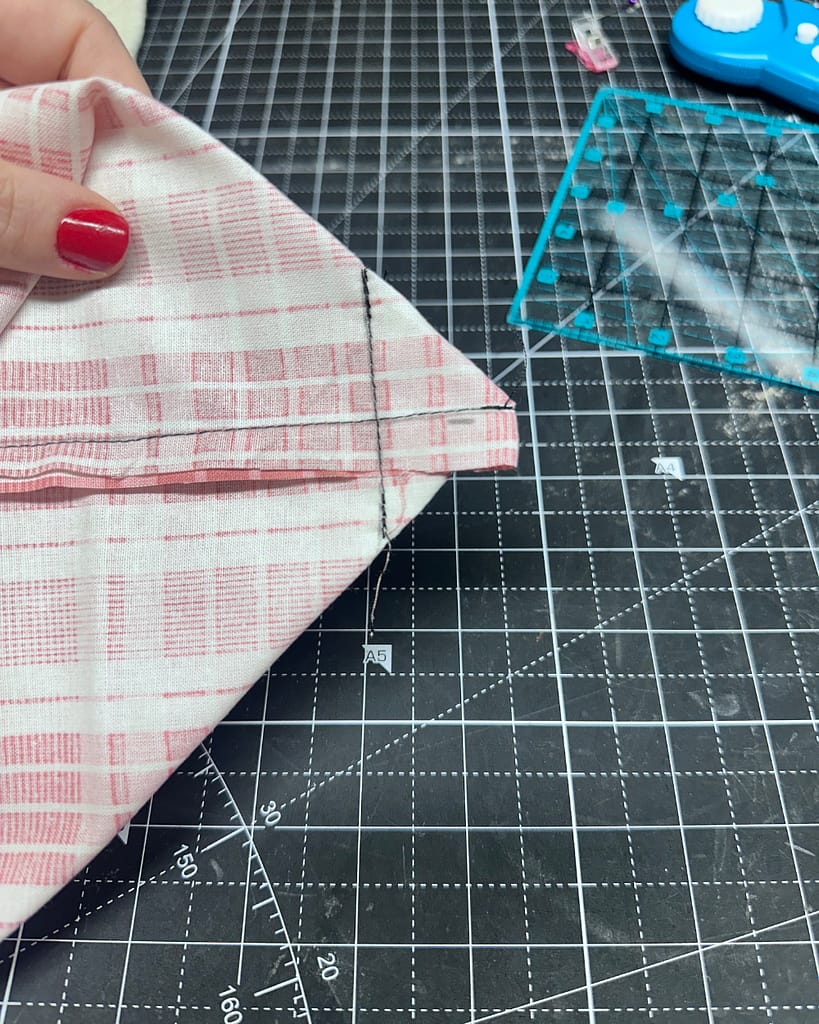
Repeat on the remaining corner, then box both corners of the lining in the same way.
Adding a Snap Closure to Your Book Sleeve
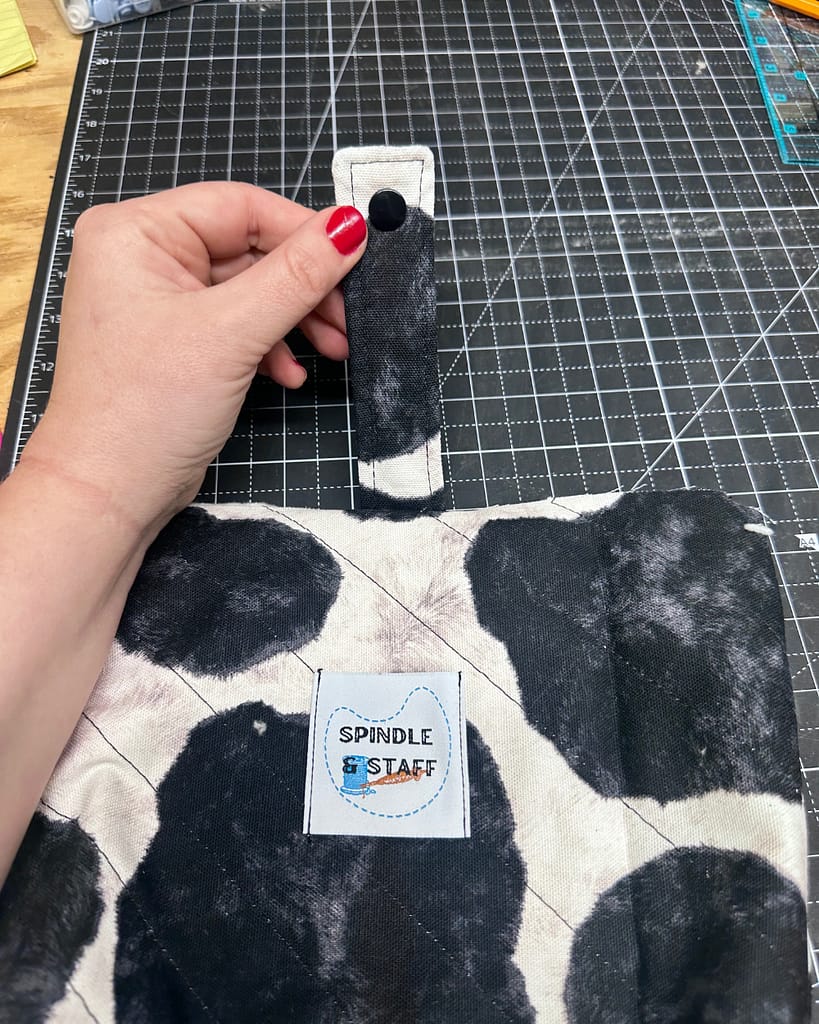
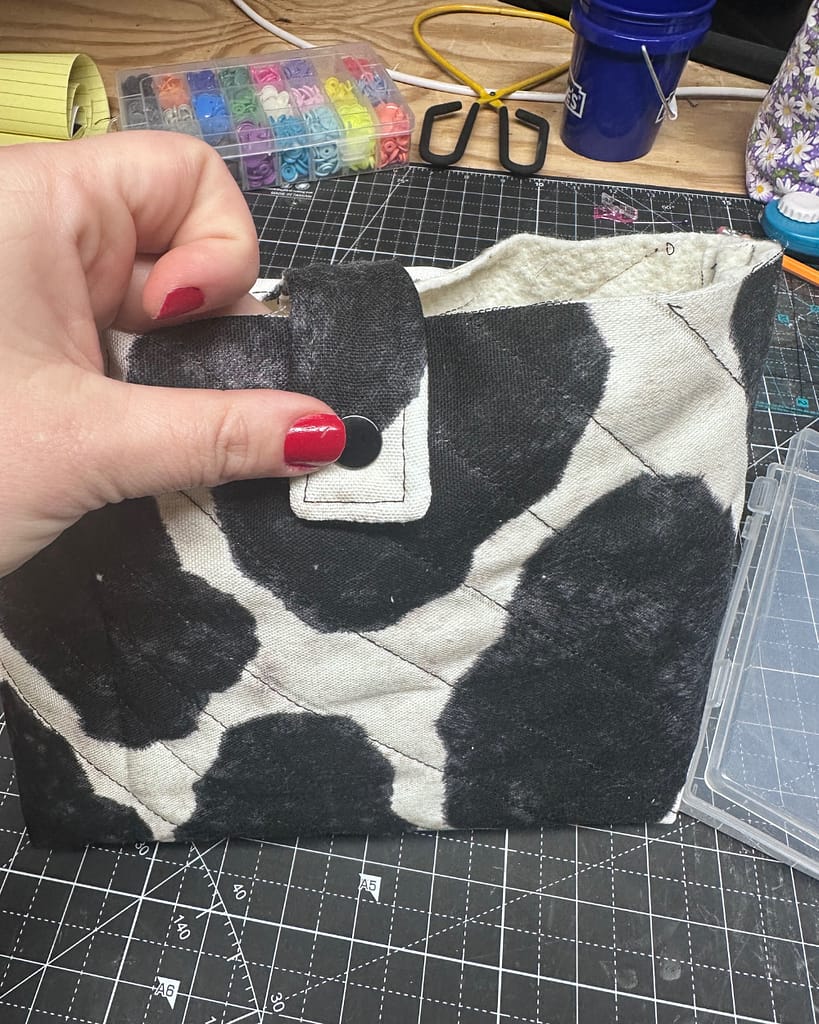
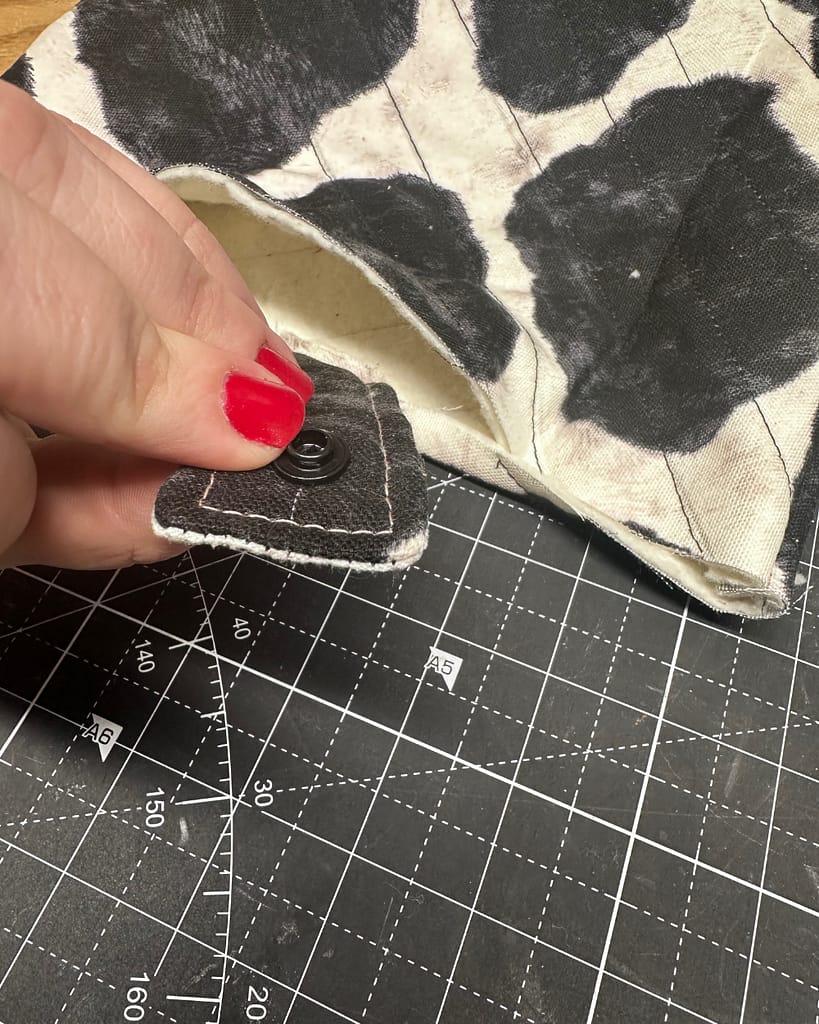
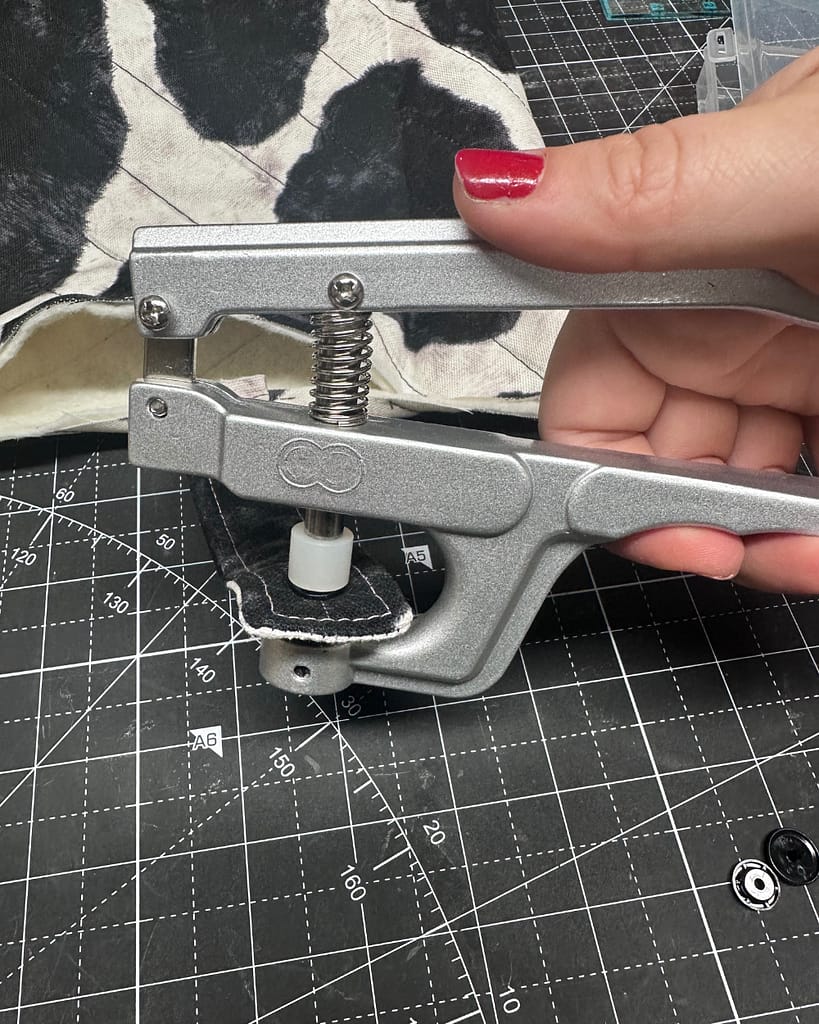
A KAM snap closure keeps the book securely inside the sleeve and gives the finished project a polished look. Before installing the snap, double-check the placement and orientation of both pieces.
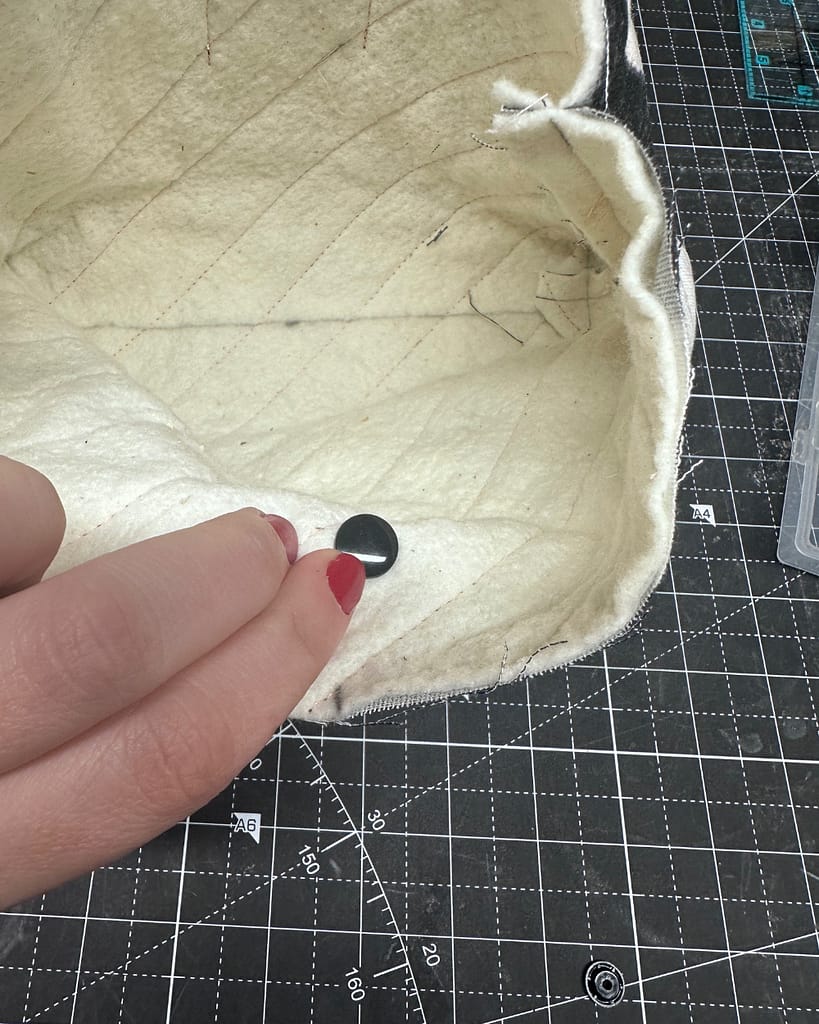
Place each snap piece into the pliers and squeeze firmly. Test the closure before continuing to make sure the two sides align and fasten securely.
Turn the quilted exterior right side out. Leave the lining separate for now.
Fold the strap over the open edge and position it at the center of the front of the sleeve. Mark where the end of the strap meets the exterior.
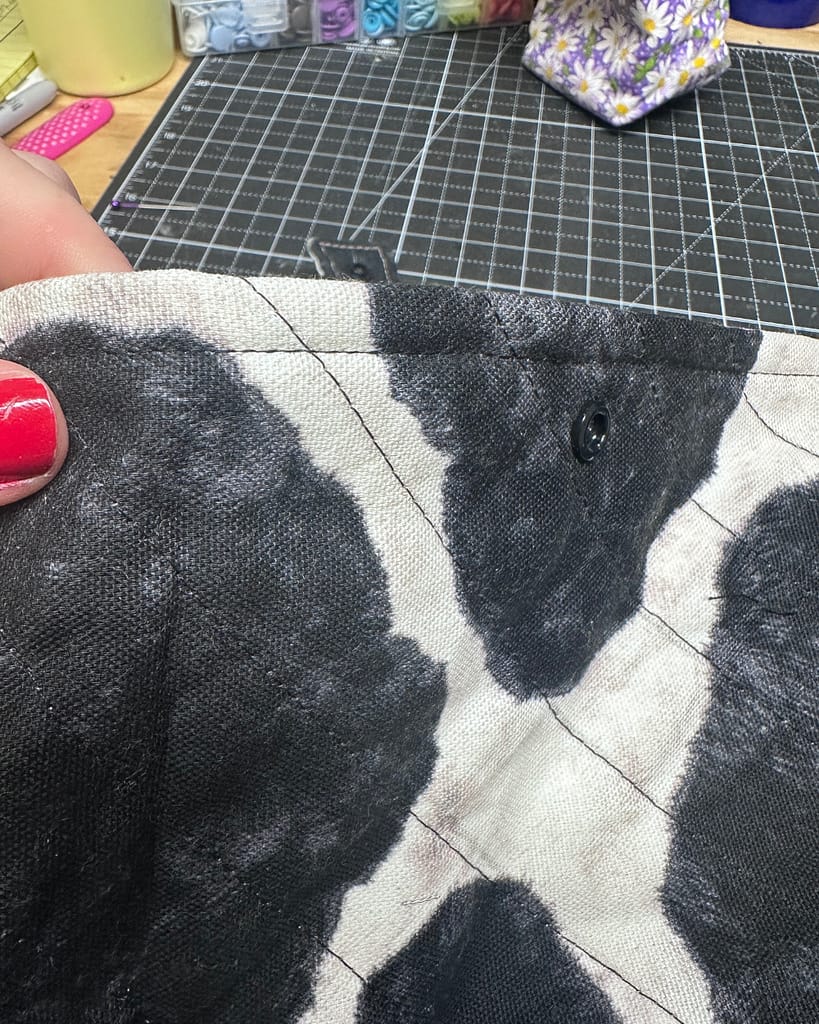
Use the awl from the KAM snap kit to carefully pierce a small hole through the marked spot on the exterior.
Install the female socket on the exterior. The socket should face outward, while the smooth cap sits inside the book sleeve.
Fold the strap over the opening again and press it against the installed socket. Mark the matching snap position on the strap.
Pierce the strap at the marked point and install the male stud. The stud should face the female socket, while the smooth cap remains visible on the outside of the closed strap.
Attach lining to main body of the book sleeve
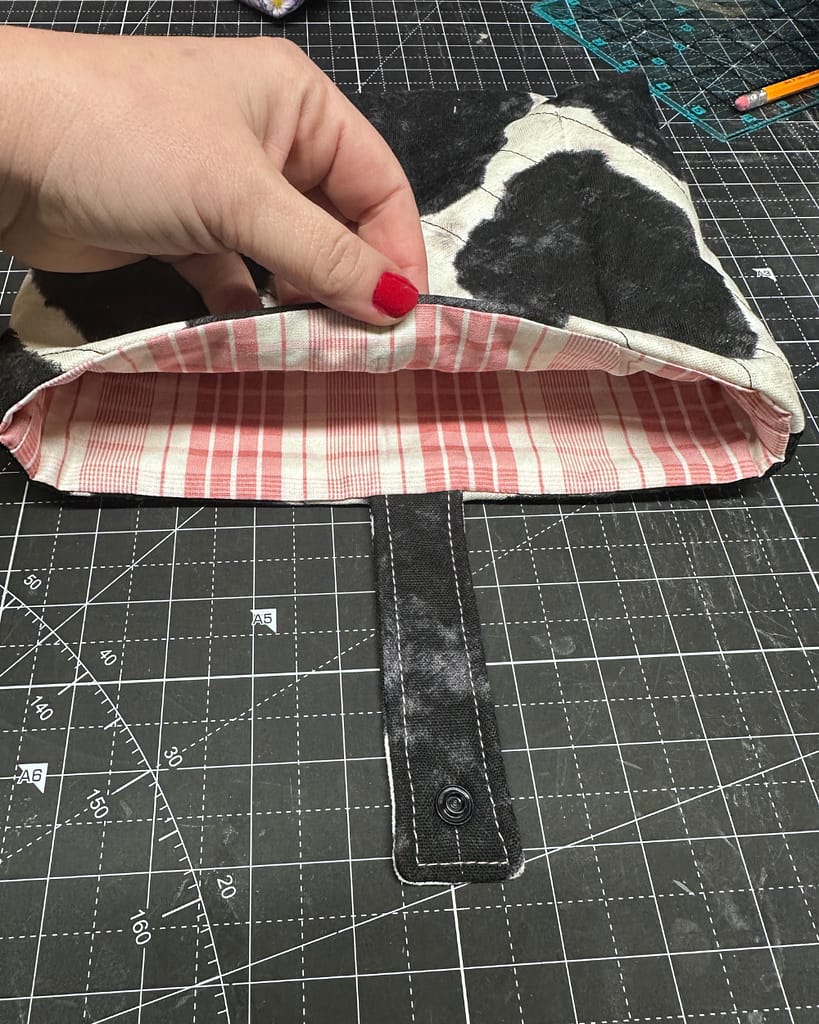
- Turn the quilted exterior wrong side out. Tuck the closure strap completely inside the sleeve so it stays away from the upper edge.
- Turn the lining right side out.
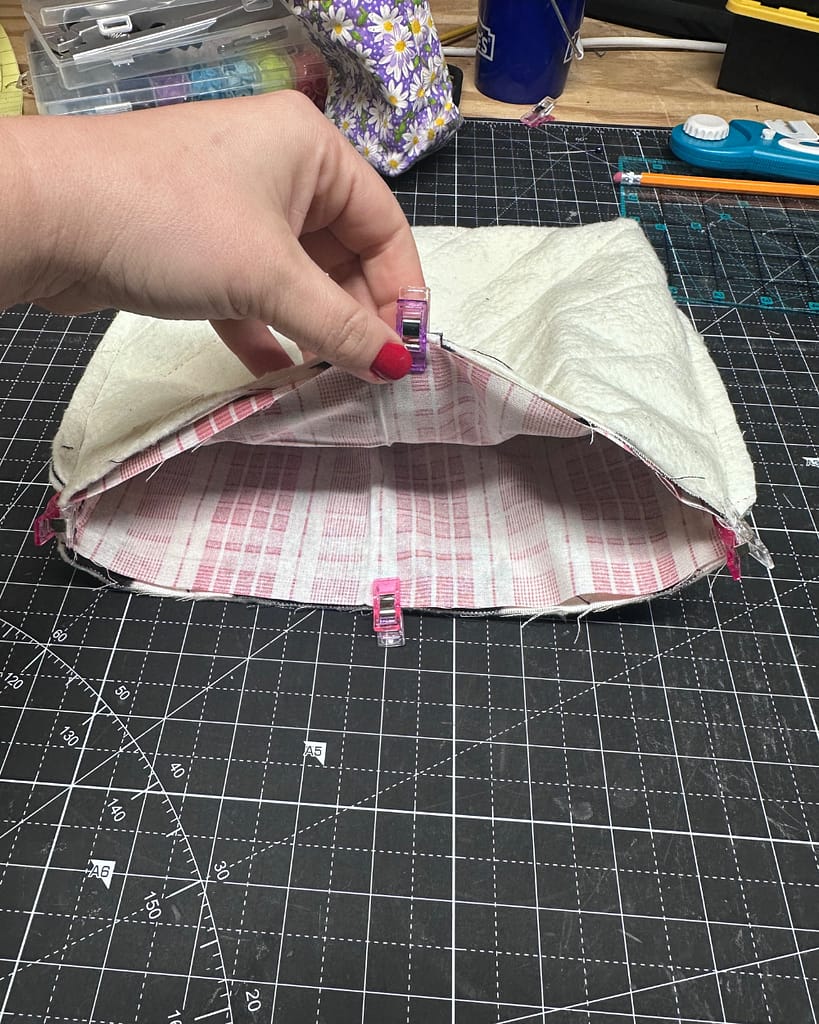
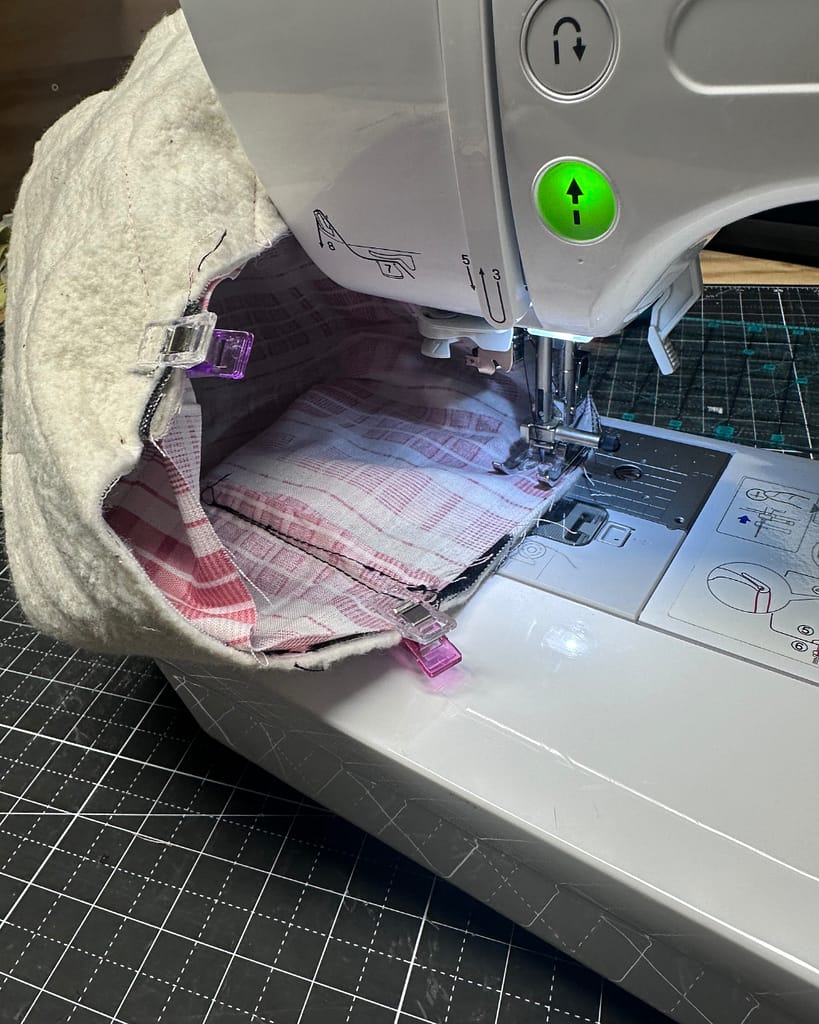
- Insert the lining into the exterior. The right sides of the exterior and lining should be touching, with the wrong sides visible.
- Push the lining’s boxed corners into the boxed corners of the exterior. Match the side seams and the center marks along the upper raw edges.
- Pin or clip the layers together around the entire opening. Make sure the strap remains tucked inside and is not caught near the stitching line.
- If needed, trim a small amount of bulk from the exterior’s side-seam allowances at the upper edge. Do not cut into the stitching.
- Using a ¼″ seam allowance, sew completely around the upper edge. Overlap your first few stitches and backstitch to secure the seam.


Turn the book sleeve right side out
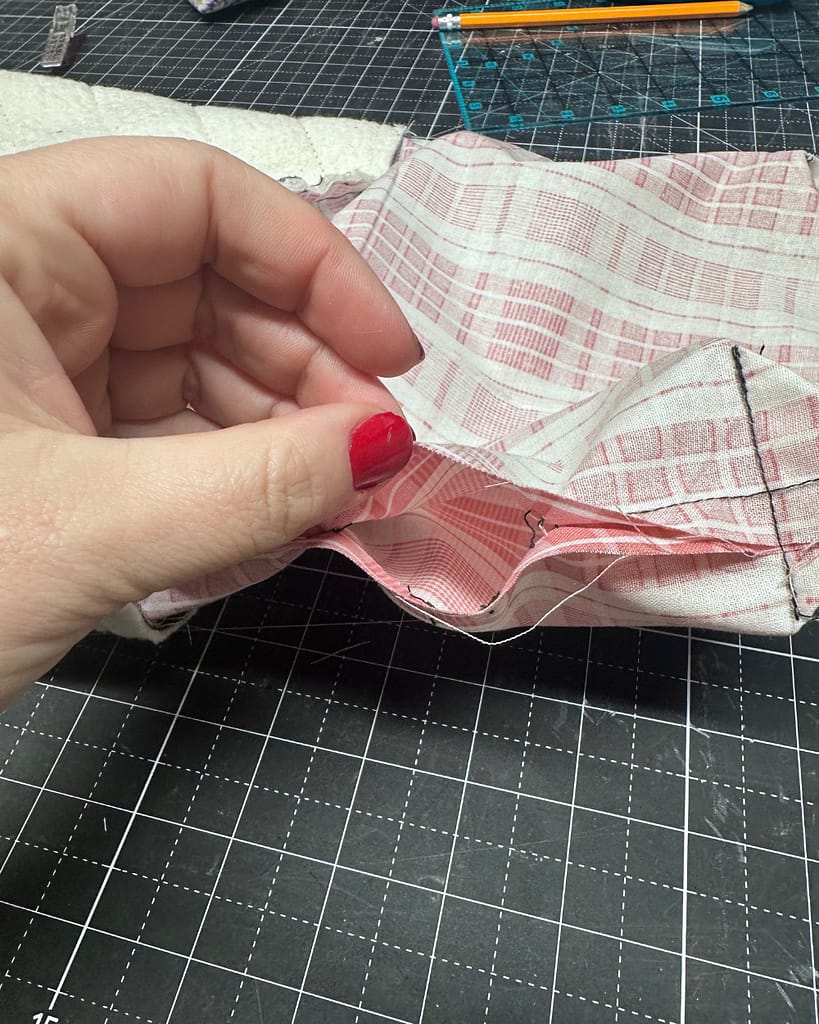
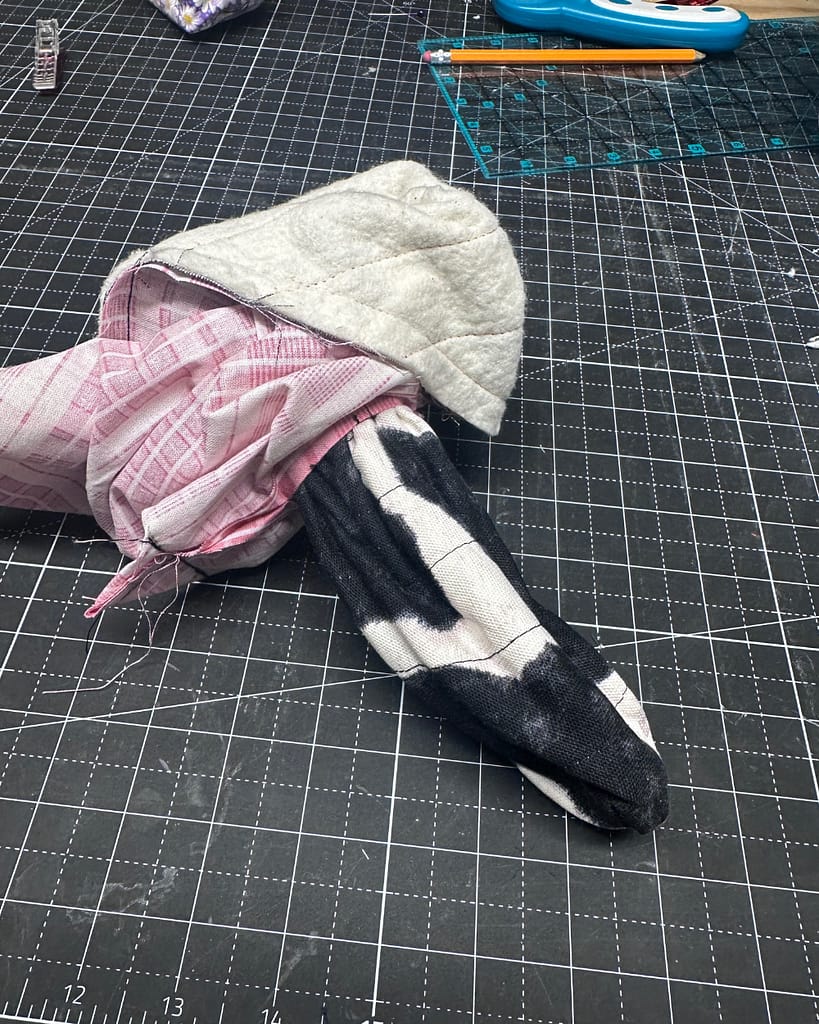
- Pull the lining out of the quilted exterior so you can easily reach the opening left in the lining’s side seam.
- Reach through the opening and grasp one lower corner of the quilted exterior.
- Gently pull the exterior through the opening. Continue working the fabric through a little at a time until the entire book sleeve is right side out. Avoid pulling forcefully, especially where several layers meet.
- Use a point turner to gently shape the boxed corners and smooth the seams.
- Fold the raw edges of the lining opening inward so they align with the sewn seam. Press and pin or clip the opening closed.
- Machine-stitch the opening closed with a 2.5 mm stitch length, sewing as close to the folded edge as possible. For an invisible finish, close the opening by hand with a ladder stitch instead.



Press the top edge and top stitch
- Push the finished lining down inside the quilted exterior. Match the boxed corners and smooth the lining along the sides and bottom.
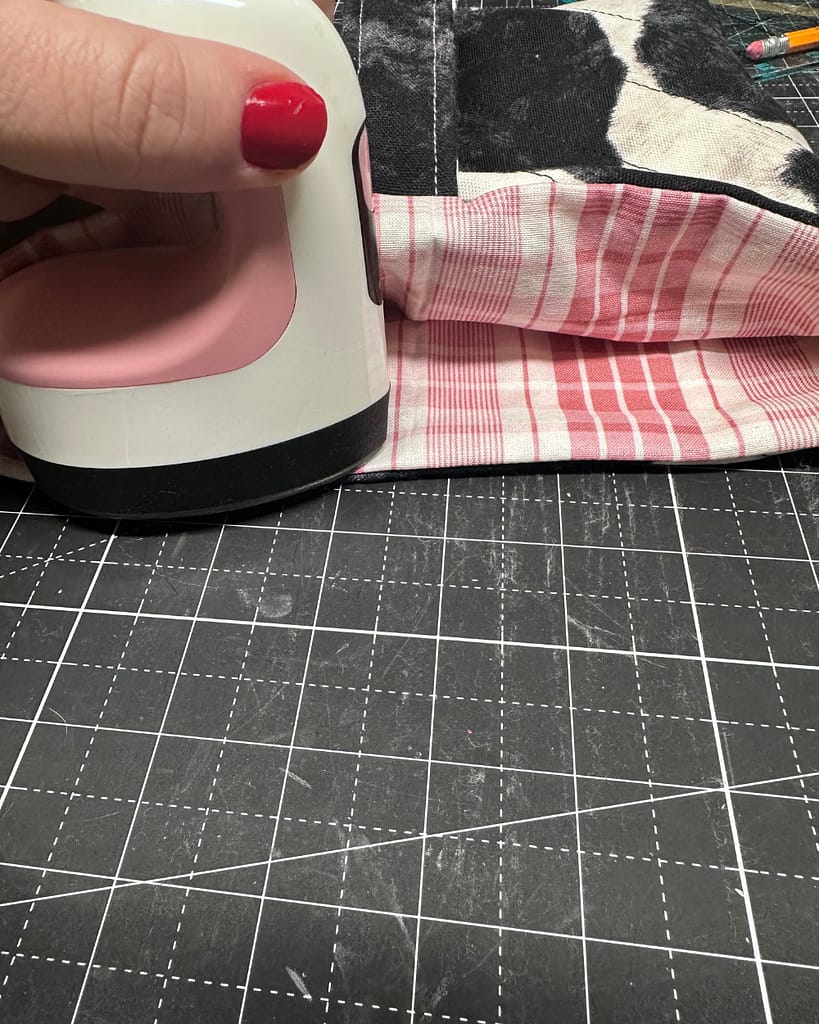
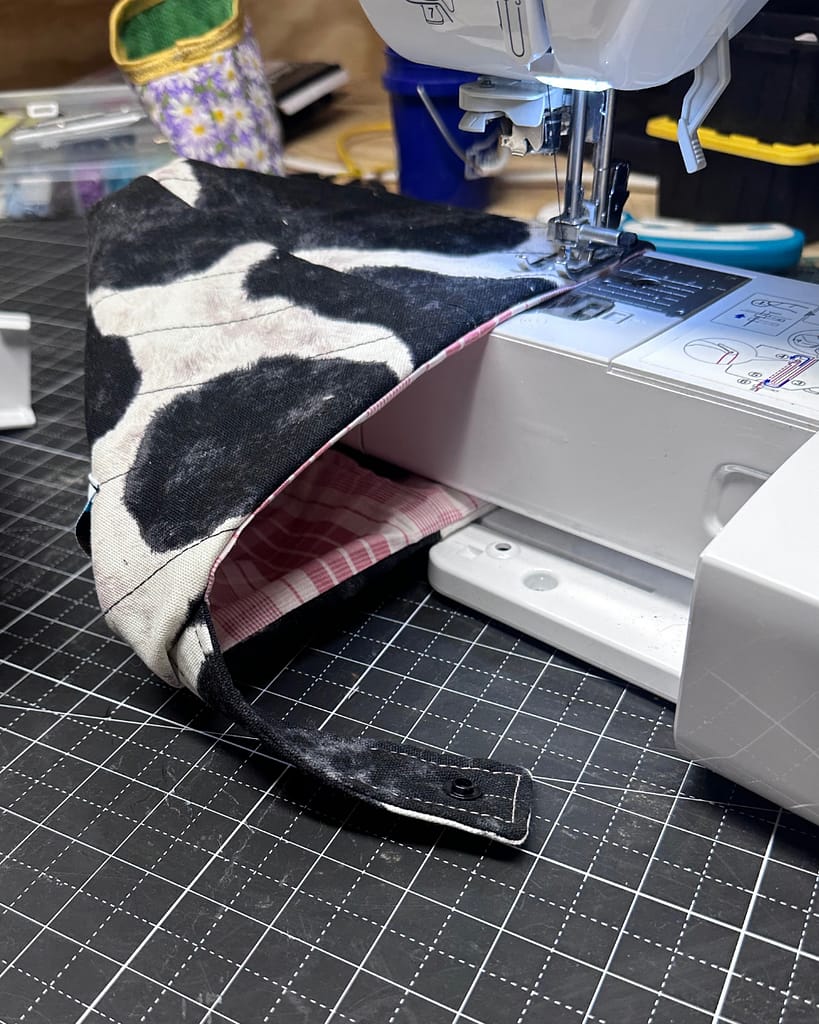
- Use your fingers to gently roll the upper seam until the exterior and lining meet evenly along the edge. Press the opening carefully, making sure the lining does not roll toward the outside.
- Pin or clip the upper edge in place. Check that the closure strap is fully extended and positioned away from the stitching path.
- Using a 4.0 mm stitch length, topstitch completely around the opening approximately ¼″ from the edge. Backstitch where the stitching begins and ends.
- Give the completed book sleeve a final press, fasten the snap, and check the inside for any loose threads.

Your Quilted Book Sleeve Is Finished!
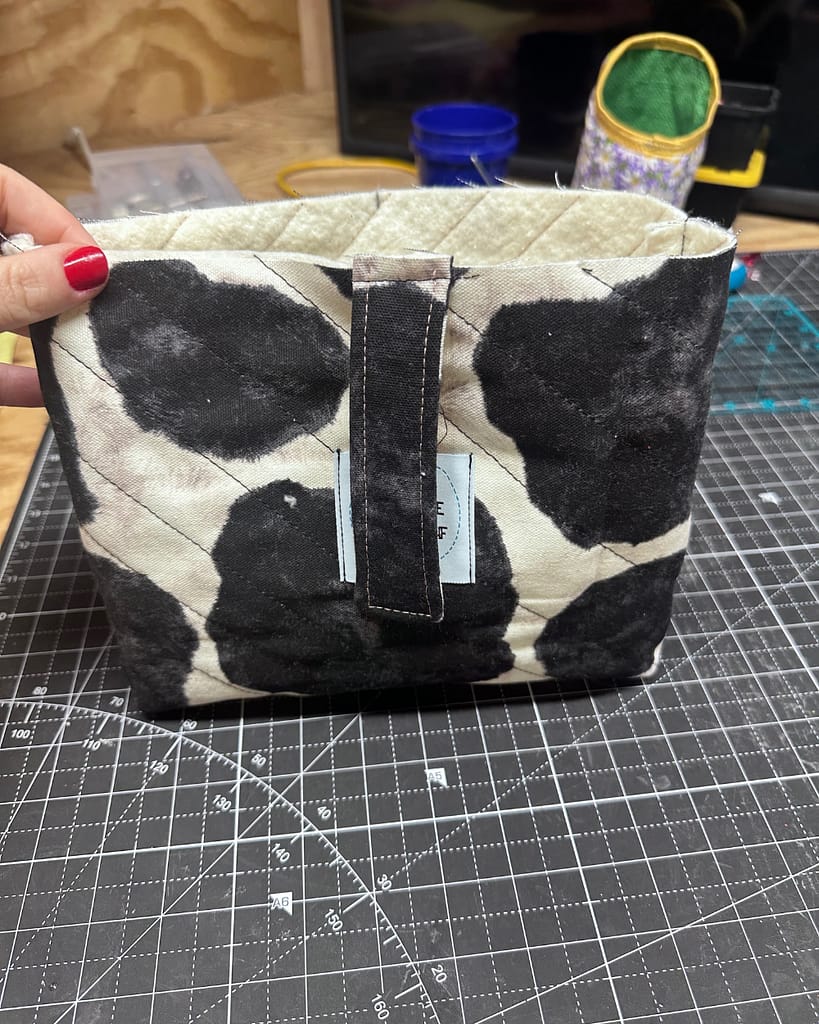
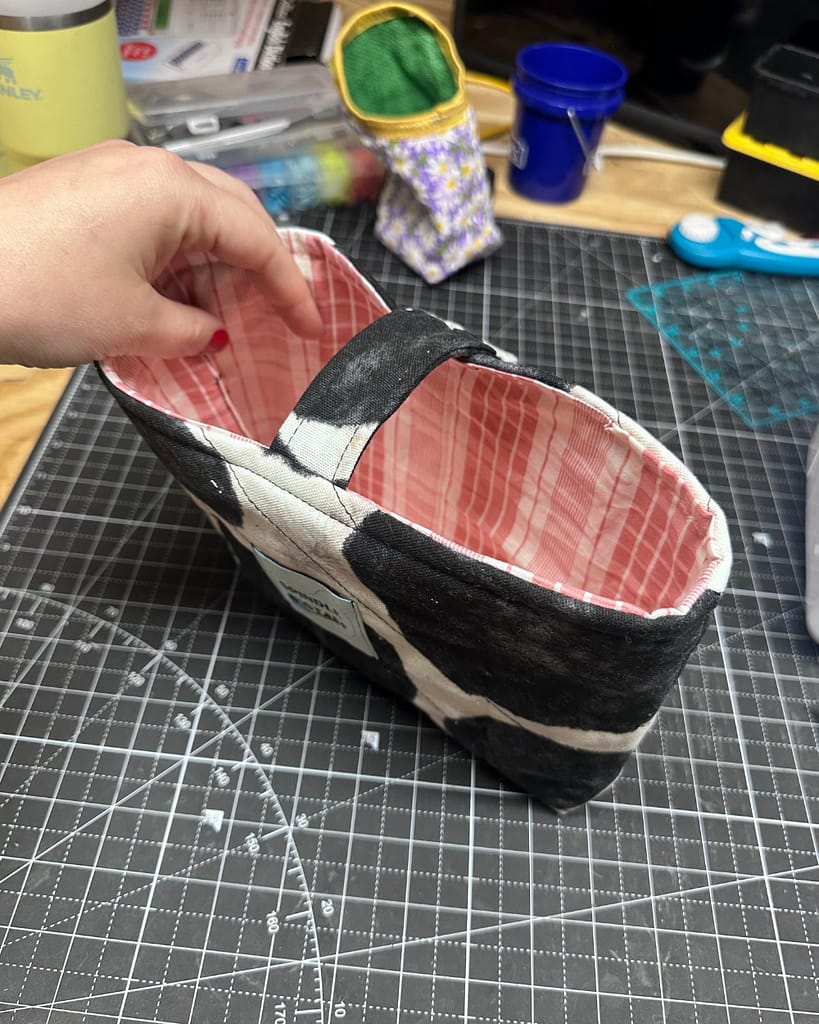
You now have a padded fabric book sleeve with a boxed bottom, washable lining, secure snap closure, and coordinating fabric strap. Slip a favorite paperback, hardcover, journal, planner, or Bible inside and check that the snap closes comfortably without pulling.
This is a satisfying project for confident beginners because it practices several useful sewing skills in one manageable project:
- Cutting accurate rectangles
- Quilting fabric and batting together
- Sewing consistent straight seams
- Making a padded fabric strap
- Boxing corners
- Adding a lining
- Installing KAM snaps
- Turning and topstitching a finished project
Once you understand the construction, you can easily make additional sleeves in different sizes and fabric combinations for gifts, craft fairs, or your own reading collection.
What Size Book Fits This Book Sleeve Pattern?
Using the 17″ × 12″ cutting measurements, a ¼″ seam allowance, and 1″ boxed corners creates a finished book sleeve approximately:
- 11½″ wide at the opening
- 7¼″ tall
- 2″ deep across the boxed bottom
The exact finished measurements may vary slightly depending on the thickness of your batting and quilting.
This size fits standard paperback books, many hardcover books, journals, and similarly sized Bibles when the book is placed inside with its longest edge running across the width of the sleeve. It can generally accommodate a book measuring up to approximately 10½″ × 6½″ × 1½″ while still leaving enough room to insert and remove it easily.
Before cutting your fabric, measure the book you plan to carry. If it is especially large, thick, or heavily padded, increase the exterior and lining measurements equally. Always allow at least ½″ of ease around the book so the finished sleeve is protective without being difficult to use.


Can This Pattern Be Used as a Bible Sleeve?
Yes. This quilted book sleeve pattern can also be used as a padded Bible sleeve. It protects the cover, page edges, ribbons, and tabs while carrying your Bible in a tote bag, backpack, or church bag.
This project creates a removable sleeve that the entire Bible slides into. It is different from a fitted Bible cover that remains wrapped around the book while you read.
Because Bible sizes vary considerably, measure yours before cutting the fabric. Compare its height, width, and spine thickness with the finished measurements in the sizing section below. Increase both the exterior and lining rectangles equally when making the pattern for a large study Bible or a Bible with wide margins and tabs.
Choose meaningful fabric, add a coordinating lining, or pair the finished Bible sleeve with a handmade bookmark to create a thoughtful gift.
Is This Book Sleeve Pattern Beginner-Friendly?
This is a good project for a confident beginner who can thread a sewing machine, sew a reasonably straight seam, backstitch, and follow a ¼″ seam allowance. The sleeve is made almost entirely with straight stitching and does not require zippers, curves, buttonholes, or complicated pattern pieces.
A few techniques may be new if you have only completed very simple projects:
- Quilting fabric to batting
- Sewing through several layers
- Making boxed corners
- Attaching a lining
- Turning a lined project right side out
- Installing a KAM snap
The step-by-step photos will guide you through each technique. Take your time around bulky seams, use the handwheel when necessary, and make sure the strap remains clear of the side and upper seams.
If this is your very first sewing project, begin with my Learn to Sew resources and practice sewing straight lines on scrap fabric before starting the book sleeve.
Add a Handmade Book Sleeve to a Hope Chest
A handmade book sleeve is a practical addition to a hope chest because it combines a useful finished item with skills that can be applied to many future sewing projects. It is also small enough for a young sewist to complete without becoming overwhelmed.
This project teaches:
- Measuring and cutting accurately
- Coordinating exterior and lining fabrics
- Quilting fabric with batting
- Following multi-step sewing instructions
- Boxing corners and adding structure
- Installing a practical closure
- Pressing and finishing seams neatly
- Choosing or creating a thoughtful handmade gift
A finished sleeve can protect a Bible, journal, planner, cookbook, or treasured book. It can also be included in a handmade gift basket or saved as a useful piece for a future home.
Explore more practical sewing, homemaking, and life-skills projects in The Hope Chest Hub.
More Beginner Sewing Projects
If you enjoyed making this quilted book sleeve, continue practicing the same skills with these useful projects:
- Quilted Fabric Basket With Handles — Practice quilting, boxed corners, lining, handles, and topstitching.
- Simple 8.5″ Hot Pad — A quick project for practicing straight seams and sewing through padded layers.
- DIY Waist Apron With Pockets — Make a useful handmade gift while practicing hems, straps, and pockets.
- Cloth Napkins With Mitered Corners — Learn careful pressing, accurate hems, and professional-looking corners.
You can also browse all of my free sewing patterns and tutorials.
Don’t forget the FREE printable tutorial! I’ll send it to your inbox so you can find it later!
Book Sleeve Sewing FAQs
Quick, beginner-friendly answers to common questions about how to sew a padded book sleeve (and how to size it for gifts).
What is a book sleeve?
A book sleeve is a padded fabric cover designed to protect books from damage while traveling or being stored. It typically includes quilting cotton fabric and batting to cushion books from spills, bent corners, and everyday wear.
What size should I make a book sleeve?
This pattern begins with 17″ × 12″ exterior and lining rectangles. Using a ¼″ seam allowance and 1″ boxed corners creates a finished sleeve approximately 11½″ wide, 7¼″ tall, and 2″ deep. It fits most standard paperbacks, many hardcover books, journals, and similarly sized Bibles. For the easiest fit, use it with a book measuring no more than approximately 10½″ × 6½″ × 1½″. Measure unusually large or thick books before cutting, then increase the exterior and lining measurements equally while allowing at least ½″ of ease around the book.
What fabric is best for sewing a book sleeve?
Quilting cotton is the best fabric for sewing a book sleeve because it is easy to sew, widely available, and durable. For extra protection, cotton canvas or linen can be used for the exterior, paired with cotton fabric on the lining.
Do I need batting for a book sleeve?
Yes, batting is recommended for a book sleeve because it provides cushioning and structure. Low-loft cotton or polyester batting works well and keeps the sleeve lightweight while still protecting the book.
Is a book sleeve a good beginner sewing project?
A book sleeve is an excellent beginner sewing project. It uses straight seams, simple construction, and minimal supplies, making it ideal for new sewists who want a practical and giftable finished item.
Can I sew a book sleeve without a sewing machine?
You can sew a book sleeve by hand, but it will take longer and require strong, even stitches. A sewing machine is recommended for durability, especially when sewing through batting and multiple fabric layers.
How long does it take to sew a book sleeve?
Most book sleeves can be sewn in 30–45 minutes, even by beginners. Once you are familiar with the process, it often takes less than 30 minutes from cutting to finished sleeve.
Can book sleeves be washed?
Most book sleeves made with cotton fabric and batting can be machine washed on a gentle cycle and air dried. Washing before gifting is recommended to prevent shrinkage later.
Are book sleeves good handmade gifts?
Book sleeves make excellent handmade gifts because they are useful, customizable, and quick to sew. They are especially popular gifts for readers, teachers, students, homeschool families, and book lovers.
Can I customize a book sleeve?
Book sleeves are easy to customize by changing fabric prints, adding quilting lines, adjusting size, or including features like a button loop or snap closure. Custom sizing also allows sleeves to fit Bibles, planners, or journals.
Will a book sleeve protect books in a backpack or bag?
A padded book sleeve helps protect books inside backpacks, purses, and tote bags by reducing corner damage and shielding against light spills. While it is not waterproof, it significantly reduces everyday wear.
What books are book sleeves best for?
Book sleeves work well for paperbacks, hardcovers, textbooks, journals, planners, and Bibles. They are especially useful for books carried daily or packed for travel.
