How to Sew a Quilted Fabric Basket With Handles (Free Pattern)
Some links in this post may be affiliate links. That means I might make a small commission on qualifying purchases if you click the link. There is no extra cost to you.
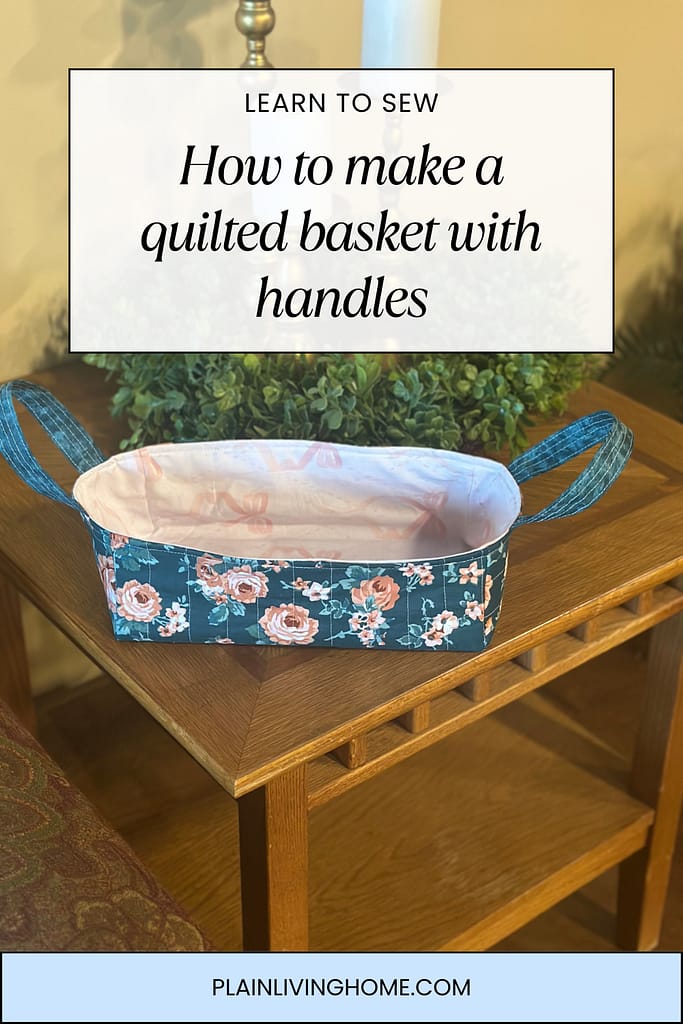
This quilted fabric basket with handles is a useful sewing project you can finish in under an hour. The free sewing pattern uses straight seams, simple quilting, and boxed corners, making it a great project for confident beginners.
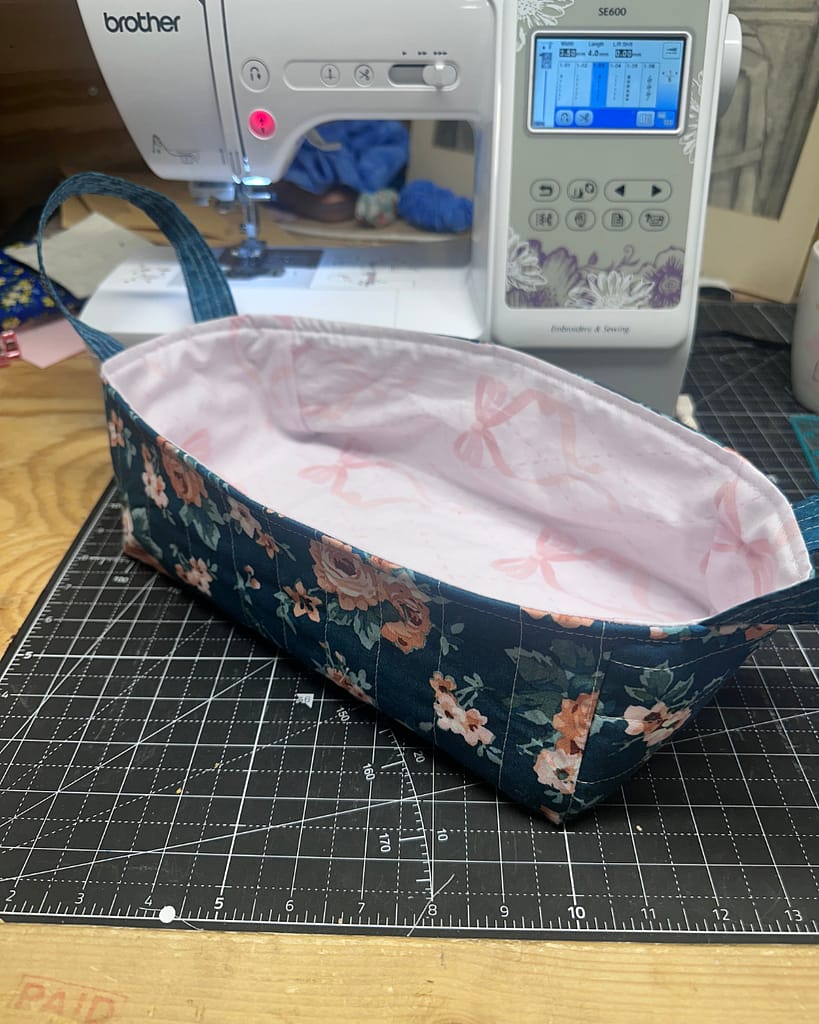
The finished basket measures approximately 7 inches wide, 14 inches long, and 3½ inches tall. Use it as a handmade gift basket, storage bin, Easter basket, bread basket, sewing organizer, or homeschool supply basket. The sturdy handles make it easy to carry from room to room.
Below, you’ll find the exact cutting measurements, step-by-step photo instructions, resizing tips, and a free printable version of the quilted basket pattern.
Grab a copy of my free
Quilted Basket Sewing Tutorial (Printable PDF)
Sew a beautiful quilted fabric basket with handles in under an hour — perfect for storage, gifts, homeschool organization, and craft fair projects.
Inside the PDF you’ll get:
- Exact cutting measurements
- Clear construction steps
- Photo-supported instructions
- Tips for batch sewing and resizing
Table of Contents
- Finished Basket Size & Skill Level
- Supplies Needed
- Step 1 – Prepare the Quilted Outer Panel
- Step 2 – Prepare the Lining Panel
- Step 3 – Make the Basket Handles
- Step 4 – Attach the Handles
- Step 5 – Box the Corners
- Step 6 – Join the Lining and Basket
- Step 7 – Turn and Finish the Basket
- Sewing Assembly-Line Style for Bulk Projects
- Using Fabric Baskets for Homeschool Organization
- Organizing a Hope Chest with Fabric Baskets
- Sewing Room Organization Ideas
- Final Thoughts
- Frequently Asked Questions


Finished Basket Size & Skill Level
This basket finishes as a medium-size quilted fabric basket with sturdy handles and boxed corners. It is roughly 7 inches wide, 14 inches long and 3.5 inches tall. To change the size of the basket, you can cut your fabric smaller or larger and change the size of the square cutouts.
Skill level: Confident beginner – Learn to Sew Here so you can tackle this project
Time to complete: Under one hour
Techniques used: Straight-line quilting, boxed corners, turning, and topstitching
Supplies Needed
Before you begin, prep all of your pattern pieces. First, make sure you have the following:
- 1 – 15” x 20” outer fabric (quilting cotton or canvas)
- 1 – 15” x 20” lining fabric (quilting cotton)
- 1 – 15” x 20” batting or foam for shaping the basket
- 2 – 4” x 12” strips for handles
Get the Free Quilted Fabric Basket Pattern
Want to save this project for your next sewing day? I’ll send the printable quilted basket tutorial directly to your inbox.
The printable includes:
- Exact cutting measurements
- A complete supply list
- Step-by-step, photo-supported instructions
- Tips for resizing and sewing several baskets at once
Enter your information below, and I’ll send you the free pattern.
Notions & tools:
- Coordinating or contrasting thread
- Scissors or rotary cutter
- Iron
- Quilting clips or pins
- Ruler
Step 1 – Prepare the Quilted Outer Panel
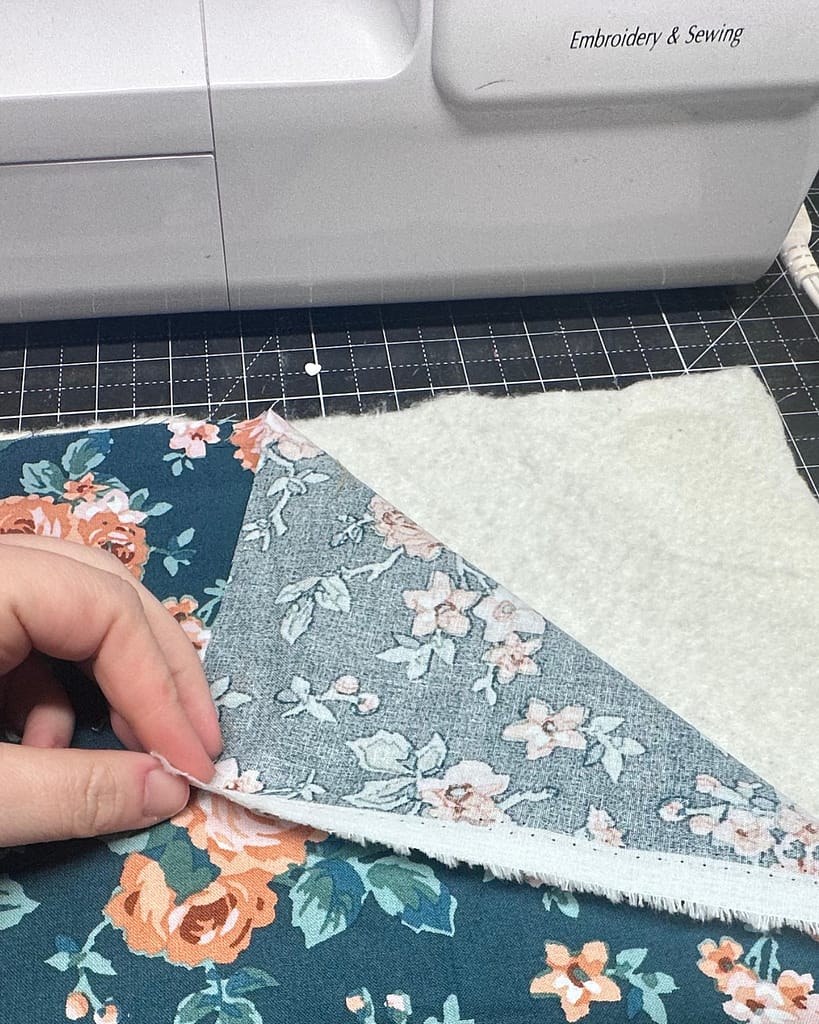
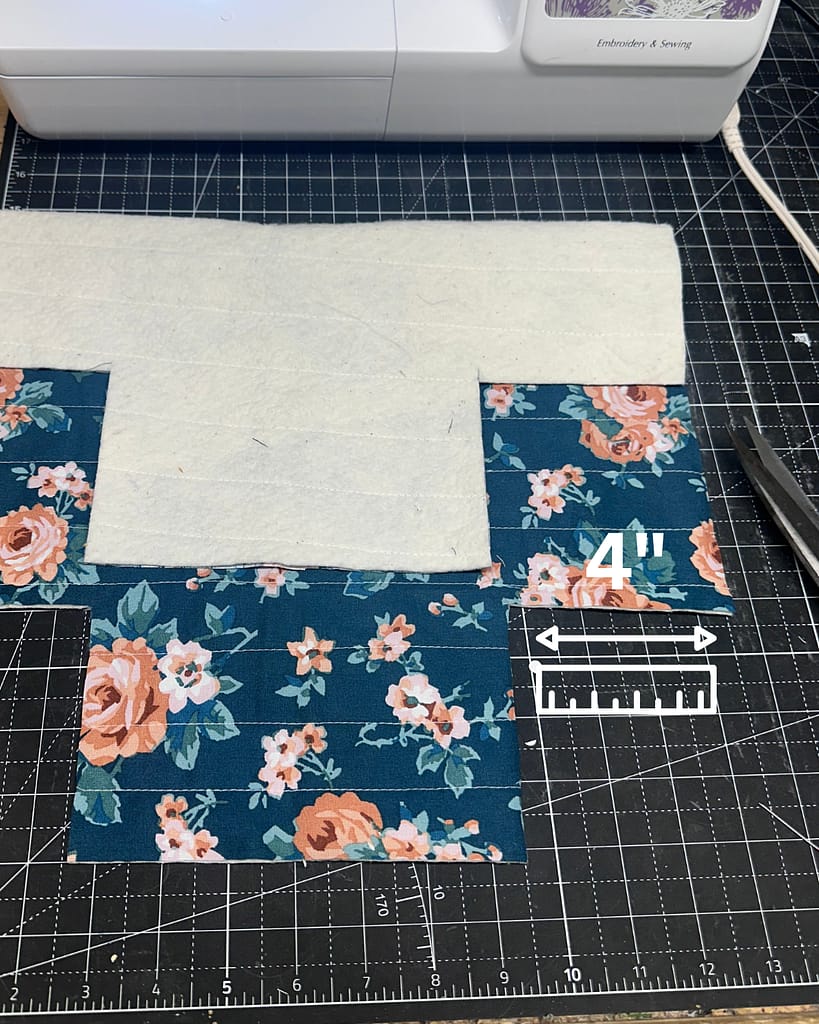
To get started, lay the outer fabric on top of the batting or foam with the pretty side facing away from the batting.
Quilt through both layers by sewing straight lines 1 inch apart. Quilt in straight lines, crosshatch, decorative stitches, free-motion designs, or hand quilting to add texture and strength.
Trim all loose threads. Cut a 4” square out of each corner to prepare the panel for boxing.
Step 2 – Prepare the Lining Panel
To prepare, press the lining fabric flat before cutting.
Then, cut a 4” square out of each corner so it matches the outer panel exactly. Set the lining aside.
Step 3 – Make the Basket Handles
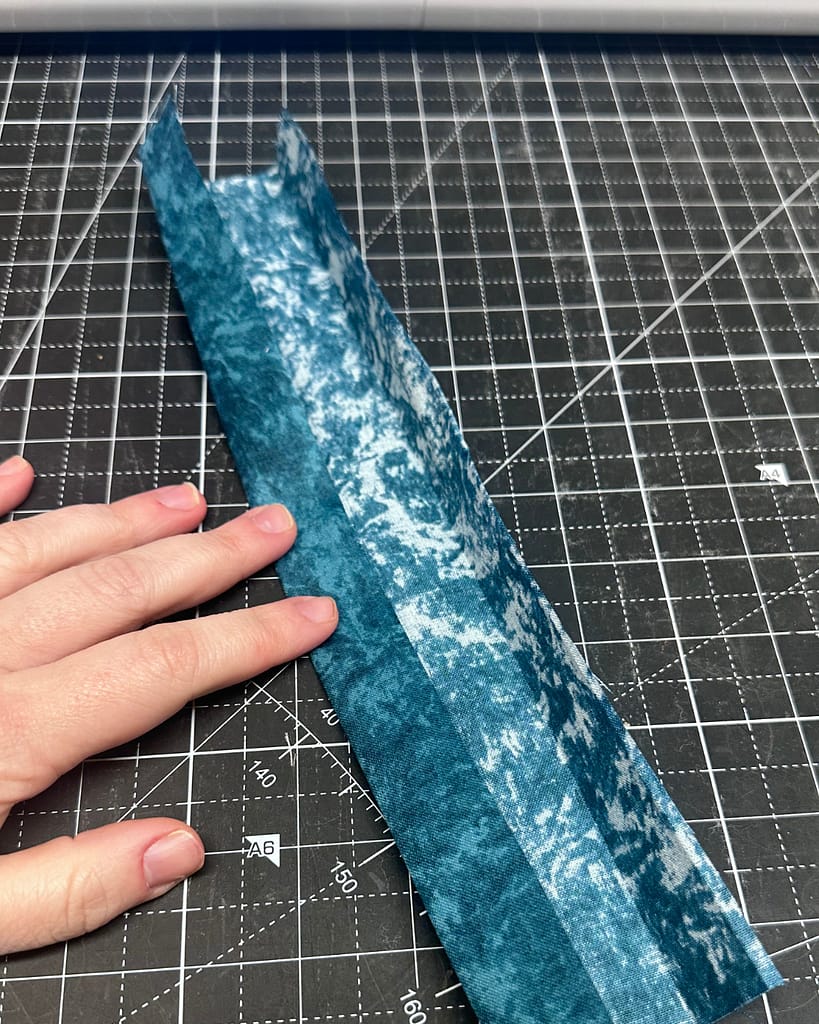
Fold each strap in half lengthwise with the pretty side out and press. Next, open the strip and fold both raw edges into the center crease, then fold again and press firmly.
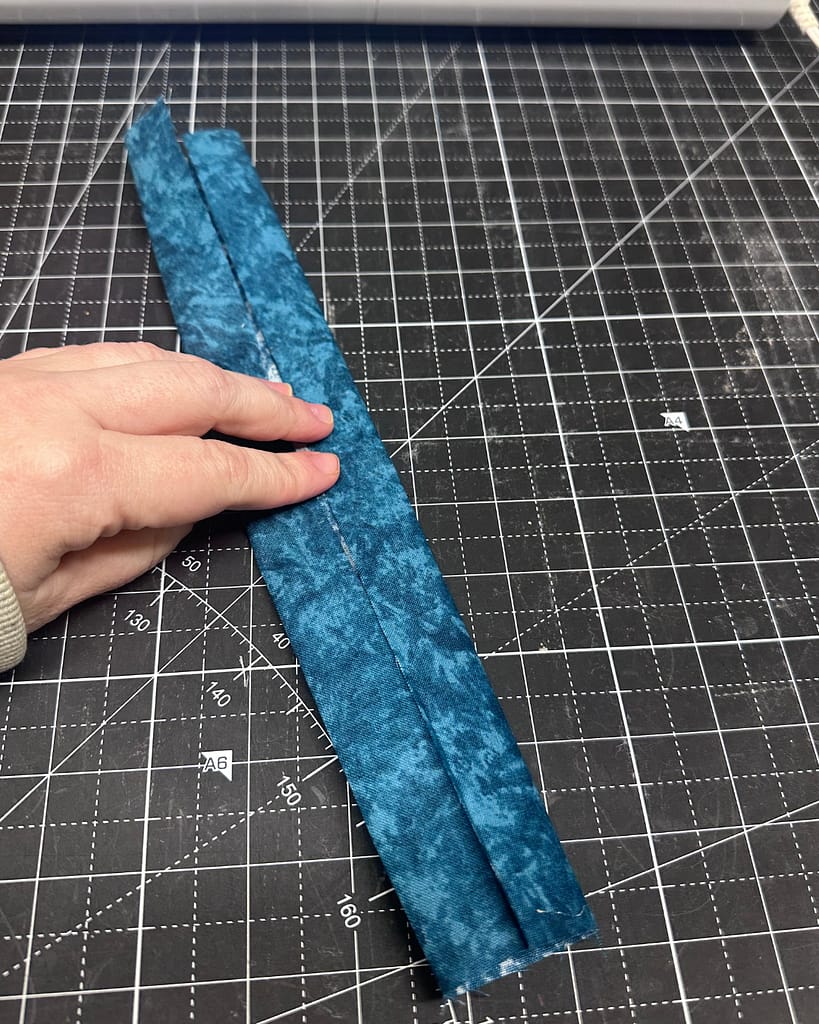
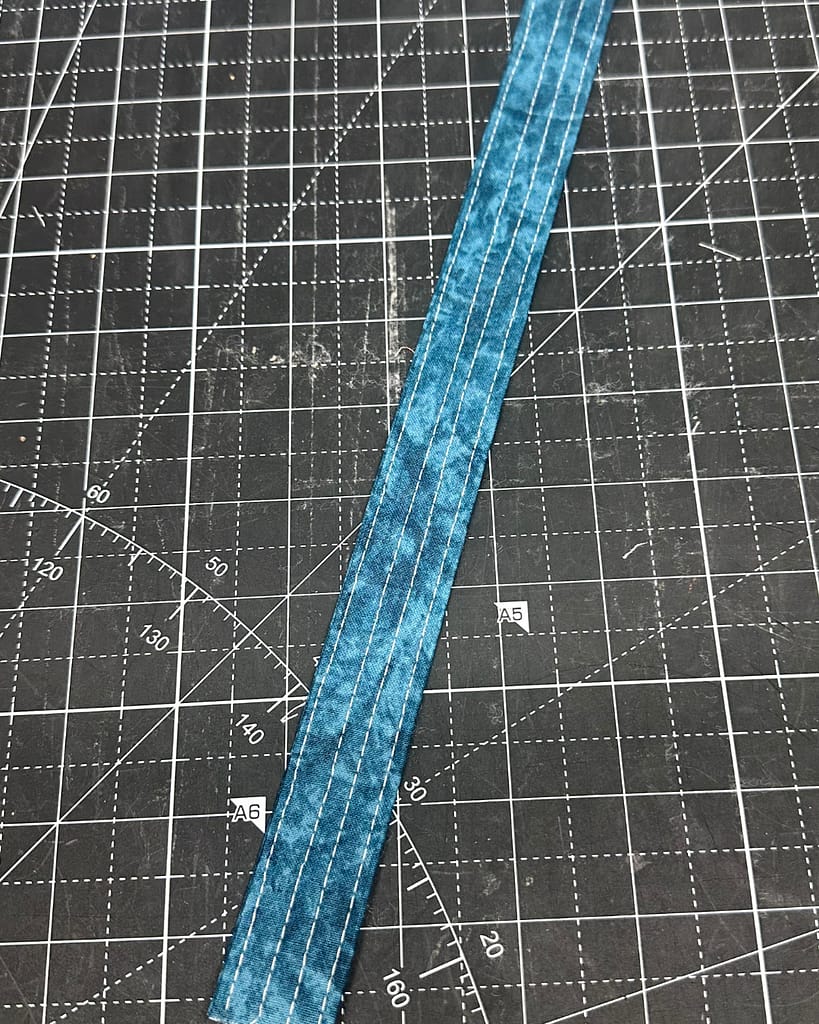
Finally, topstitch close to the folded edge. Use a 4.0 mm stitch length. Then add three more rows of stitching down the length of the strap. Each stitch line should be a scant 1/4″ apart. (That means ever-so-slightly less than 1/4″). To complete each strap, you’ll have to create four total stitch lines. Then, repeat the process for the second handle.
Step 4 – Attach the Handles
Lay the quilted panel flat with the pretty side facing up.
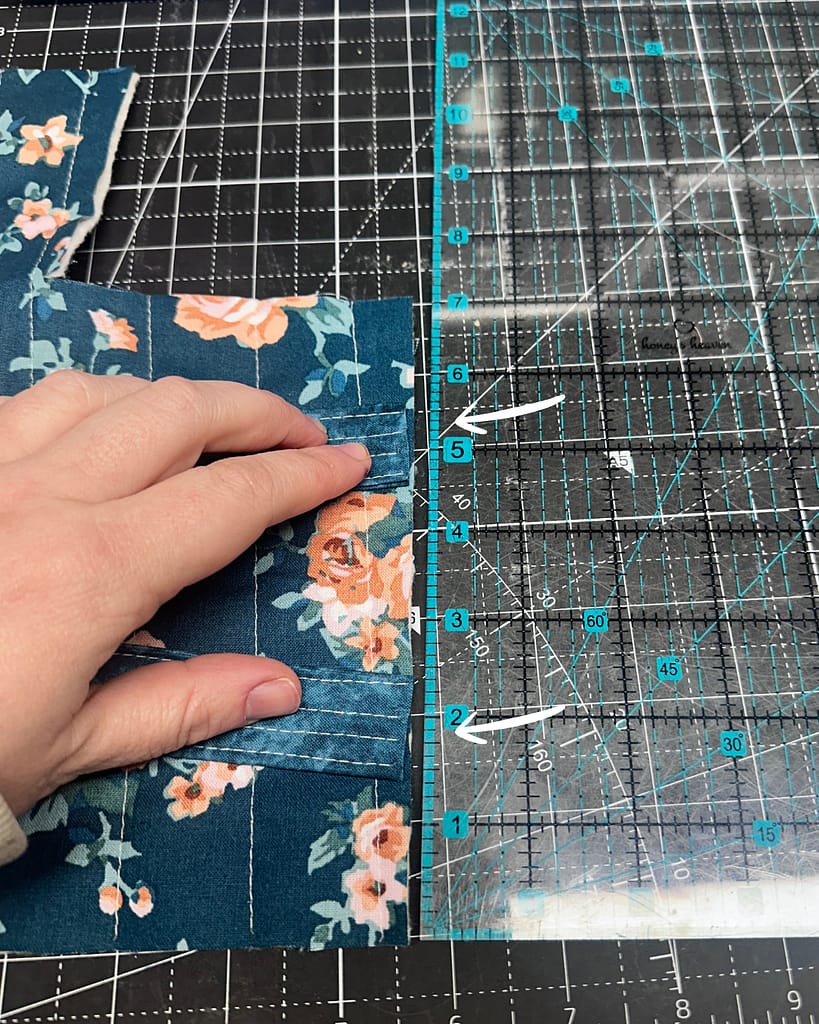
Mark placement points 2” and 5” from the corner on each short edge. Place the strap ends on the marks, curve the strap gently, and baste both ends close to the edge.
Step 5 – Box the Corners
Bring the raw vertical and horizontal edges of each cut corner together with pretty sides touching.
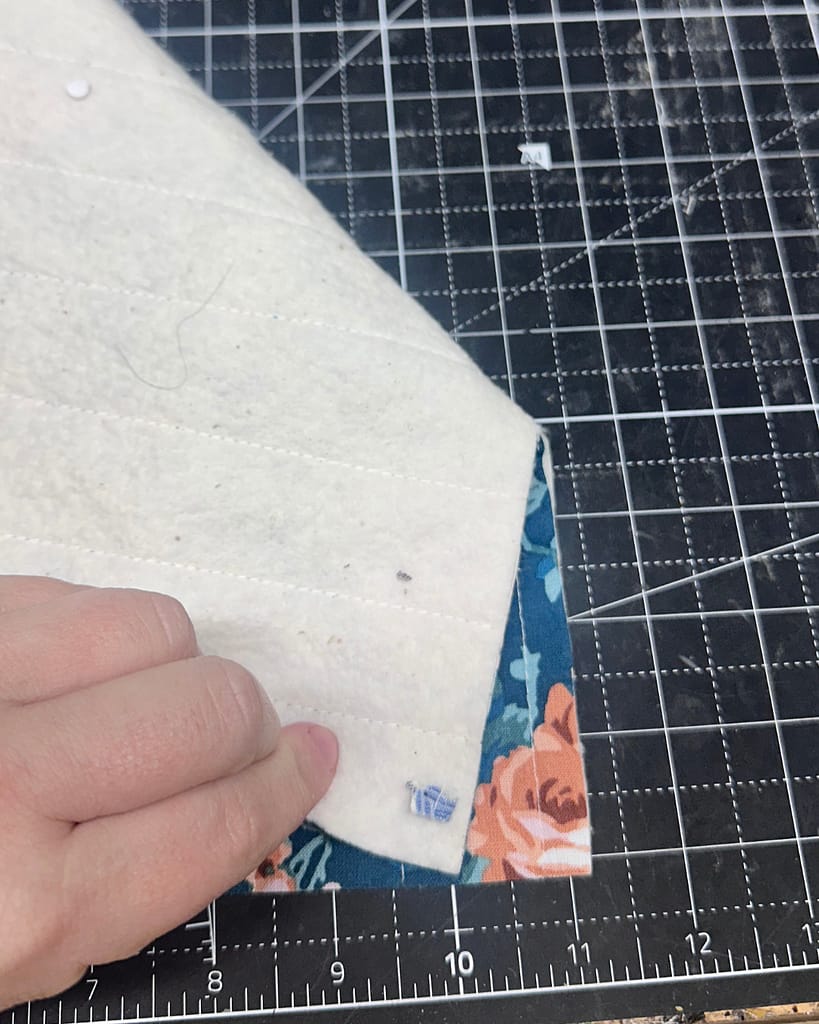
Sew across the 4” opening to create the boxed corner and backstitch securely. Afterward, repeat for all four corners on the outer panel and the lining panel.
Step 6 – Join the Lining and Basket
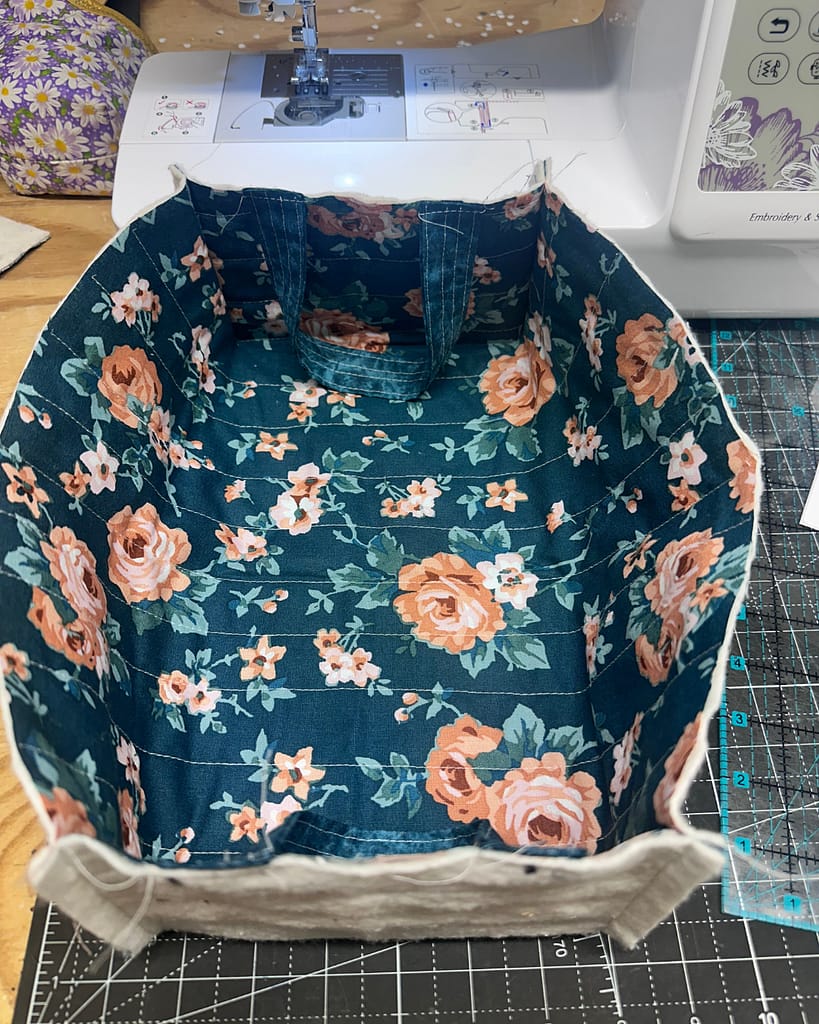
Turn the outer basket inside out so the batting faces outward. Leave the lining right side out, then place it inside the outer basket. The right sides of the outer fabric and lining should now be facing each other.
Match the corner seams and align the raw edges around the top. Tuck the handles between the two layers and clip everything securely in place.
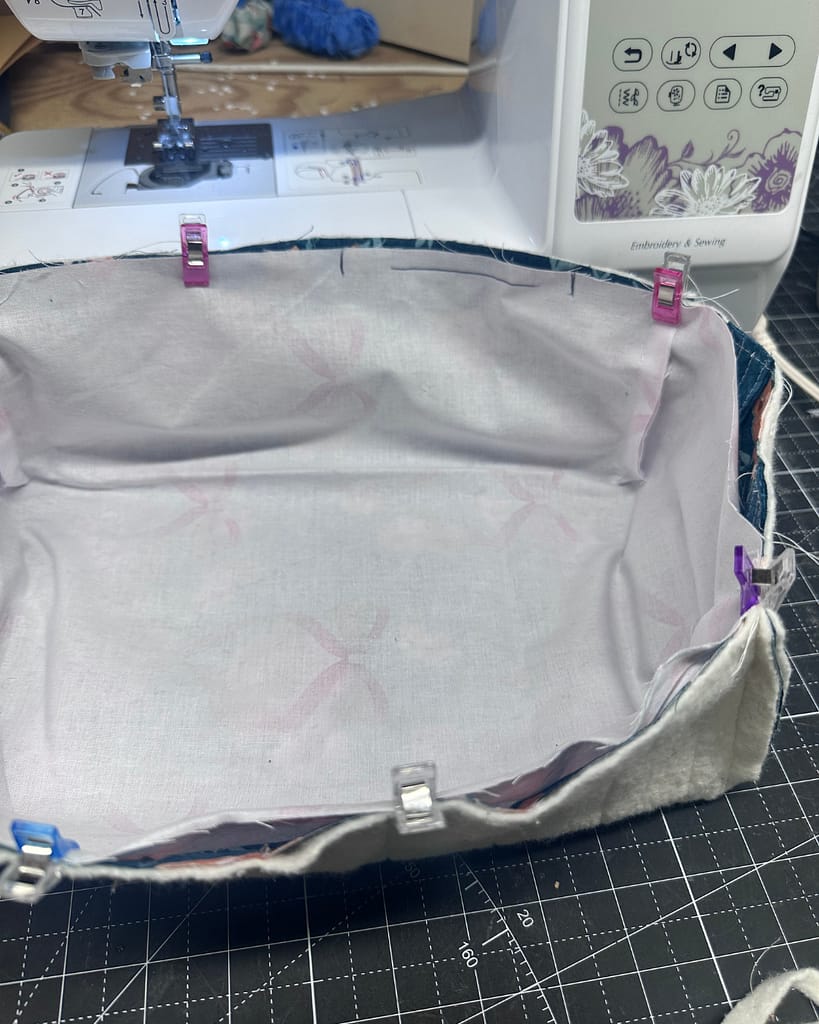
Beginning along one long edge, sew around the top using a ¼-inch seam allowance. Leave a 4-inch opening for turning, and backstitch securely at both ends of the opening.
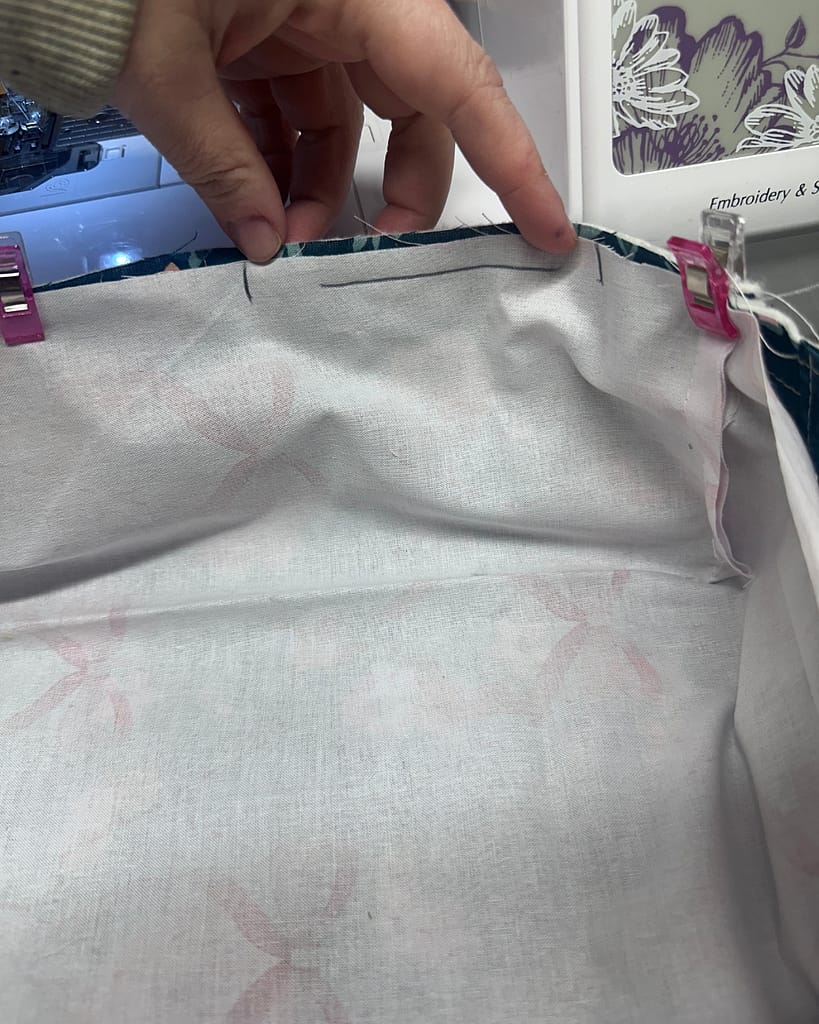
Step 7 – Turn and Finish the Basket
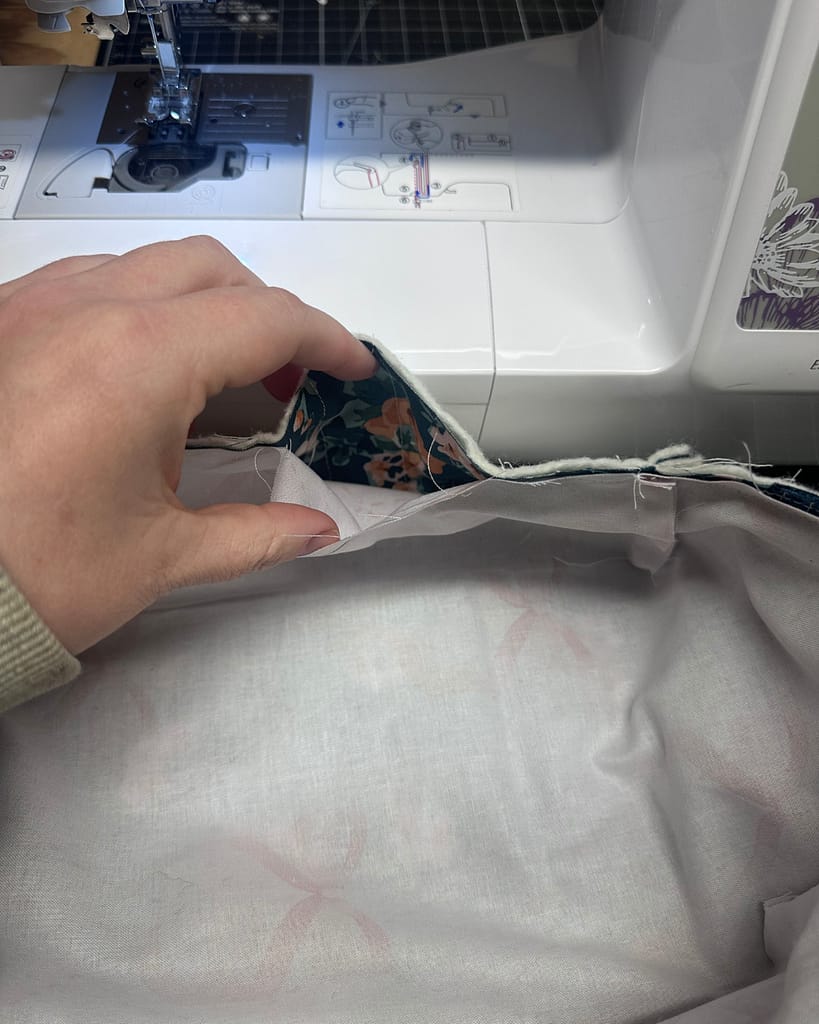
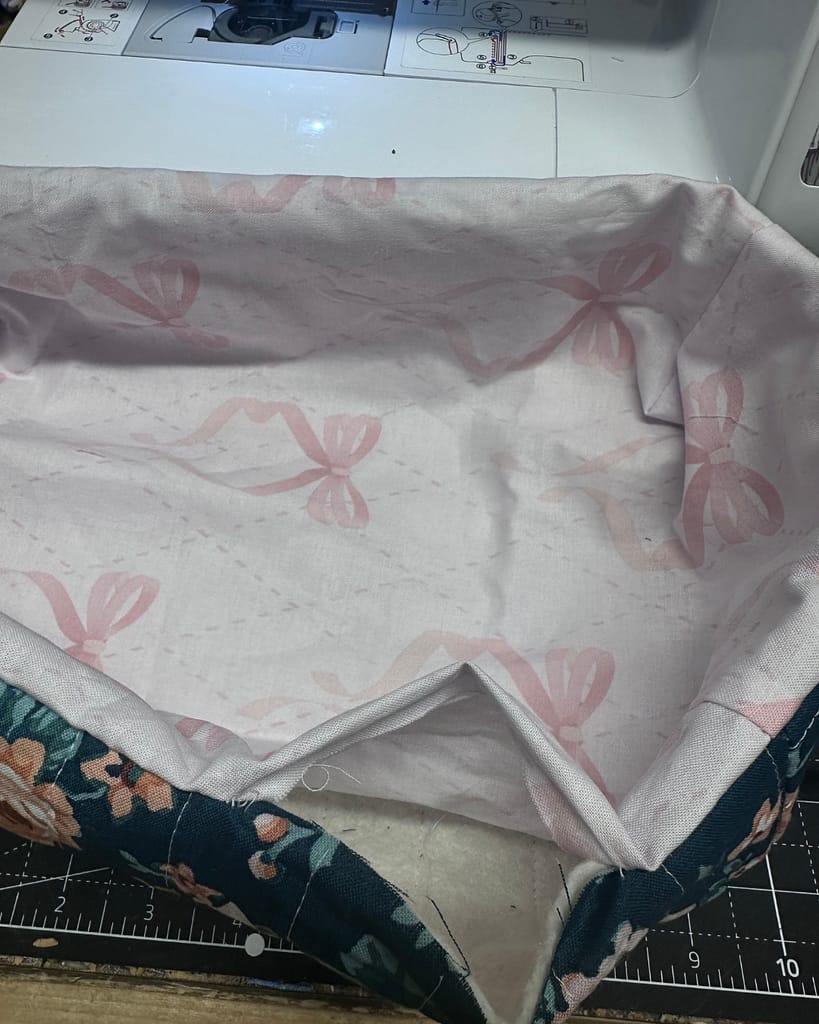
Gently pull the basket right side out through the 4-inch opening. Push out the boxed corners, pull the handles into place, and tuck the lining neatly inside the basket.
Press the top edge, making sure the raw edges of the opening are folded inward and aligned with the finished seam. Topstitch around the entire rim approximately ⅛ inch from the edge, using a 3.0–4.0 mm stitch length. This closes the turning opening and keeps the lining from rolling outward.
Give the basket one final press, then shape the corners and sides.
Use the Quilted Basket as a Handmade Gift Basket
This quilted fabric basket makes a useful part of the gift instead of disposable packaging. Choose fabric that matches the recipient, then fill the basket with a few related items.
Gift basket ideas include:
- A book, handmade bookmark, tea, and a small candle
- Homemade bread, jam, cloth napkins, and a wooden spoon
- Sewing notions, fabric, thread, and quilting clips
- Coffee, a mug, homemade treats, and a jar cozy
- Bath products, a washcloth, and other self-care items
- Baby supplies, burp cloths, and a small handmade toy
For Christmas, use holiday fabric and finish the basket with ribbon or a reusable fabric gift tag. You can also sew several baskets assembly-line style for teacher gifts, hostess gifts, or family gift exchanges.
Find more ideas in my Easy Handmade Christmas Gifts You Can Sew roundup.
Sewing Assembly-Line Style for Bulk Projects
This basket works beautifully for assembly-line sewing, especially if you plan to make several at once.
Cut all fabric first, quilt all panels together, then box corners and assemble in batches. This method saves time. All things considered, this project is ideal for sewists who sell finished baskets or use them as displays for product photography and craft fairs.
Using Fabric Baskets for Homeschool Organization
These baskets make excellent homeschool organization tools for shelves, carts, and workstations.
Use them to hold your homeschool resources like flashcards, manipulatives, notebooks, art supplies, or quiet-time activities. The handles make it easy for children to carry their materials from shelf to table.
Organizing a Hope Chest with Fabric Baskets
Fabric baskets work beautifully inside a hope chest to keep items grouped and easy to access.
Use one basket to hold a full set of sheets, another for kitchen towels, or one for cooking utensils and linens. In addition to organization, the baskets themselves are a great hope chest item. Plus, baskets keep collections together while adding beauty and order to long-term storage.
Sewing Room Organization Ideas
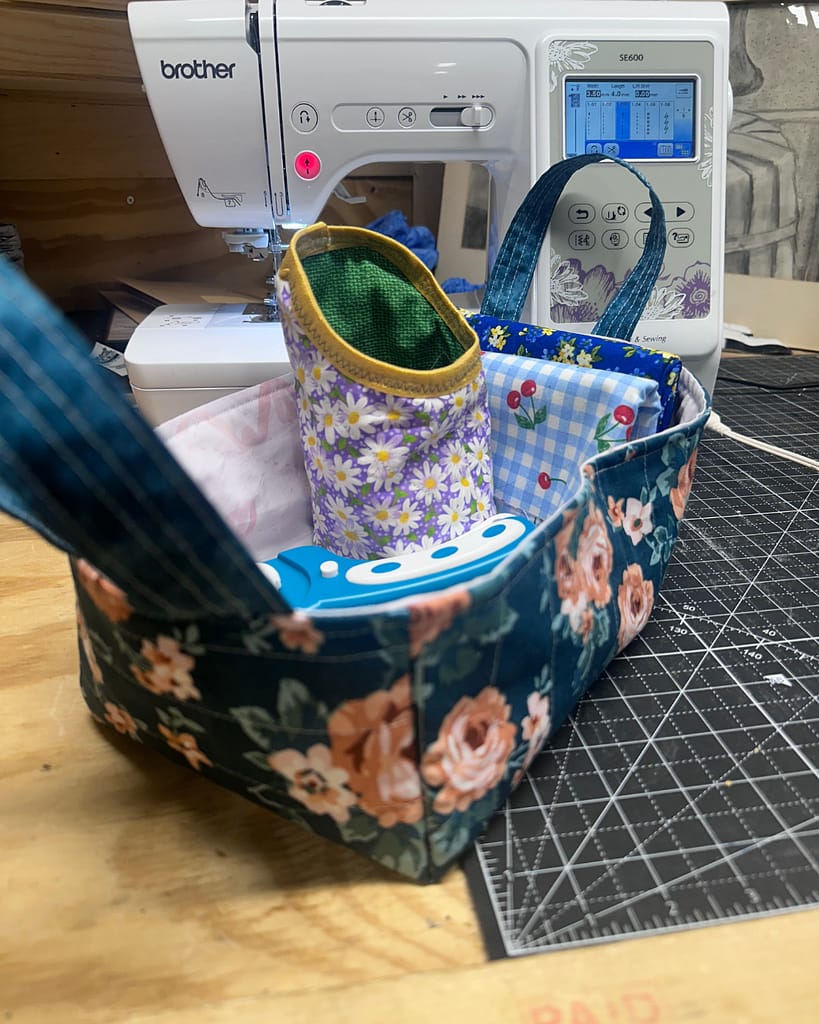
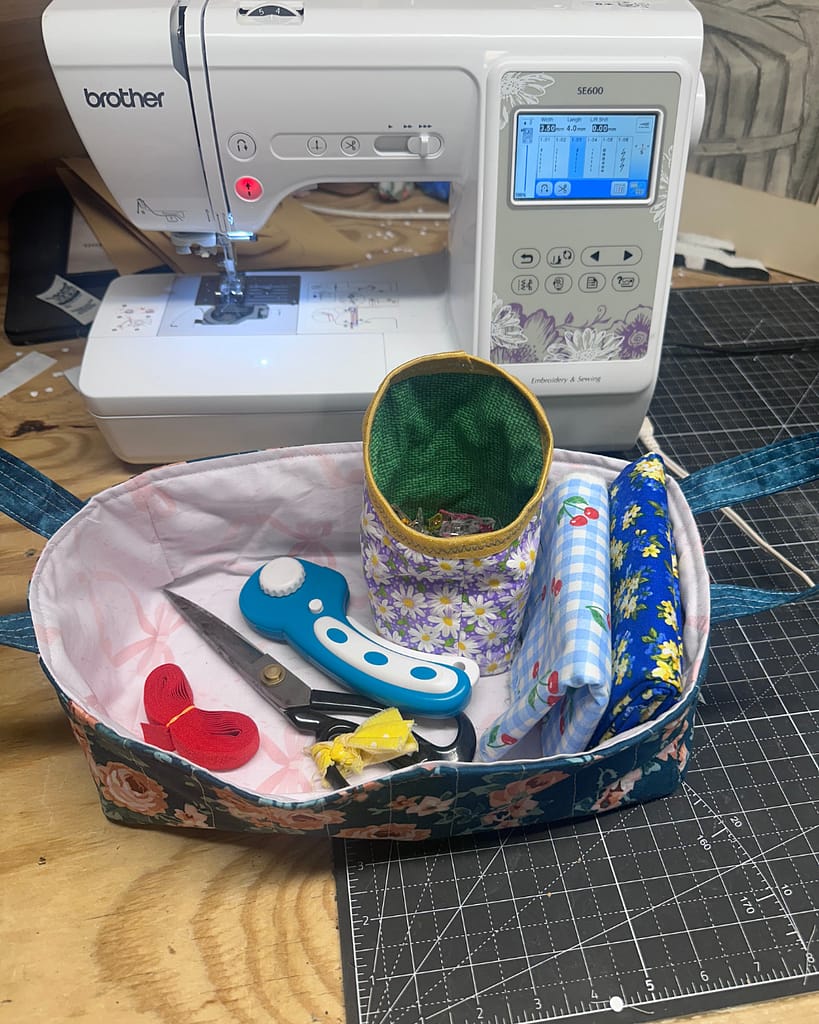
Also, this basket works perfectly for organizing sewing supplies and tools.
Use it to hold rotary cutters, scissors, rulers, pins, clips, folded fabric, works-in-progress, and notions. The soft sides protect tools while keeping everything visible and portable.
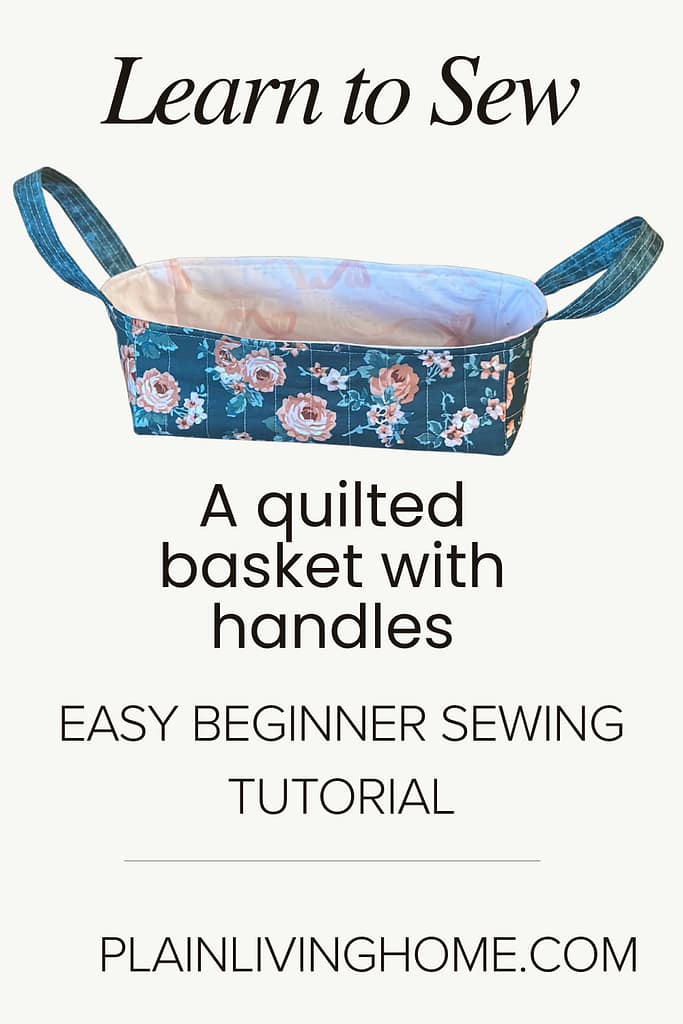
This quilted fabric basket with handles is a fast, satisfying project you can finish in under an hour.
Once you sew one, you’ll find endless uses for it in your home, homeschool room, sewing space, and gift giving. Change the fabric, adjust the size, and create baskets for every season and purpose.
Quilted Fabric Basket FAQs
Quick answers about fabrics, sizing, washing, bulk sewing, and the best ways to use this quilted basket with handles.
What is a quilted fabric basket used for?
Use a quilted fabric basket for storage, gifting, and everyday organizing. It works as a gift basket, Easter basket, homeschool supply bin, bread basket, or sewing organizer—just change the fabric to match the season or room.
How long does it take to sew this basket?
Plan on under an hour once you’ve made one before. If you batch-cut and quilt multiple panels at once, you can finish several baskets in one sewing session assembly line.
What fabric works best for a quilted basket?
Quilting cotton gives you a soft basket with lots of cute print options, and canvas gives you extra structure. If you want the basket to stand tall, pair quilting cotton with foam or a firmer batting.
Can a beginner sew a quilted fabric basket with handles?
Yes. You’ll sew straight seams, quilt simple lines, and box the corners. If you can sew a tote bag or a pillow cover, you can make this basket.
Can I resize this basket pattern?
Yes—resize the main panel to change the basket footprint. Then adjust the corner cutout size to control the depth, and keep the outer panel, lining, and batting the same size so they match during assembly.
Is this basket washable?
Yes. Wash on cold or gentle and dry on low or air dry.
How do I make the basket more sturdy?
Choose canvas for the outer fabric, use foam for shaping, and quilt a little more densely. You can also add extra topstitching around the rim and handles for strength.
Is this a good project to sell or use at craft fairs?
Yes—these baskets sell well because buyers understand the value right away. They also make excellent display containers for product photos and craft fair booths, and you can offer multiple sizes and seasonal prints to increase sales.
What can I store in this basket for homeschool organization?
Use it for flashcards, manipulatives, pencils, art supplies, read-aloud books, and quiet-time activities. The handles let kids carry materials from shelf to table without dumping everything.
How can I use baskets to organize a hope chest?
Use baskets to group items by category so the chest stays neat and easy to manage. One basket can hold a full set of sheets, another can hold kitchen towels, and another can hold cooking utensils or linens you want to keep together.
What sewing supplies fit well in this basket?
It holds rotary cutters, scissors, rulers, cutting tools, pins, clips, folded fabric, and all the little notions that roam your workspace. Use one basket per category so you can grab exactly what you need and put it away fast.
How do I sew these baskets assembly-line style?
Cut all outer panels, lining panels, and handle strips first. Quilt every outer panel, box all corners, then sew linings and outers in batches before you topstitch the rims. This workflow keeps your machine settings consistent and saves a ton of time.
➡️ Next Projects to Try
- New to sewing? Try the Basic Square Hot Pad Tutorial first.
- A handmade book sleeve, favorite book, bookmark, tea, and a small candle
- Or make a full Housewarming Gift Set with hot pads, an apron, cloth napkins, and more.
- Create a bakers gift basket with a sourdough starter jar cover, a bowl cover, a sourdough starter cozy, a bread bag, and a hot pad.
- Head over to Quilt Therapy for more easy, free basket tutorials.
- This tutorial was featured over on Quilt Therapy in an a round up of free Easter Basket sewing tutorials! Check those out for more free, easy sewing patterns.

One Comment