How to Sew a Reading Quilt That Folds Into a Tote
Some links in this post may be affiliate links. That means I might make a small commission on qualifying purchases if you click the link. There is no extra cost to you.
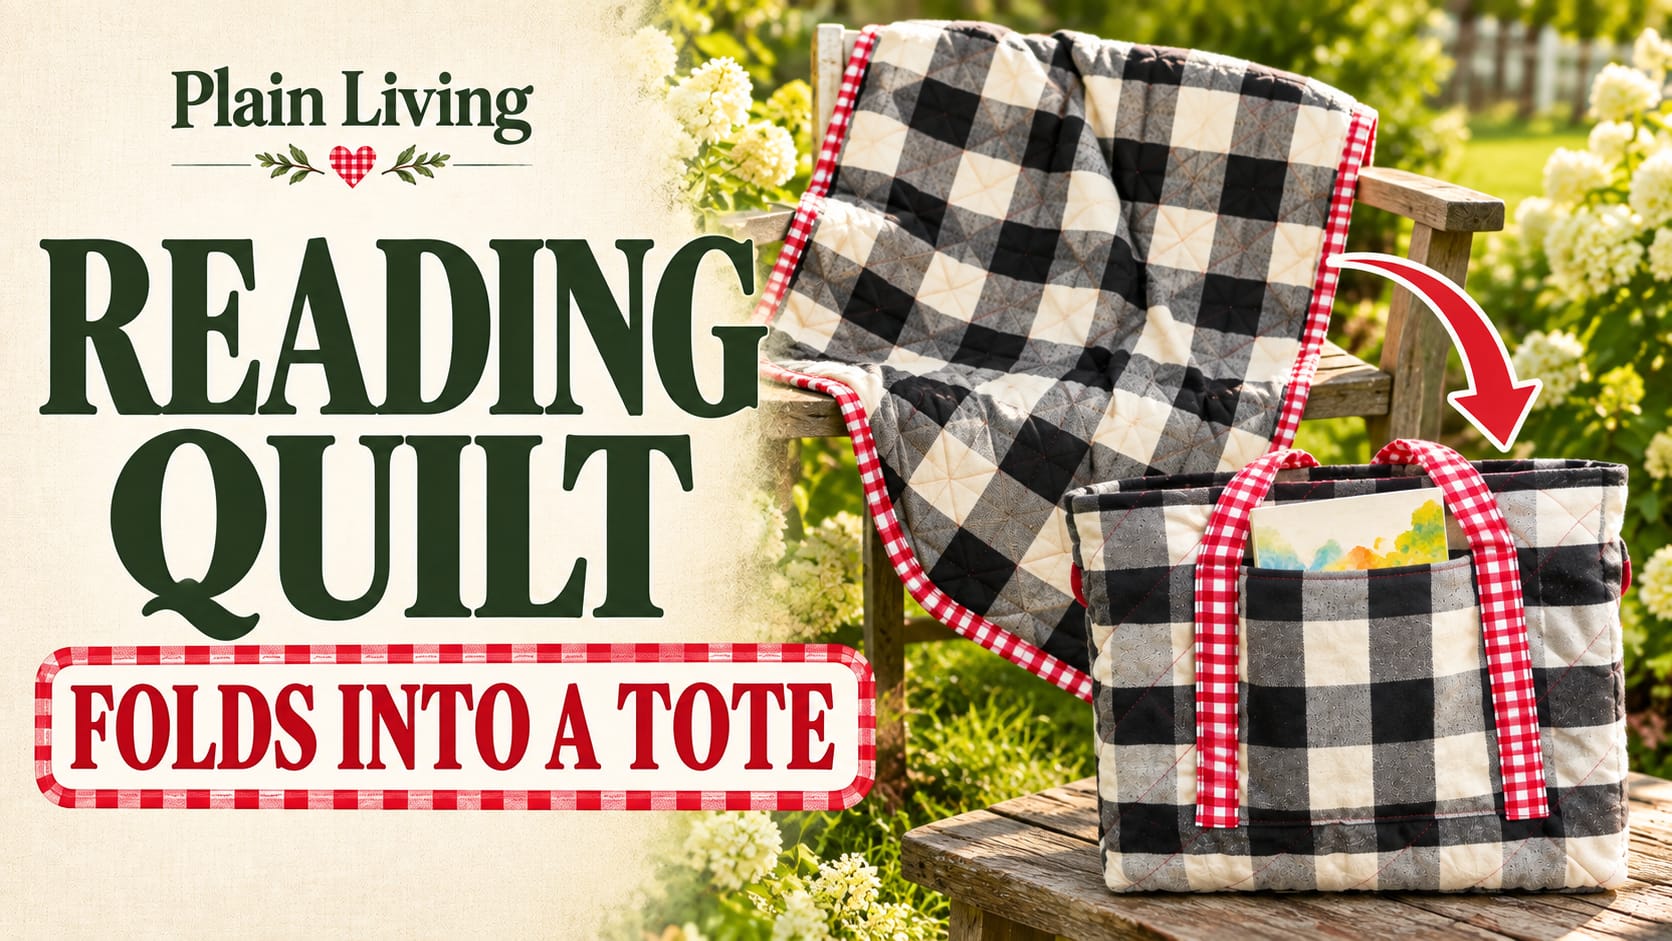
A reading quilt that folds into a tote gives you a soft place to sit and a handy way to carry your book. Spread it out for reading time. When you are done, fold it up and bring the handles together. A small pocket holds a favorite book or notebook.
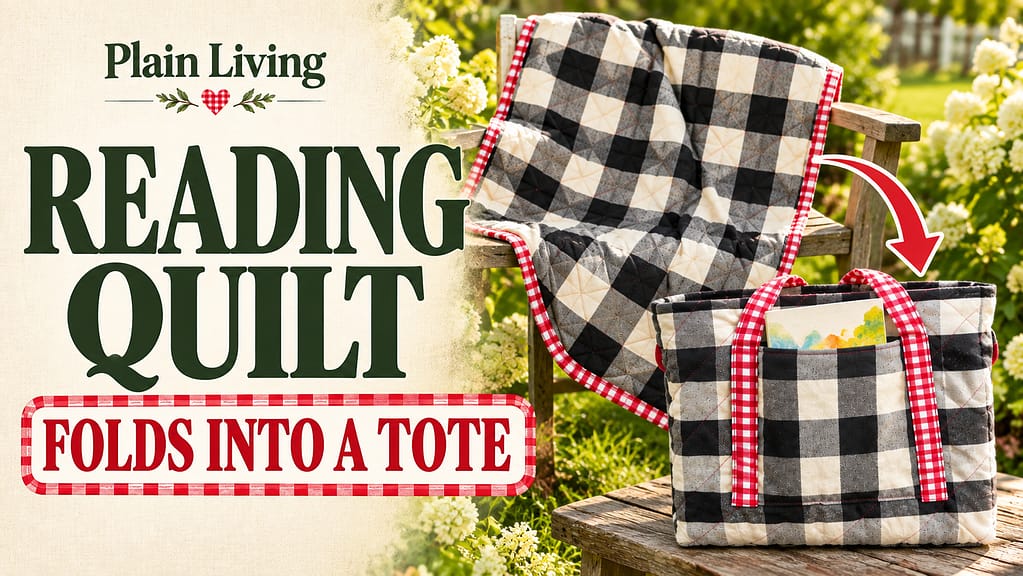
I made this one at my kitchen table with black-and-white duck cloth, red gingham, cotton batting, and red binding. You do not need a sewing room to make something useful! In my video, I show the whole project, including a few things I would do differently next time.
This written guide slows those steps down for new sewists. We will make a small quilt, finish its edges, add a pocket, and attach two handles. Take one step at a time. Practice on scraps before sewing your project.
Watch the Video Tutorial
At a Glance
This reading quilt is a mini quilt with two handles and a book pocket. Spread it out for a cozy place to read, then fold it into a tote for easy carrying.
- Size: About 36 × 36 inches when open.
- Skill level: Beginner friendly, with step-by-step help.
- Stitches: Straight stitches only.
- Skills you’ll learn: Layering a quilt, quilting straight lines, binding the edges, and sewing a pocket and handles.
- A fun gift for: Book lovers, children, and teachers.
Before You Begin
New to sewing? You can work through this project one step at a time. It uses straight stitches, but sewing through quilt layers and adding binding may take some practice.
Before cutting your fabric:
- Practice on scraps. Learn to thread your machine and sew a straight line. Then try stitching through fabric and batting together.
- Read the steps first. Watch the video to see how the quilt comes together. Use the linked guides for extra help with new skills.
- Check your book size. Make sure your pocket will have room for the book’s width and thickness.
- Test the fold. Check the pocket and handle placement before sewing them in place.
Take your time and pause when you need to. A few crooked stitches are part of learning—and your quilt can still be useful and loved.
Watch the How to Sew a Reading Quilt Video
Watch my reading quilt sewing tutorial.
The video is a construction demo rather than a full beginner lesson. This post adds basic terms, checkpoints, and links for skills that need a closer look.
Helpful sections:
- supplies at 1:11
- quilt layers at 1:45
- quilting at 2:41
- binding at 4:59
- pocket at 10:09
- handles at 11:38
- placement at 12:49
- and folding at 16:34.
What is a Reading Quilt Tote?
The quilt starts at about 36 inches square. It may finish a little smaller after quilting and trimming. The tote is made by folding the quilt; it does not have sewn bag sides or a zip closure. The pocket holds the book, while the folded quilt forms the tote shape.
My video uses flexible sizing. The pocket is roughly 8-9 inches square before sewing. Below, I use two 9-inch squares as a clear starting point, not an exact measurement taken from the finished sample. Check your book before cutting.
This is a learning project with several skills. If you have never used a machine, start with my beginner sewing guide. Learn to thread your machine and sew a straight line first. Give yourself time for practice and breaks.
Supplies and cutting guide to make the Tote
Use woven fabric that does not stretch. Light or medium-weight duck cloth makes a sturdy back. Very heavy canvas can be hard for a home machine to sew through.
| Piece | What to prepare |
|---|---|
| Quilt front | One square of quilting cotton, about 36 x 36 inches |
| Quilt back | Duck cloth or canvas large enough to extend beyond the front on all sides while quilting |
| Padding | Low-loft cotton batting, also larger than the front |
| Two 9 x 9-inch squares of fabric | |
| Handles | Two 4 x 22-inch strips of woven fabric |
| Edge finish | About 4.5-5 yards of wide bias tape for a quilt near 36 inches square; measure after trimming |
One yard is 36 inches long, but it may shrink in the wash. Buy extra if you want a true 36-inch square after washing. You also need extra fabric for the pocket and handles. A backing and batting around 38 inches square give useful working room. That larger size is a beginner-friendly allowance, not the exact cut size from my video.
You will also need thread, a sewing machine, scissors, a ruler, pins or quilting safety pins, fabric clips, an iron, and an ironing surface. A seam ripper helps remove stitches if you need to try again. A walking foot can help feed the quilt layers evenly.
Optional tools from my video description include basting spray, quilting pins, bias tape tools, a quilting ruler, and marking pens. I do not use all of these in the video. They are options, not required purchases. Test any marking tool on a scrap first.
Choose wide tape that can wrap around all three quilt layers. Packaged bias tape and folded quilt binding use different width labels. Read the package and test the fit on a layered scrap before buying enough for the quilt.
A few sewing words to know for this project
The right side is the side you want people to see. The wrong side is the back of that fabric. A raw edge is a cut edge that has not been finished.
A seam allowance is the space between the cut edge and your line of stitching. Backstitching means sewing a few stitches backward, then forward, to secure a seam. Topstitching is a visible line sewn from the outside of a finished piece.
Basting holds layers in place before the final sewing. Binding covers the raw edges of a quilt. You can find more terms in my sewing terms glossary.
Step 1: Wash, press, and cut
Wash and dry the outer fabrics as their care labels allow. This helps deal with shrinkage before you sew. Follow the batting maker’s directions; do not assume loose batting should go through the wash.
Press the fabric flat. Lift the iron and set it down rather than pulling the cloth out of shape. Smooth fabric is easier to measure and sew.
Cut your quilt front, backing, batting, pocket squares, and handles. Measure twice before cutting. For this guide, use a 1/4-inch seam allowance for the pocket. Your 9-inch pocket squares will finish about 8 1/2 inches square before they are attached.
Lay the intended book on the pocket fabric. Allow room for its width and thickness, plus the seams. Make a larger pocket if needed, then check that it fits inside the folded tote area.
Step 2: Make the quilt sandwich
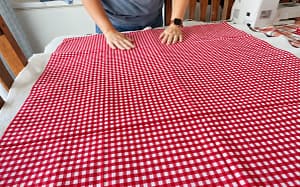
A quilt sandwich has three layers. Lay the backing on a clear table with its right side down. Place the batting over it. Add the quilting cotton with its right side up.
Smooth each layer from the middle toward the edges. The batting and backing should extend beyond the front fabric. Keep the layers flat without stretching them.
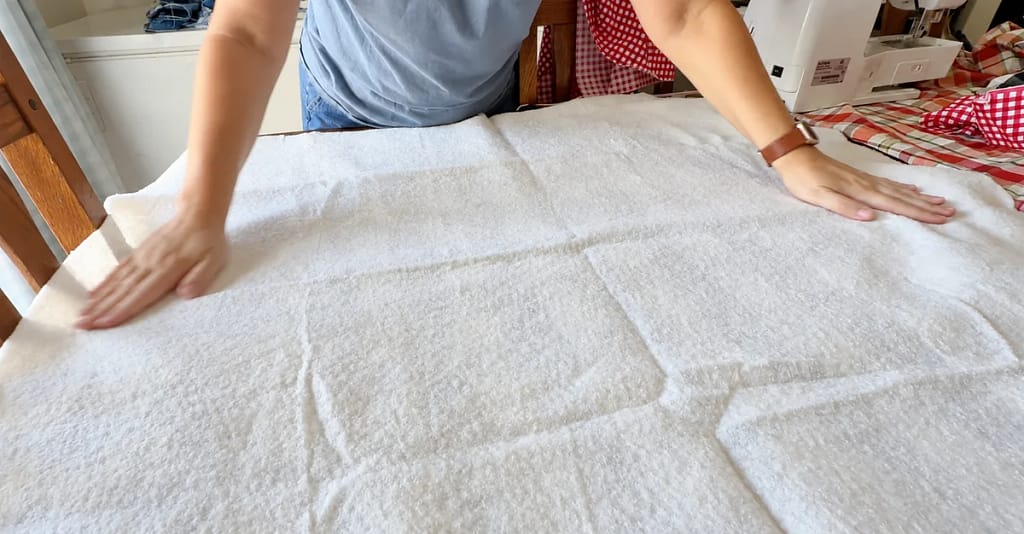
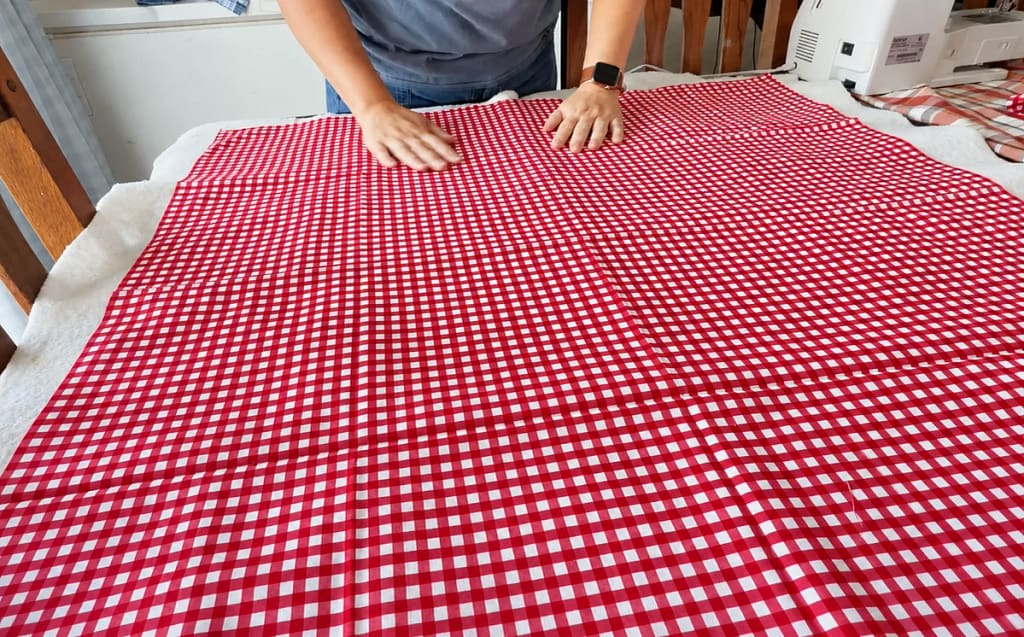
Baste the layers with quilting safety pins or a fabric basting spray made for this use. Follow the spray label if you use one. Edge clips alone do not hold the middle of a quilt steady.
I skip basting in the video, but I recommend it here. It gives a new sewist more control and helps keep the back from bunching. For more photos, see how to make a quilt sandwich.
Step 3: Quilt the layers together
Quilting means sewing through the front, batting, and backing to hold them together. You can use straight lines; there is no need for a fancy design.
I sew diagonal lines about 2-“3 inches apart. Check the batting label for its maximum quilting distance. Your lines must meet that limit. Mark your chosen lines with a ruler and a tested fabric marker.
Make a small practice sandwich with the same fabrics. Test the needle, thread, and stitch length. In the video, I use about 3.5-4 mm for quilting. Adjust if your test stitches look loose or uneven.
Support the quilt on the table. Roll the extra fabric so it fits in the space beside the needle. Lower the presser foot, then sew slowly along a marked line. Let the machine move the fabric. Do not push or pull it.
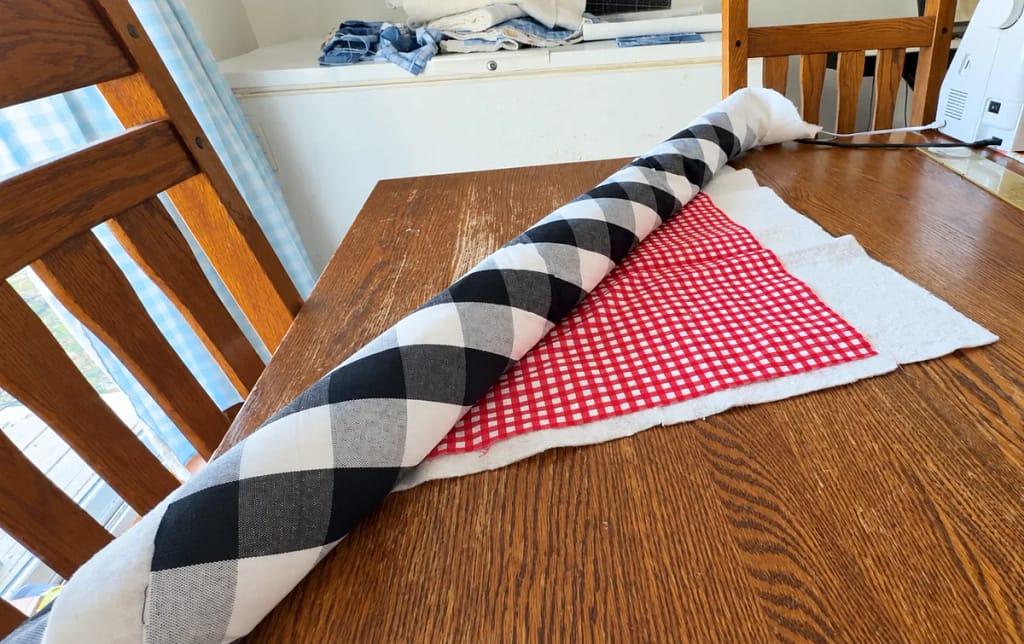
Work from near the middle outward. Check the back after the first line. If you see a fold sewn into the backing, stop and remove those stitches before doing more. Remove pins before they reach the needle.
Step 4: Trim the quilt square
Lay the quilt flat. Use a ruler to trim away extra backing and batting. Aim for four straight sides and square corners. Cut only as much as you need to tidy the edges.
Measure the trimmed quilt. A little shrinkage from quilting is normal. Use its actual size for the next steps. Check that all three layers reach each edge and that no loose folds remain.
Step 5: Prepare the binding
Measure around all four quilt edges. Add about 12 inches for joining and handling the ends. A 36-inch square has a 144-inch edge all the way around; adding 12 inches gives 156 inches, or about 4 yards.
Ready-made wide bias tape saves a step. You can also make your own. Sew4Home’s bias binding guide shows cutting, joining, pressing, and attaching it. Choose the section that matches your tape type.
If you need to join packaged pieces, open the folds first. Sew a diagonal join, check that the strip lies flat, and trim the seam allowance. Press the seam open and restore the folds. Practice with two scraps before joining your full length.
Step 6: Sew the binding around the quilt
For the pre-folded tape method in my video, open the tape and place one raw edge against the quilt’s raw edge. Start on the duck-cloth side so the final visible stitching can be on the cotton side. Leave a loose starting tail.
Clip the tape in place and sew along its first crease. Test this on your layered scrap first. The finished tape must cover the edge and the first stitch line when wrapped over.
At each corner, make a miter: a small diagonal fold that lets the tape turn neatly. The stopping point depends on your seam width, so do not copy a fixed one-inch stopping distance for every tape. Use the corner directions for your chosen binding method.
Leave about 10-12 inches of the quilt edge unsewn near the starting point. Join the loose ends, then sew down that gap. Watch my demo video at timestamp 7:11 and check the linked guide before cutting the tails.
Wrap the tape over the raw edge to the cotton side. Tuck the raw edge inside its fold. Clip it so the folded edge covers the first stitch line. Form a neat diagonal fold at each corner.
Sew close to the folded edge. I use a blanket stitch in the video. A straight stitch works too if it catches the folded edge all the way around. Check both sides for missed spots and sew them again.
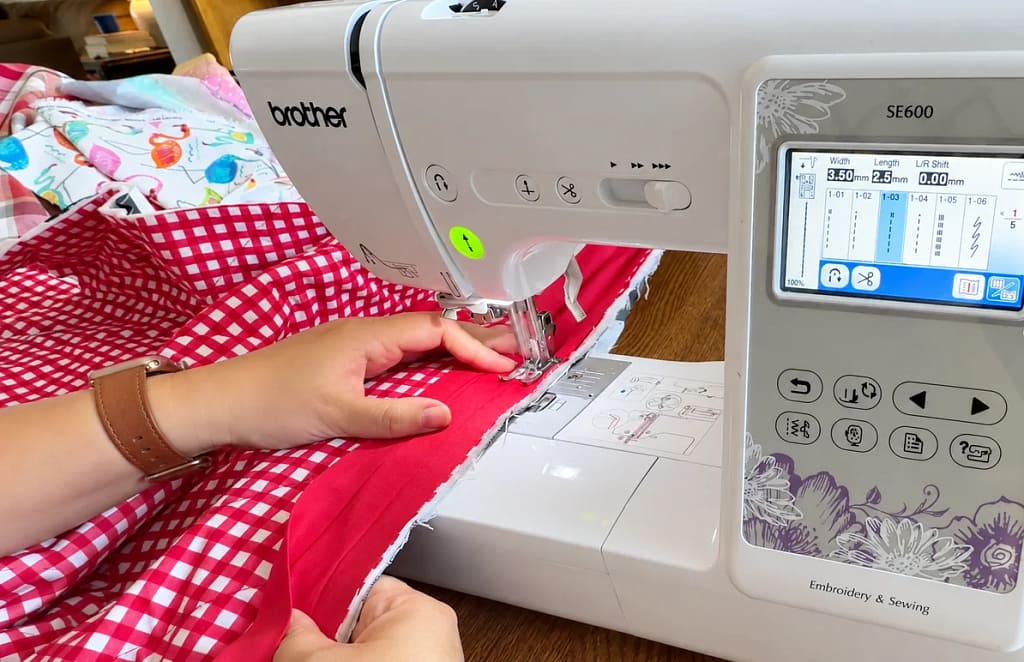
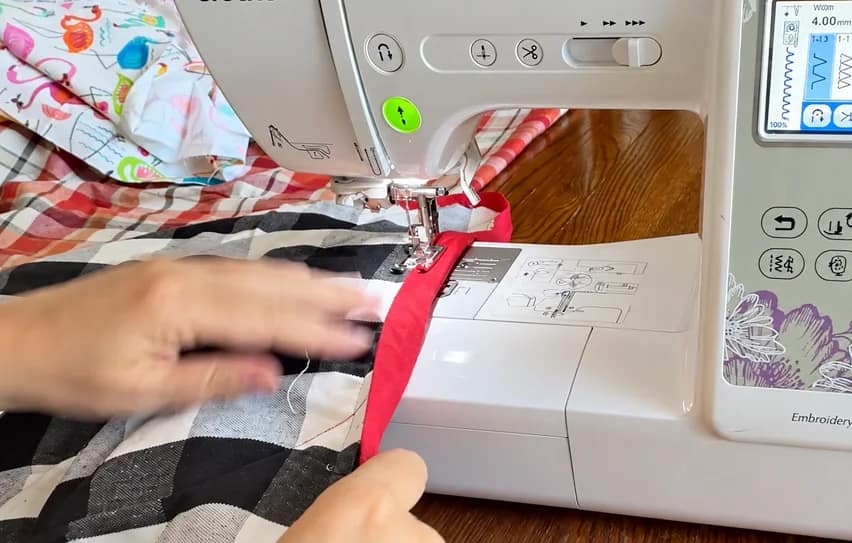
For a different option, WeAllSew’s quilt binding lesson explains folded quilt binding. Follow that method’s own cut width and seam allowance rather than mixing its steps with packaged tape directions.
Step 7: Sew the pocket
Place the two pocket squares right sides together. Pin the edges. Mark a 3- 4-inch opening along the edge that will become the pocket bottom.
Use a straight stitch around the square, 1/4″ inch from the cut edges. Start and stop at the opening, backstitching at both ends. In the video, I use about a 2.5 mm stitch for this seam.
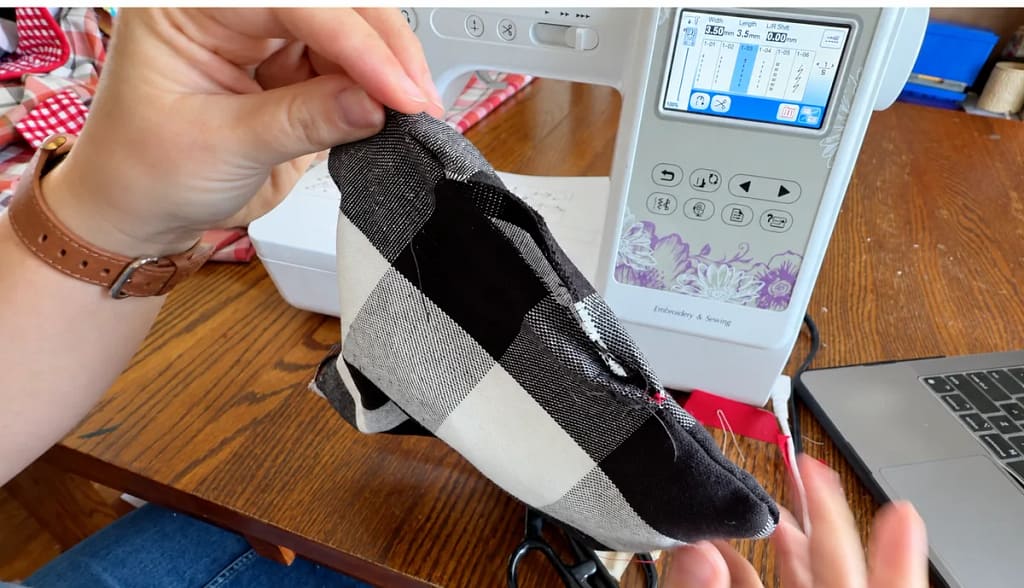
Trim a small triangle from each corner without cutting the stitches. Turn the pocket right side out through the opening. Gently push the corners out with a blunt tool.
Fold the opening’s seam allowance inward and press the pocket flat. Topstitch close enough to the edge to catch the folded opening shut. Check it before moving on. This sewing closes the turning gap; the pocket’s top will stay open when we attach it to the quilt.
Step 8: Make two handles
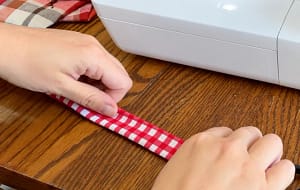
Fold one 4 x 22-inch strip in half lengthwise and press a center crease. Open it. Fold each long raw edge to the center crease, then press again. Fold it in half along that first crease. It should now be about 1 inch wide, with the long cut edges hidden inside.
Clip the folds together. Topstitch close to both long edges, sewing slowly. Make the second handle the same way. The short ends will be tucked under when attached.
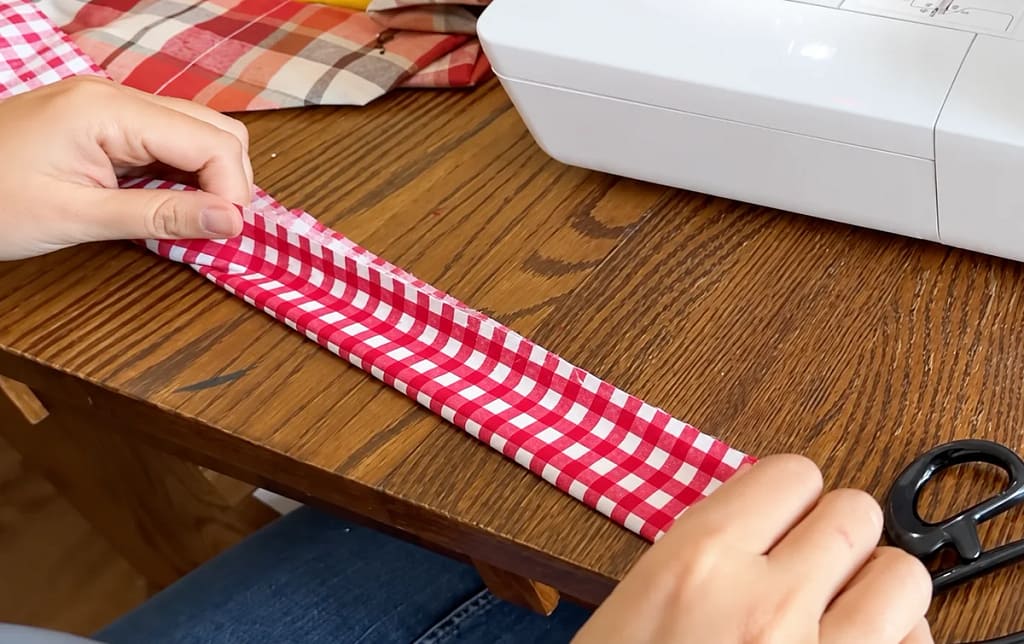
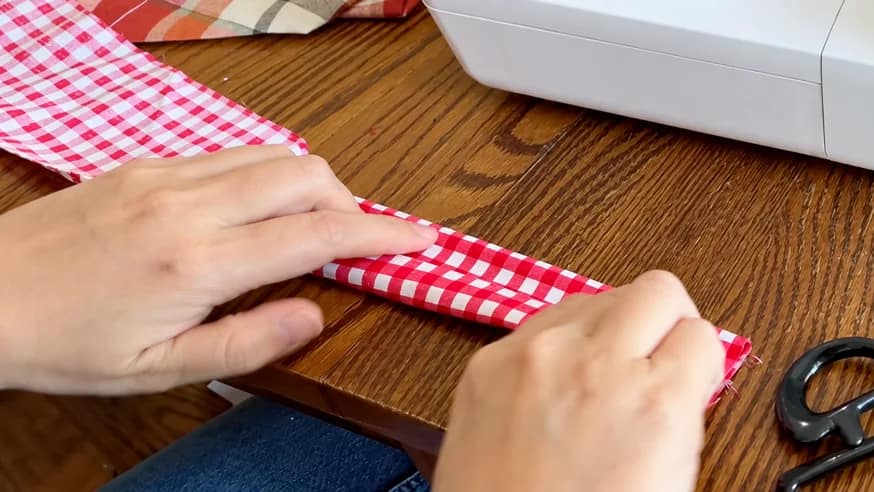
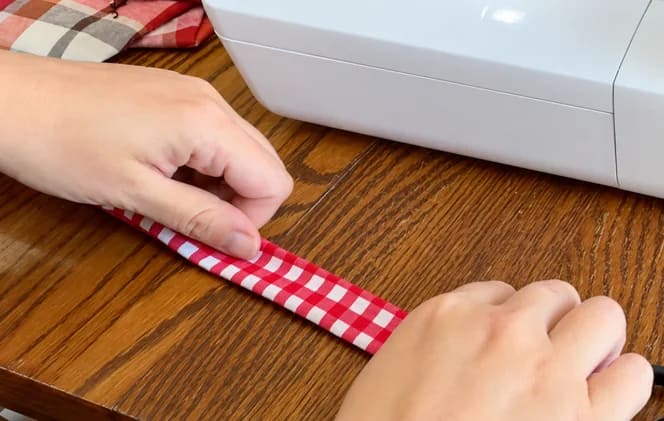
Pressing helps here. My video shows finger-folding, but an iron makes those narrow layers much easier to keep lined up.
Step 9: Plan the pocket and handle placement
Lay the quilt duck-cloth side up. Fold it in half both ways to find the center. Mark the two center lines with removable marks or pins.
Center the pocket from left to right on one side of the horizontal middle line. Its opening points toward that side’s outer quilt edge. Its bottom sits near the middle line. In the video, mine is about 3 inches away; I note that moving it a little closer would help the fold.
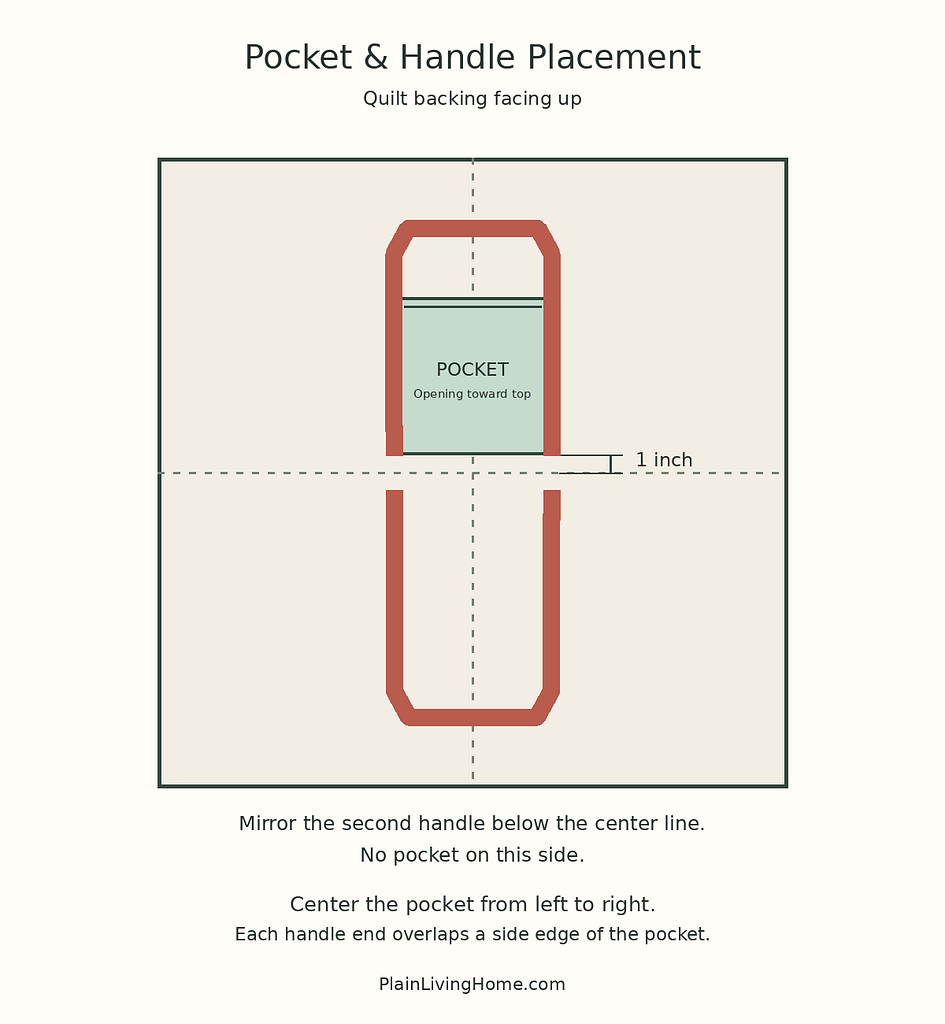
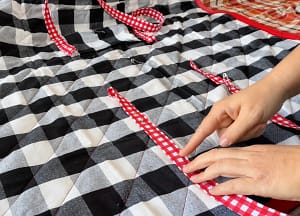
Place one handle over the pocket’s side edges. Each pocket side runs beneath the center of a handle end. The free loop points toward the outer quilt edge. Tuck each short raw end under and pin it.
Mirror the second handle across the horizontal center line. Match its left and right positions to the first handle. Its loop points toward the opposite outer edge. Trace each handle with your fingers to check for twists.
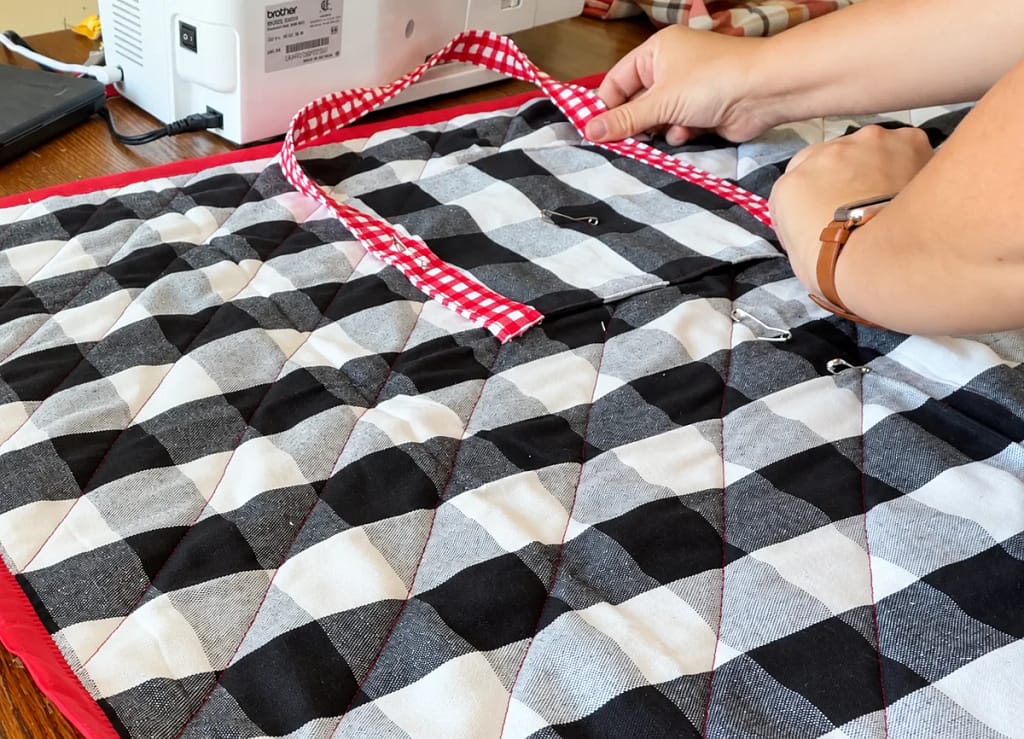
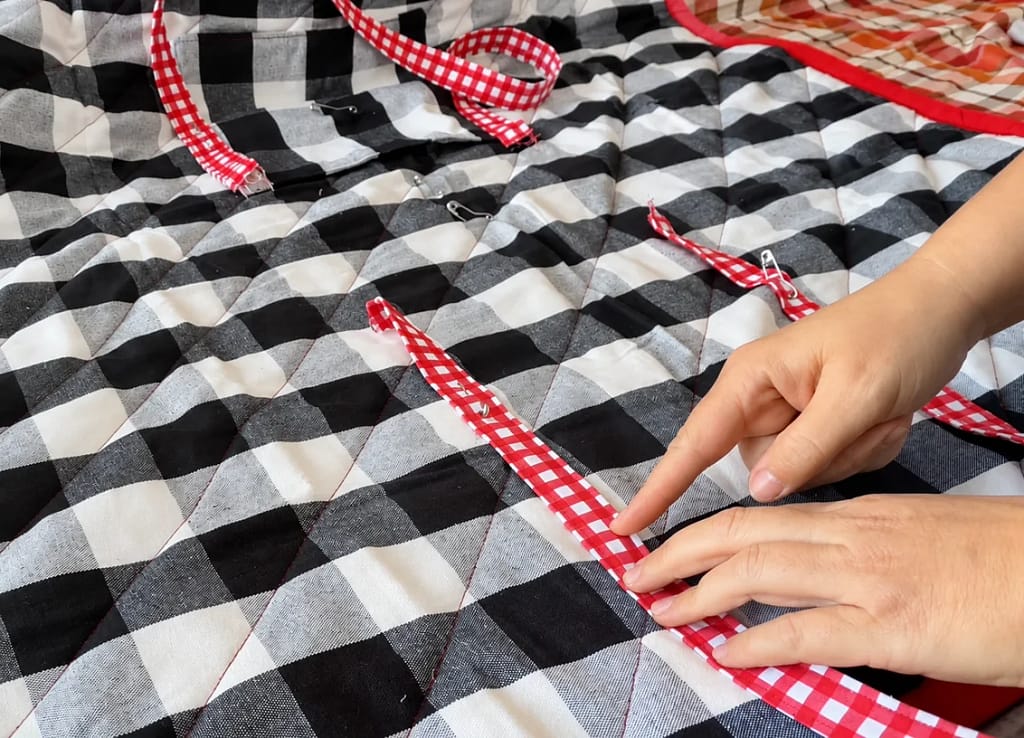
Now test the fold using the steps below. Keep sharp pins away from your hands. Check that the handles meet, the pocket stays outside, and the book fits. Adjust and mark the layout before sewing. This test matters more than copying my rough placement exactly.
Step 10: Attach the pocket and handles
Unfold the quilt and lay it flat again. Sew through the quilt layers when attaching the pieces. Keep the free handle loops out of the needle’s path.
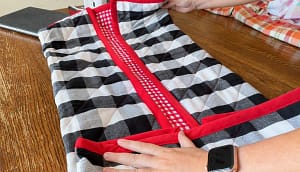
On the pocket side, stitch along both long edges of each handle’s attached section, across its tucked short end, and across the point where the free loop begins. These stitch lines secure the handle and catch the pocket’s side edge beneath it.
Sew across the pocket bottom to close it against the quilt. Leave the top opening free. Backstitch at the start and end of the attachment seams.
On the opposite side, sew a rectangle around each handle’s attached end. Make sure all short cut edges are tucked inside. An extra diagonal line inside each rectangle can add reinforcement; this is an optional addition to the video method.
Check the pocket with your hand. Check all four handle ends for missed fabric. Remove every pin and trim the thread tails.
Step 11: Fold the reading quilt into a tote
Lay it cotton side up, with the handles and pocket underneath. Fold the left and right sides inward, roughly in thirds. Adjust the folds to follow the outside handle positions.
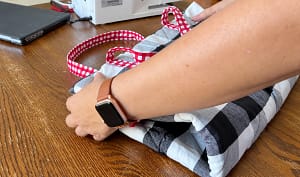
Fold the top and bottom edges inward toward the places where the handles attach. Fold the whole quilt in half across its middle so the handles come together.
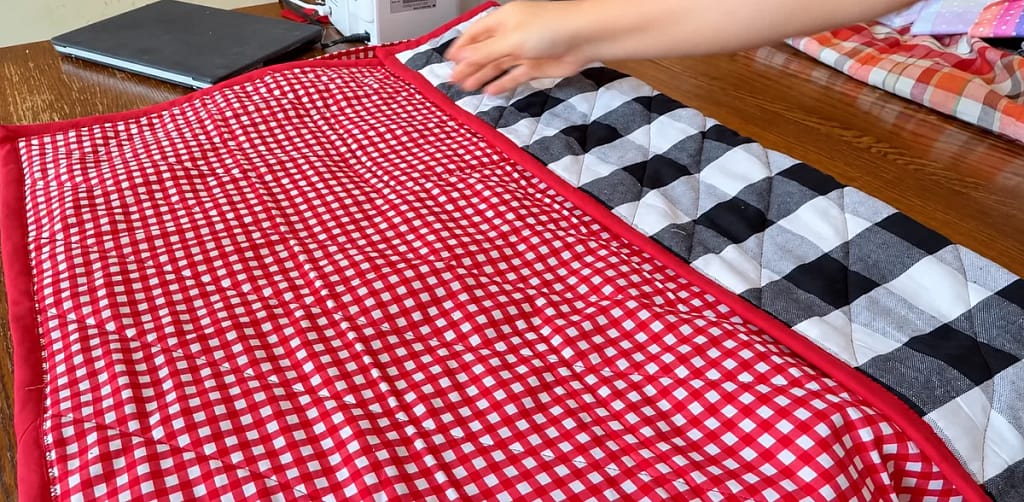
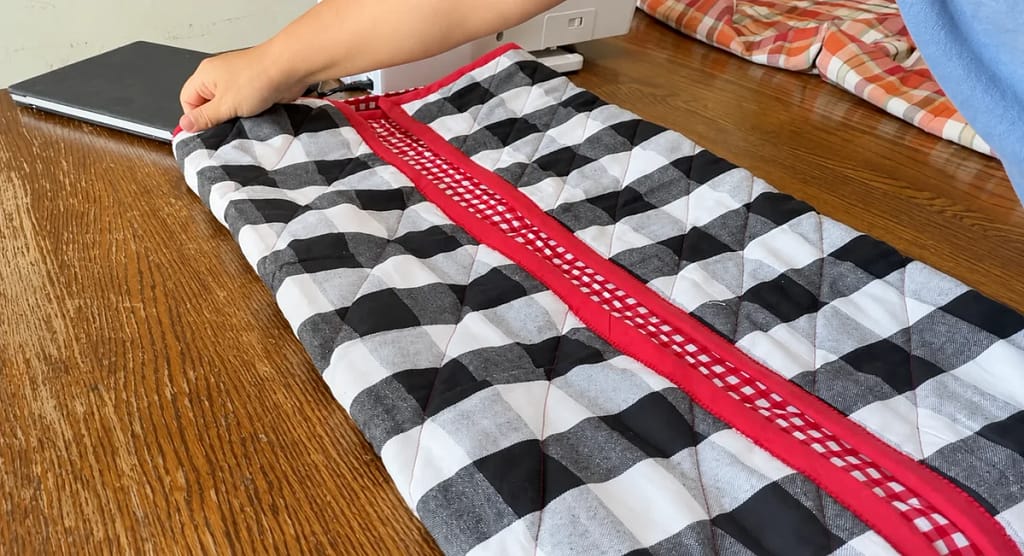
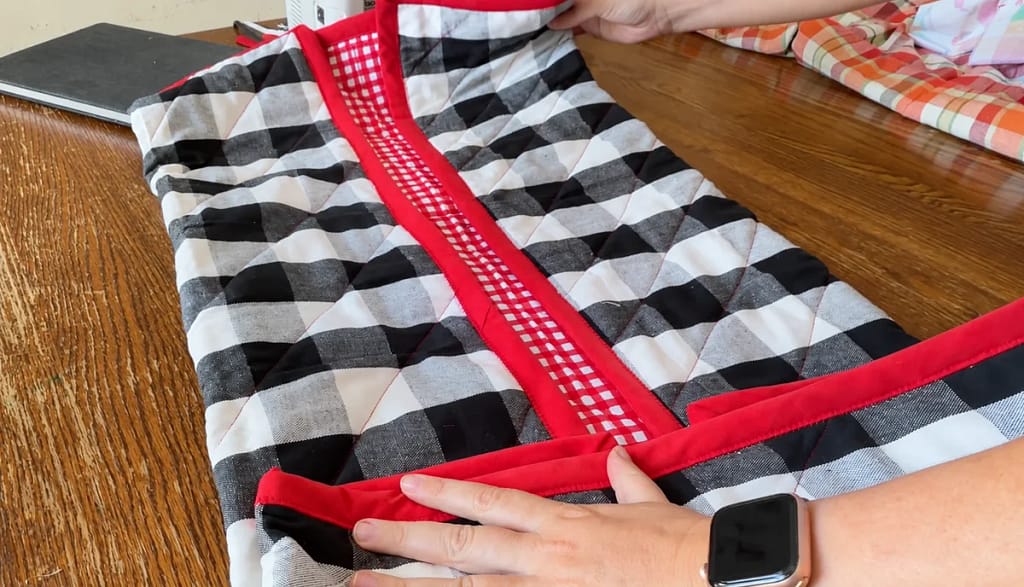
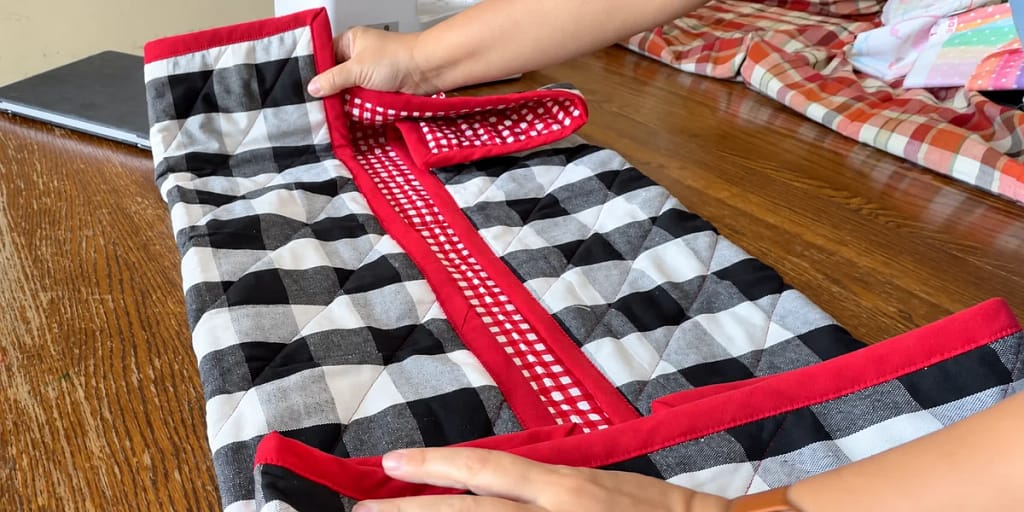
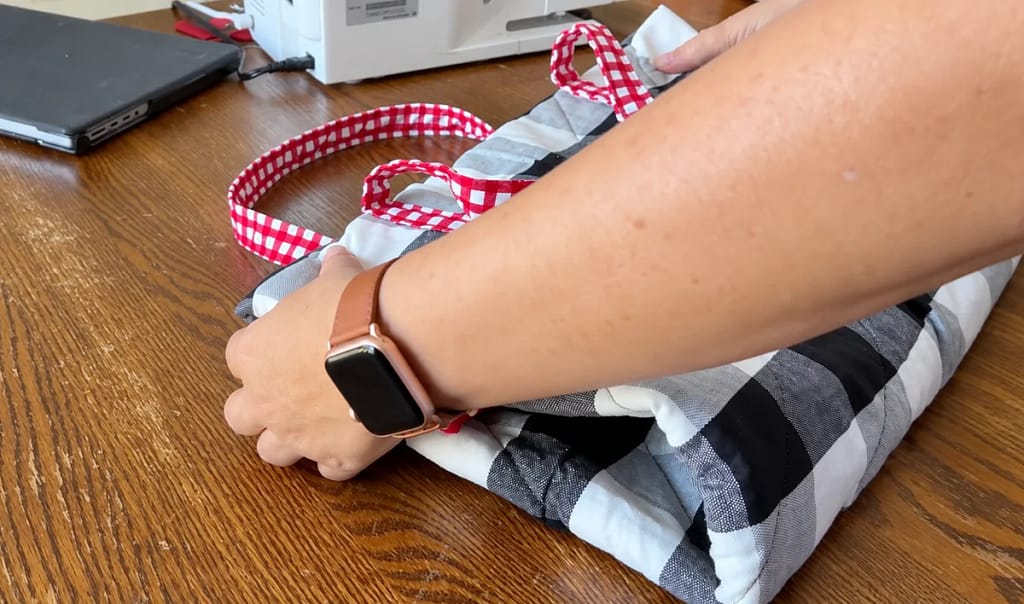
The pocket should be on the outside and open at the top. Slide in a book and lift gently by both handles. If the shape seems awkward, unfold it and adjust the side folds. The batting’s thickness can change how tightly it folds.
Troubleshooting and care
If the quilt bunches, check your basting and support its weight. If the machine skips stitches, stop and test the needle and settings on matching scraps. If a handle twists, remove its attachment stitches, flatten it, and pin it again.
If the binding misses the folded edge, clip the area and sew it again. If the pocket is too tight, make a larger one before attaching it. Changing the fold cannot make a small pocket hold a large book.
Choose wash settings that suit every material in the project. Check fabric, batting, and thread care guidance. Expect some shrinkage or quilted texture after washing. Cotton and duck cloth are not waterproof, so keep books away from wet ground.
Make it your own
Use favorite colors, animal prints, or a soft floral fabric. Add a book and a handmade bookmark for a reading gift. A teacher might enjoy one for a reading corner, and a child can use it for pretend picnics or reading outside.
For another book-lover project, try my quilted book sleeve tutorial.
Your first quilt does not have to look perfect. Take your time, check each step, and enjoy making something you can use. What fabric would you pick for your reading quilt?
Make It a Gift for a Book Lover
This reading quilt makes a thoughtful handmade gift. It gives someone a cozy place to read and an easy way to carry their book. Choose fabric in their favorite colors to make it feel personal.
Tuck a few small gifts into the pocket, or wrap them with the folded quilt:
- A book: Pick a favorite story, a new release they want to read, or a book you think they would enjoy. Add a note sharing why you chose it.
- An Amazon gift card for books: Let them choose their next read. Slip the gift card into a handmade card or use it as a bookmark.
- A handmade book sleeve: Pair the quilt with a matching sleeve to help protect their book. My beginner-friendly book sleeve tutorial walks you through the steps.
- A journal: A reading journal gives them a place to track finished books, save favorite quotes, and write down what they want to read next. A simple lined notebook works well, too.
- A set of pens: Add smooth-writing pens for taking notes or colorful pens for decorating journal pages.
- A bookmark: Use a fabric scrap from the quilt to make a matching bookmark.
For a simple gift set, pair the quilt with one book and a handwritten note. For a larger bundle, add a book sleeve, journal, pens, and a gift card. You can also tuck in a note showing how to fold the quilt back into its tote shape.
How to Sew a Reading Quilt FAQs
What is a reading quilt that folds into a tote?
A reading quilt that folds into a tote is a small quilt with two carry handles and a book pocket. You can spread it out for reading, then fold it so the handles meet and the pocket sits on the outside. The folded quilt forms the tote.
Can a beginner sew this reading quilt?
Yes! This reading quilt uses straight stitches and simple fabric shapes. Beginners can follow the project one step at a time. Practice sewing through fabric and batting on scraps first, and use the linked lessons for extra help with quilting and binding.
How big is the finished reading quilt?
The quilt front starts at 36 × 36 inches. The finished quilt may be a little smaller after quilting and trimming. Measure your trimmed quilt before cutting the binding or placing the pocket and handles.
What fabric should I use for a reading quilt?
Use woven quilting cotton for the front and light or medium-weight duck cloth or canvas for the backing. Choose fabric that does not stretch. Very heavy canvas can make the seams harder for a home sewing machine to handle.
Do I need a special sewing machine or walking foot?
You need a sewing machine that can sew through your chosen fabric and batting layers. A walking foot can help the layers feed evenly, but it is optional. Test a small quilt sandwich before starting the full quilt.
What size should I cut the book pocket?
Two 9 × 9-inch fabric squares are a good starting point. With a ⅜-inch seam allowance, the pocket finishes about 8¼ inches square before attachment. Check your book’s width and thickness, and allow extra room to slide it in and out.
Where do the pocket and handles go?
Lay the quilt backing side up. Center the pocket from left to right, with its bottom edge 1 inch above the horizontal center line. Place the handle ends over the pocket’s side edges. Mirror the second handle below the center line, without a pocket.
Can I use store-bought bias tape to bind the quilt?
Yes. Choose wide bias tape that can wrap around all three quilt layers. Test it on a quilted scrap before sewing. For a quilt near 36 inches square, plan on about 4½–5 yards, then check the amount against your quilt’s actual perimeter.
How do I fold the reading quilt into a tote?
Lay the quilt cotton side up. Fold the left and right sides inward, roughly in thirds, keeping the folds outside the handles. Fold the top and bottom edges inward toward the handle attachments. Then fold across the middle to bring the handles together. The book pocket should face outward.
Can I make the reading quilt larger?
Yes, but a larger quilt may need different pocket and handle placement. Extra fabric and batting also make a thicker folded tote. Test the fold and check that the handles meet before sewing the pocket and handles in place.
Is the reading quilt waterproof?
No. Cotton, duck cloth, and batting are not waterproof. Use the quilt on dry surfaces and keep books away from wet ground.
How do I wash a reading quilt?
Follow the care directions for all the materials you used, including the fabric and batting. Choose settings that suit the whole project. Some shrinkage and a softer, crinkled quilt texture may appear after washing.
Does this reading quilt make a good handmade gift?
Yes! Choose fabric in the reader’s favorite colors and tuck a book into the pocket. You can also add a matching book sleeve, bookmark, reading journal, pens, or an Amazon gift card so they can choose their next book.
Quilted Reading Tote
Equipment
- safety pins
Materials
- 1 yard duck cloth pick a favorite print
- 1 yard quilting cotton pick a favorite print
- 5 yards bias tape single or double fold
- 1 yard cotton batting
Instructions
Step 1: Wash, press, and cut
- Wash and dry the outer fabrics as their care labels allow. This helps deal with shrinkage before you sew. Follow the batting maker’s directions; do not assume loose batting should go through the wash.
- Cut: (1) 36" x 36" quiltling cotton, (1) 36" x 36" duck cloth, (1) 37" x 37" batting, (2) 8" x 8" pocket or (2) 9 " x 9" (choose either fabric), (2) 4" x 22" straps (choose either fabric).
- Press the fabric flat. Lift the iron and set it down rather than pulling the cloth out of shape. Smooth fabric is easier to measure and sew.
- Cut your quilt front, backing, batting, pocket squares, and handles. Measure twice before cutting. For this guide, use a 1/4-inch seam allowance for the pocket. Your 9-inch pocket squares will finish about 8 1/2 inches square before they are attached.
- Lay the intended book on the pocket fabric. Allow room for its width and thickness, plus the seams. Make a larger pocket if needed, then check that it fits inside the folded tote area.
Step 2: Make the quilt sandwich
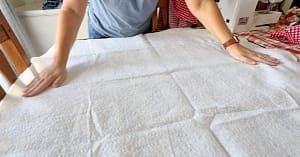
- A quilt sandwich has three layers. Lay the backing on a clear table with its right side down. Place the batting over it. Add the quilting cotton with its right side up.

- Smooth each layer from the middle toward the edges. The batting and backing should extend beyond the front fabric. Keep the layers flat without stretching them.
- Cotton smoothed over batting and duck cloth to make the quilt sandwich.

- Baste the layers with quilting safety pins or a fabric basting spray made for this use. Follow the spray label if you use one. Edge clips alone do not hold the middle of a quilt steady.
- I skip basting in the video, but I recommend it here. It gives a new sewist more control and helps keep the back from bunching.
Step 3: Quilt the layers together
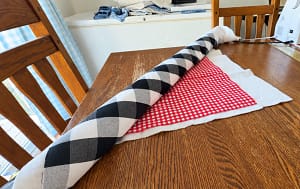
- Quilting means sewing through the front, batting, and backing to hold them together. You can use straight lines; there is no need for a fancy design.

- I sew diagonal lines about 2-“3 inches apart. Check the batting label for its maximum quilting distance. Your lines must meet that limit. Mark your chosen lines with a ruler and a tested fabric marker.
- Support the quilt on the table. Roll the extra fabric so it fits in the space beside the needle. Lower the presser foot, then sew slowly along a marked line. Let the machine move the fabric. Do not push or pull it.
- Check the back after the first line. If you see a fold sewn into the backing, stop and remove those stitches before doing more. Remove pins before they reach the needle.
Step 4: Trim the quilt square
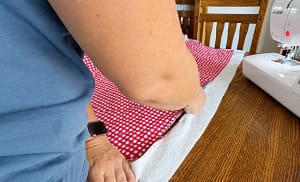
- Lay the quilt flat. Use a ruler to trim away extra backing and batting. Aim for four straight sides and square corners. Cut only as much as you need to tidy the edges.

- Measure the trimmed quilt. A little shrinkage from quilting is normal. Use its actual size for the next steps. Check that all three layers reach each edge and that no loose folds remain.
Step 5: Prepare the binding
- Measure around all four quilt edges. Add about 12 inches for joining and handling the ends. A 36-inch square has a 144-inch edge all the way around; adding 12 inches gives 156 inches, or about 4 yards.

- Ready-made wide bias tape saves a step. You can also make your own. Sew4Home’s bias binding guide shows cutting, joining, pressing, and attaching it. Choose the section that matches your tape type.
- If you need to join packaged pieces, open the folds first. Sew a diagonal join, check that the strip lies flat, and trim the seam allowance. Press the seam open and restore the folds. Practice with two scraps before joining your full length.
Step 6: Sew the binding around the quilt
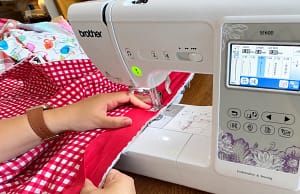
- For the pre-folded tape method in my video, open the tape and place one raw edge against the quilt’s raw edge. Start on the duck-cloth side so the final visible stitching can be on the cotton side. Leave a loose starting tail.
- Clip the tape in place and sew along its first crease. Test this on your layered scrap first. The finished tape must cover the edge and the first stitch line when wrapped over.
- At each corner, make a miter: a small diagonal fold that lets the tape turn neatly. The stopping point depends on your seam width, so do not copy a fixed one-inch stopping distance for every tape. Use the corner directions for your chosen binding method.
- Leave about 10-“12 inches of the quilt edge unsewn near the starting point. Join the loose ends, then sew down that gap. Watch my demo at 7:11 and check the linked guide before cutting the tails.
- Wrap the tape over the raw edge to the cotton side. Tuck the raw edge inside its fold. Clip it so the folded edge covers the first stitch line. Form a neat diagonal fold at each corner.
- Sew close to the folded edge. I use a blanket stitch in the video. A straight stitch works too if it catches the folded edge all the way around. Check both sides for missed spots and sew them again.

- For a different option, WeAllSew’s quilt binding lesson explains folded quilt binding. Follow that method’s own cut width and seam allowance rather than mixing its steps with packaged tape directions.
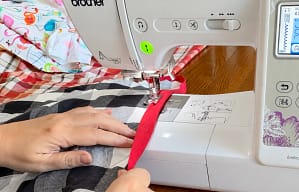
Step 7: Sew the pocket
- Place the two pocket squares right sides together. Pin the edges. Mark a 3-4" opening along the edge that will become the pocket bottom.

- Use a straight stitch around the square, 1/4″ inch from the cut edges. Start and stop at the opening, backstitching at both ends. In the video, I use about a 2.5 mm stitch for this seam.
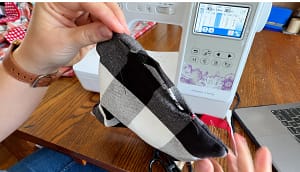
- Trim a small triangle from each corner without cutting the stitches. Turn the pocket right side out through the opening. Gently push the corners out with a blunt tool.
- Fold the opening’s seam allowance inward and press the pocket flat. Topstitch close enough to the edge to catch the folded opening shut. Check it before moving on. This sewing closes the turning gap; the pocket’s top will stay open when we attach it to the quilt.
- Black-and-white fabric pocket turned right side out.
Step 8: Make two handles
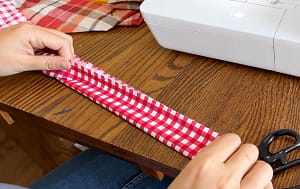
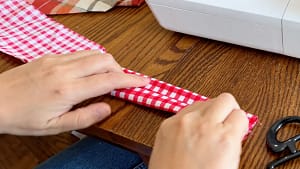
- Fold one 4 ” x 22-inch strip in half lengthwise and press a center crease. Open it. Fold each long raw edge to the center crease, then press again. Fold it in half along that first crease. It should now be about 1 inch wide, with the long cut edges hidden inside.
- Clip the folds together. Topstitch close to both long edges, sewing slowly. Make the second handle the same way. The short ends will be tucked under when attached.

- Pressing helps here. My video shows finger-folding, but an iron makes those narrow layers much easier to keep lined up.

Step 9: Plan the pocket and handle placement
- Lay the quilt duck-cloth side up. Fold it in half both ways to find the center. Mark the two center lines with removable marks or pins.
- Center the pocket from left to right on one side of the horizontal middle line. Its opening points toward that side’s outer quilt edge. Its bottom sits near the middle line. In the video, mine is about 3 inches away; I note that moving it a little closer would help the fold.
- Place one handle over the pocket’s side edges. Each pocket side runs beneath the center of a handle end. The free loop points toward the outer quilt edge. Tuck each short raw end under and pin it.
- Mirror the second handle across the horizontal center line. Match its left and right positions to the first handle. Its loop points toward the opposite outer edge. Trace each handle with your fingers to check for twists.

- Now test the fold using the steps below. Keep sharp pins away from your hands. Check that the handles meet, the pocket stays outside, and the book fits. Adjust and mark the layout before sewing. This test matters more than copying my rough placement exactly.
Step 10: Attach the pocket and handles
- Unfold the quilt and lay it flat again. Sew through the quilt layers when attaching the pieces. Keep the free handle loops out of the needle’s path.
- On the pocket side, stitch along both long edges of each handle’s attached section, across its tucked short end, and across the point where the free loop begins. These stitch lines secure the handle and catch the pocket’s side edge beneath it.
- Sew across the pocket bottom to close it against the quilt. Leave the top opening free. Backstitch at the start and end of the attachment seams.
- On the opposite side, sew a rectangle around each handle’s attached end. Make sure all short cut edges are tucked inside. An extra diagonal line inside each rectangle can add reinforcement; this is an optional addition to the video method.
- Check the pocket with your hand. Check all four handle ends for missed fabric. Remove every pin and trim the thread tails.
Step 11: Fold the reading quilt into a tote
- Lay it cotton side up, with the handles and pocket underneath. Fold the left and right sides inward, roughly in thirds. Adjust the folds to follow the outside handle positions.
- Fold the top and bottom edges inward toward the places where the handles attach. Fold the whole quilt in half across its middle so the handles come together.

- The pocket should be on the outside and open at the top. Slide in a book and lift gently by both handles. If the shape seems awkward, unfold it and adjust the side folds. The batting’s thickness can change how tightly it folds.
Troubleshooting and care
- If the quilt bunches, check your basting and support its weight. If the machine skips stitches, stop and test the needle and settings on matching scraps. If a handle twists, remove its attachment stitches, flatten it, and pin it again.
- If the binding misses the folded edge, clip the area and sew it again. If the pocket is too tight, make a larger one before attaching it. Changing the fold cannot make a small pocket hold a large book.
- Choose wash settings that suit every material in the project. Check fabric, batting, and thread care guidance. Expect some shrinkage or quilted texture after washing. Cotton and duck cloth are not waterproof, so keep books away from wet ground.
Notes
About the author
Kim is an adventurous mama of 5 who has been building new skills over 16 years of marriage. Over the past decade, she and her family have built a homestead from the ground up, starting with meat and egg chickens, growing into a large garden, and learning to preserve their harvest.
She taught herself to sew, crochet, and knit 13 years ago through books and early YouTube tutorials, and has been making handmade projects ever since.
Cooking from scratch became a necessity and a passion as her family learned to eat more nutritionally and live more frugally. She tests all of her sourdough and fresh milled flour recipes on the kids to ensure they’re delicious and nutritious.
At Plain Living, Kim shares what she’s actually lived — not theory, but the real skills she’s picked up through years of trial, error, and love for her family and home.
