The Best Sourdough Bagel Recipe (Chewy & Easy Homemade Bagels)
Some links in this post may be affiliate links. That means I might make a small commission on qualifying purchases if you click the link. There is no extra cost to you.
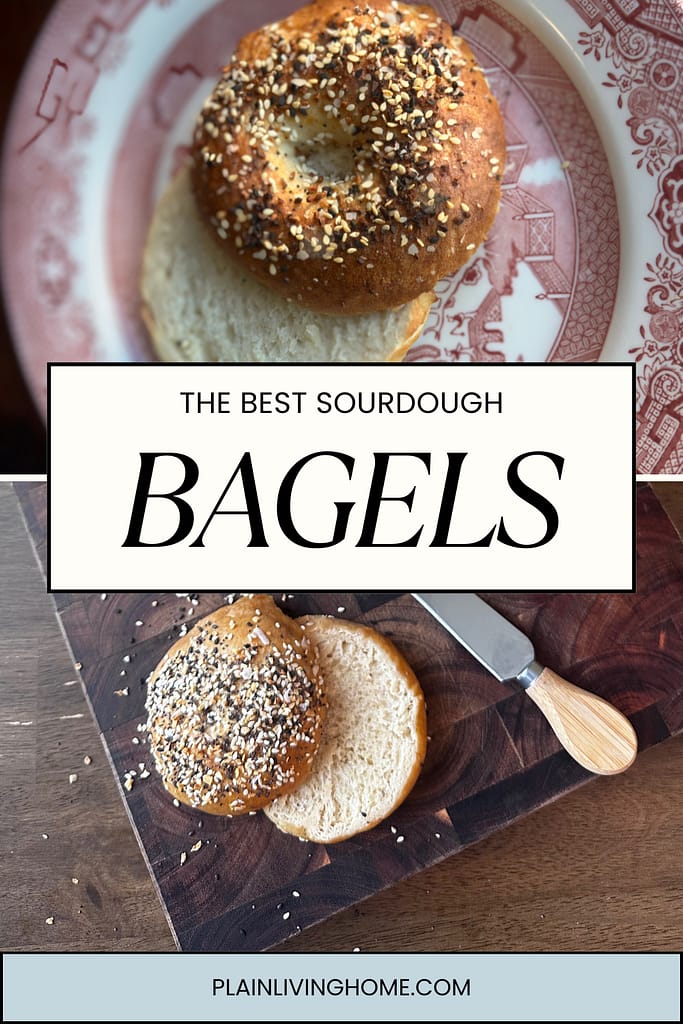
I’ve been making this sourdough bagel recipe regularly for more than two and a half years, and it has become one of the most dependable recipes in our family kitchen. These homemade bagels are golden and chewy outside, soft inside and sturdy enough for cream cheese, breakfast sandwiches or easy lunches.
For our family of seven, a recipe also needs to be practical. I often double the batch so we can enjoy some immediately and freeze the rest for busy mornings. I’ve also served them to overnight guests, packed them for snacks and given them to friends.
During those two and a half years, I’ve tested different flours, proofing times, shaping methods, water baths and baking temperatures. I’ve made them in residential ovens and in an unpredictable RV propane oven, and the recipe has remained remarkably dependable. Everything-seasoned and plain bagels are our favorites.
If you’re still learning how to measure flour, knead dough, or recognize a proper rise, visit my Baking Basics for Beginners guide before you begin.
For more ways to use freshly ground wheat and spelt, browse my Fresh Milled Flour Recipes for Beginners hub, where you’ll find tested recipes and practical guidance for working with whole grain flour.

Table of contents
- What These Sourdough Bagels Are Like
- Ingredients For Easy Sourdough Bagels
- How to Make Sourdough Bagels
- Serving & Storage for Sourdough Bagels
- Try some of my Other Simple Sourdough Recipes
- Sourdough Gift Basket
- Sourdough Bagel FAQs (Everything You Need to Know)
- Tips for Perfect Chewy Sourdough Bagels Every Time
- Save or Print the Recipe
- About the Author
What These Sourdough Bagels Are Like
This recipe produces substantial, bakery-style sourdough bagels with a glossy, chewy crust and a soft but sturdy interior. The main formula combines fresh-milled hard red wheat with unbleached all-purpose flour for added flavor without making the bagels excessively heavy.
A firm dough gives the bagels their structure, while the baking-soda and coconut-sugar water bath helps create their characteristic crust. They can be made in one day or refrigerated overnight for deeper sourdough flavor.
Why This Sourdough Bagel Recipe Works
I have made this recipe for years. Since we’ve moved several times and lived in a camper full time, I can attest to its versatility. It bakes up great in any oven. Whether you’re using a small RV propane oven, a residential electric oven, or a natural gas oven, these days bagels consistently turn out well. I’ve even recently used fresh milled spelt without changing the recipe.
This recipe is truly the best because it is consistent. I think it works so well because it:
- Active sourdough starter provides natural fermentation and flavor.
- Fresh-milled hard red wheat adds structure and a hearty wheat flavor
- .All-purpose flour keeps the interior lighter and softer.
- A short dough rest allows the flour to absorb the water before kneading.
- Boiling creates the glossy, chewy exterior that separates a true bagel from an ordinary roll.
- Visual proofing cues make the recipe adaptable to different kitchen temperatures.
- The finished bagels freeze and reheat well for convenient breakfasts.
Bonus: I’ll walk you through shaping, proofing, boiling with a sugar & baking-soda bath, baking, and finishing touches — all seasoned with my helpful resources for each step of the process.
Sourdough Bagels at a Glance
- Yield: 8 large bagels
- Starter: Active, bubbly sourdough starter
- Flour: Fresh-milled hard red wheat and unbleached all-purpose flour
- Method: Same-day or optional overnight fermentation
- Prep time: 35 minutes
- Fermentation and proofing: Approximately 5 hours 15 minutes
- Bake time: 20 minutes
- Total time: Approximately 6 hours 10 minutes
- Storage: Freezer-friendly for up to 3 months
Fermentation time will vary with the temperature of your kitchen and the strength of your starter, so use the visual cues in the instructions as your primary guide.
Ingredients For Easy Sourdough Bagels
Bagel Dough
- 57 g melted butter (¼ cup): Helps create a softer interior and adds flavor.
- 42 g honey (2 tablespoons): Adds subtle sweetness and encourages browning.
- 9 g fine salt (½ tablespoon): Strengthens the dough and balances the flavor.
- 113 g active sourdough starter (½ cup): Provides natural fermentation and sourdough flavor.
- 296 g room-temperature water (1¼ cups): Hydrates the flour and brings the dough together.
- 280 g fresh-milled hard red wheat flour (2 cups): Adds wheat flavor, structure and nutrition.
- 240 g unbleached all-purpose flour (2 cups): Keeps the bagels lighter than an entirely whole-wheat version.
- 13 g sunflower lecithin powder (2 tablespoons), optional: Helps retain moisture and creates a slightly softer crumb.
Water Bath and Toppings
- Enough water to fill a large, wide pot approximately 3 inches deep
- 5 g baking soda (1 teaspoon)
- 48 g coconut sugar (¼ cup); brown sugar or honey may be substituted
- One large egg plus 15 g water for egg wash, or use milk
- Approximately 20–30 g everything bagel seasoning, sesame seeds, poppy seeds, coarse salt or another preferred topping
Helpful Sourdough Resources
- Why sourdough may be easier to digest
- What fresh-milled flour is and why I use it
- How to knead bread dough by hand or mixer
- Homemade everything bagel seasoning
Note: Want to learn more about using fresh-milled flour? Check out my post: “What is Fresh Milled Flour & Why Should You Use It”
For more ways to use your home-milled grain, browse my complete collection of fresh milled flour recipes, including breads, muffins, breakfast recipes, and desserts.
Thinking about whether sourdough is actually healthier? See: “Is Sourdough Really Healthier?”
Also: How to knead bread for structure: “How to Knead Bread (Hand & Mixer)”
Love everything bagel seasoning? Use my recipe: “Everything Bagel Seasoning”
How to Make Sourdough Bagels
1. Feed and Prep Your Starter
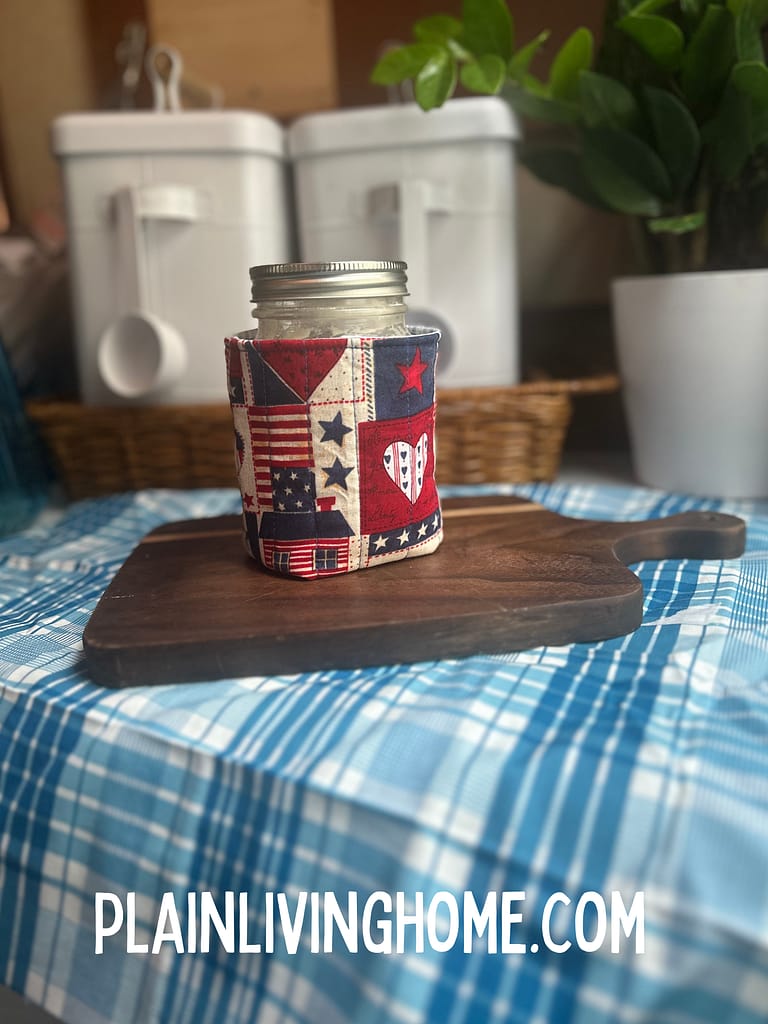
Make sure your starter is active, bubbly, and ready. Feed it well, keep it cozy, and wait for it to double and get bubbly. To help keep it warm and cozy, make a jar cozy from my free pattern. As a bonus- match your kitchen decor so you have a cute little sourdough display on the counter.
2. Mix the Bagel Dough
In a large mixing bowl, whisk together the melted butter, honey, salt, active starter and water. Add the fresh-milled hard red wheat flour, all-purpose flour and optional sunflower lecithin. Mix until no dry flour remains and a stiff, shaggy dough forms.
Allow the dough to rest for 10–15 minutes before kneading. This gives the flour time to absorb the water and makes the dough easier to work with. Because the starter, salt, butter and honey have already been added, this is a simple dough rest rather than a traditional autolyse.
3. Knead the bagel dough
Either by mixer on a 3-4 speed (8-12 minutes) or by hand (12-15 minutes) knead until smooth and elastic. If your dough is really wet from using a fresh milled flour, knead until the dough is glossy. it’s okay if it stays tacky.
The dough should feel firm and springy. If you use fresh-milled wheat, it might need a bit more time and it may lose it shape quickly. The dough will get a glossy sheen to it, and that’s how you know it’s ready.
4. Bulk Rise- Ferment your bagel dough
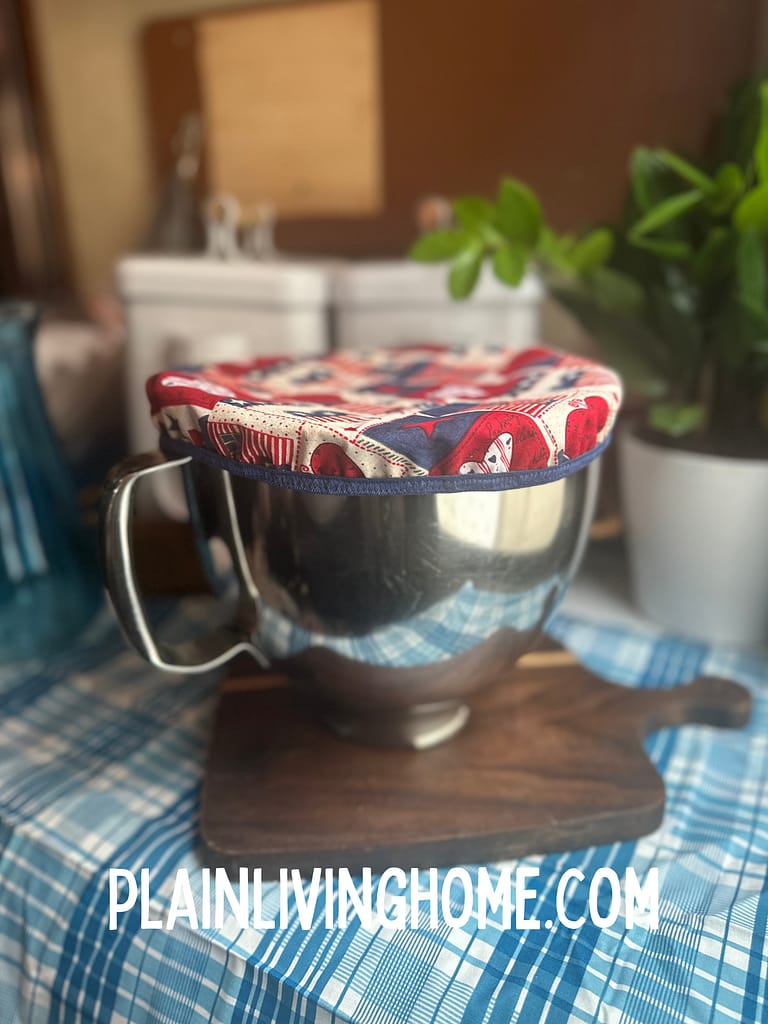
Put the dough into a lightly oiled bowl. cover it with a damp tea towel or with your own handmade fabric bowl cover. Sometimes, I just put the whole bowl inside a grocery bag and tie it up. That keeps the moisture in and helps me reuse a bag before I toss it.
Cover the bowl and let the dough rise at room temperature until it looks puffy and has increased in size by approximately 50–75%. This usually takes 3–5 hours, depending on the temperature of your kitchen and the strength of your starter. Trust the appearance of the dough more than the clock. This dough will not double in size, and will remain firmer than other doughs.
For deeper sourdough flavor, cover the dough tightly and refrigerate it for 8–12 hours after the bulk rise. The cold dough will also be firmer and easier to shape.
5. Shape Your Bagels- bakery style or rustic
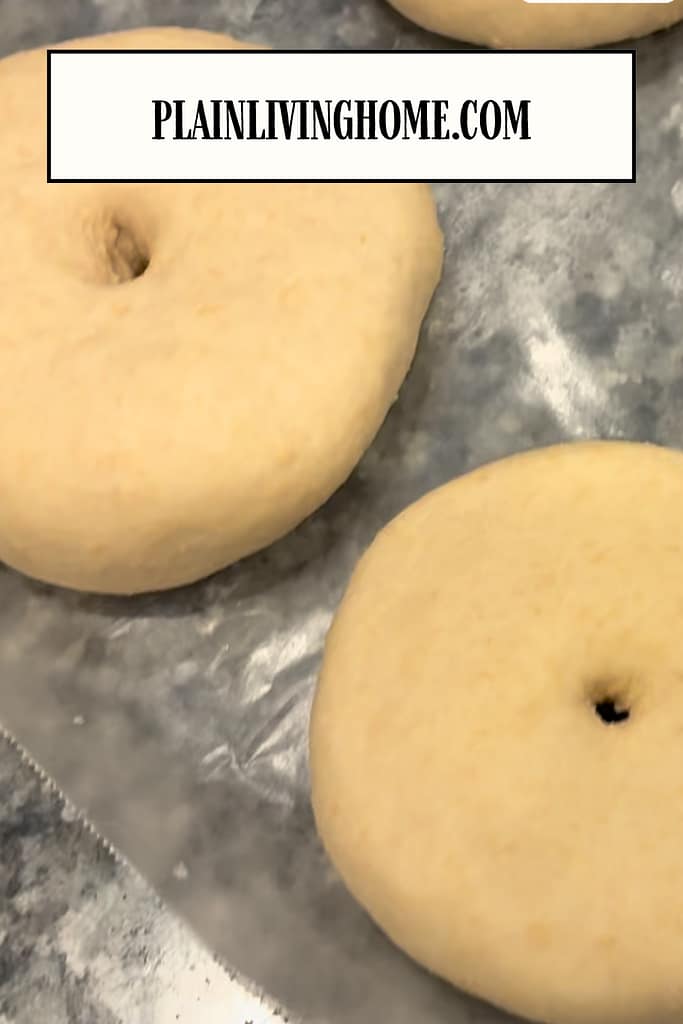
For a more rustic bagel, turn dough onto a floured surface. Divide into ~8 equal portions. Roll each into a ball. Use the rolling motion against the counter top to create tension around the surface of the dough ball. For wetter dough, you may need to add a dusting of flour.
Next, gently smash each ball into a disc until it’s roughly the size that you want your bagel to be. You can have fun here and make mini bagels by diving the enough into 12 or 16 instead of 8. It’s your bagel recipe.
Once you have little flat discs, poke a hole with your finger and gently spin to widen the hole (it will shrink as it proofs).
However, I’ve been reading lately that bakeries make their sourdough bagels little differently.
First, they split their dough into portions. Then, they roll each portion into a long rope. Next, they take the two ends, curve the rope into a circle, and roll the ends together. Bakery style sourdough bagels have that tell-tale crease that shows they were made with this method. It may create a bit more tension on the dough for better rising.
6. Proof Bagels
Place the shaped bagels on a parchment-lined baking sheet and cover them loosely with a light cloth. Let them proof at room temperature for 45–90 minutes. They should look slightly puffy and spring back slowly when gently pressed. While they proof, preheat the oven to 425°F and prepare the water bath.
7. Water Bath- boiled bagels are the only kind of bagels
Fill a large, wide pot with enough water to reach approximately 3 inches deep. Bring the water to a boil, then add 5 grams baking soda and 48 grams coconut sugar. Brown sugar or honey may also be used. Reduce the heat to maintain a steady simmer rather than a hard rolling boil.
Lower two or three bagels into the water at a time. They should float within several seconds. Boil for 20–30 seconds per side for a thinner, softer crust or 40–45 seconds per side for a classic chewy bagel crust. Carefully remove the bagels with a slotted spoon and allow the excess water to drain.
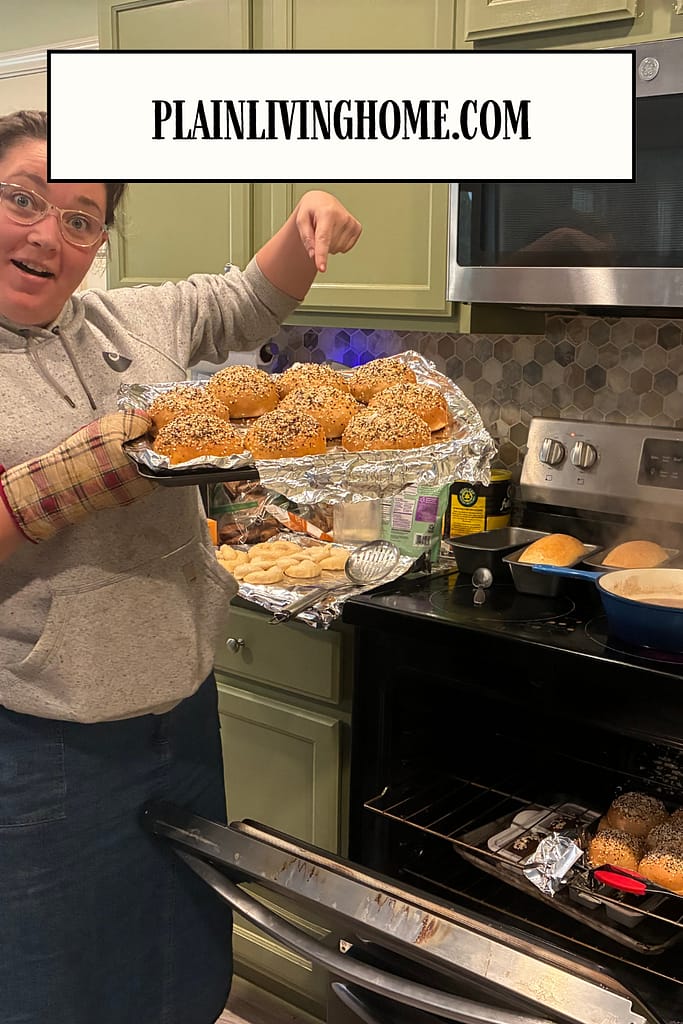
8. Top your bagels & Bake
Remove each bagel carefully with a slotted spoon to drain the excess water. Then, place each bagel on a parchment lined baking sheet. Brush with milk (or egg wash if you like) and add toppings, particularly the everything bagel seasoning that I like to make. Bake at 425°F for about 18-22 minutes until golden brown.
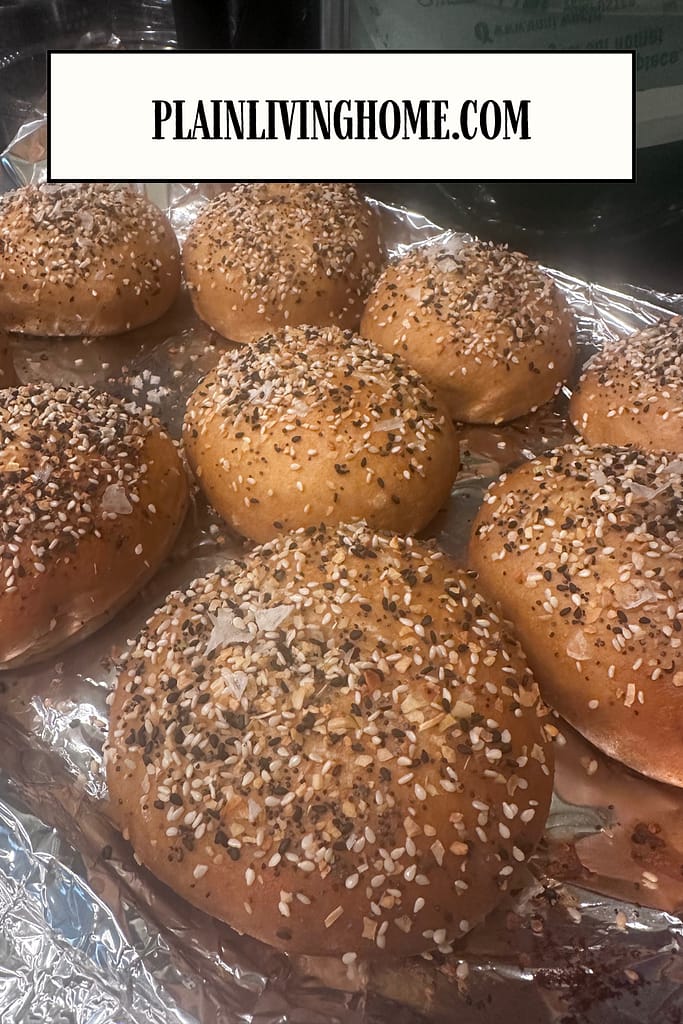
9. Finish For a chewy, delicious bagel treat
Let the bagels cool briefly. Slice and add cream cheese, or serve whole. These bagels also freeze well. When your’e ready to serve, just pop them into the oven or a toaster. Serve warm with butter or cream cheese and enjoy the chew, flavor, and shine. They also make great sandwiches and burger buns!
Just this week, I made a double batch. We had the first batch for breakfast. Then later in the week, we made BLTs on the second batch of bagels.
Serving & Storage for Sourdough Bagels
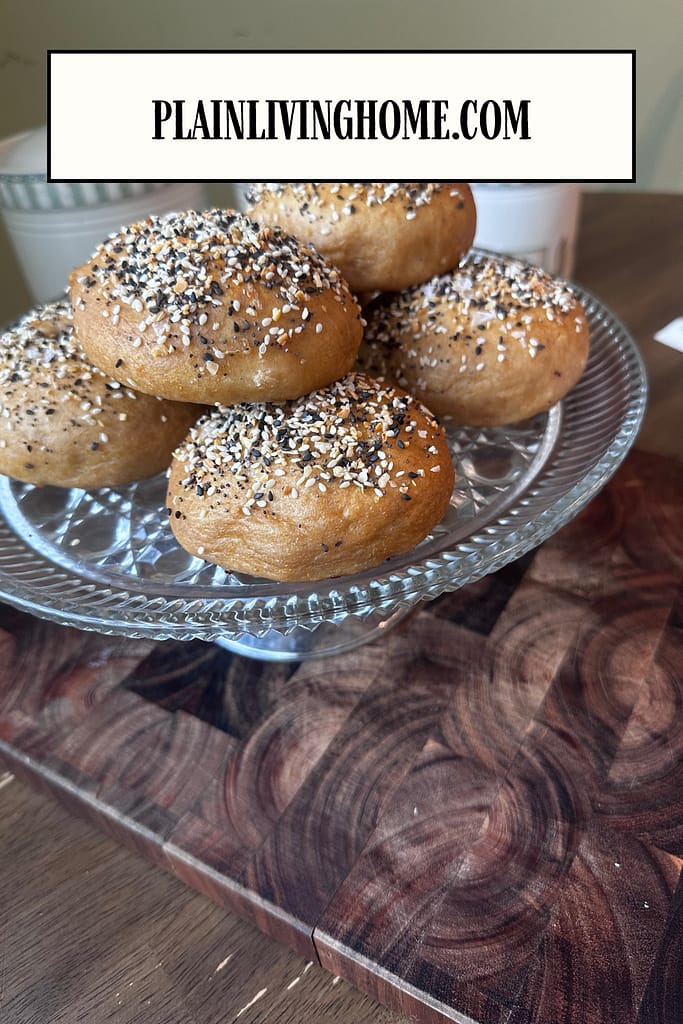
I love to serve my baked goods on a cake stand. It gives me the chance to show off my baking and make the kitchen feel cozy. It also generates some excitement about getting to eat the bagels.
Serve warm, toasted, or split with your favorite toppings — cream cheese, avocado & egg, smoked salmon, honey butter. Freeze extras after fully cooling: wrap and store up to 3 months. Reheat in toaster or oven.
These bagels hold up well thanks to the structure you built with the dough and lecithin!
Try some of my Other Simple Sourdough Recipes
Sourdough Gift Basket
Bagels are a really fun recipe to make and gift to people. A lot of people will be shocked that you can make bagels at home. I think it is a great gift for so many occasions. Make up some bagels, handwrite a recipe or two, and share some starter.
I put together a tutorial to create a handmade gift basket full of goodies for your favorite baker. Make items off this list to put together for anyone who is interested in sourdough. Find the post and tutorials here:

- How to make a Sourdough gift basket
- Sew a Sourdough Proofing Cover
- Sew a Sourdough Starter Cover
- Sew a sew of hot pads for baking bread
- Sew a waist apron
You could also print out a whole set of your favorite recipes and bind them into a personal cookbook to gift to a friend.
Sourdough Bagel FAQs (Everything You Need to Know)
Boiling sourdough bagels before baking is what gives them their classic chewy crust and shiny exterior. When bagels are dropped into simmering water (especially with baking soda and a touch of sugar), the surface starches gelatinize. This creates a thin outer layer that sets before baking.
Technically, yes — but they won’t be real bagels.
Dense sourdough bagels are usually caused by one of three things:
Underproofing – The dough didn’t ferment long enough.
Weak starter – Your sourdough starter wasn’t fully active and bubbly.
Too much flour – Bagel dough is stiff, but it should still feel elastic and slightly springy.
Proofing time depends on the temperature of your kitchen and the strength of your starter. At approximately 70–75°F, allow 3–5 hours for bulk fermentation and 45–90 minutes for the shaped bagels. Look for a 50–75% increase during bulk fermentation and slightly puffy bagels before boiling.
I have found that sourdough is a lot more forgiving than what the internet tells us. Honestly, it’s all up to your preference and experience. For a beginner, this recipe works best with active, bubbly starter for proper rise and chew. If you’re a little more advanced and you know what to look for, you can totally make these with discard.
Yes — and many bakers prefer it.
After the bulk rise:
Cover the dough tightly
Refrigerate 8–12 hours
My most dependable combination is fresh-milled hard red wheat and unbleached all-purpose flour. The hard red wheat adds flavor and structure, while the all-purpose flour keeps the bagels lighter. I have also made this recipe with all-purpose flour, bread flour and fresh-milled spelt, but those flours absorb water differently. Use the dough’s texture as your guide: it should be firm, elastic and able to hold its shape without spreading.
Start with a firm dough and allow the shaped bagels to proof properly. Boil them for 40–45 seconds per side, then bake until the crust is deeply golden. Bread flour or a combination of fresh-milled hard red wheat and all-purpose flour will also produce a substantial, chewy texture.
Tips for Perfect Chewy Sourdough Bagels Every Time
- Keep the dough stiff-make adjustments to the flour if its too sticky to work with
- Before boiling, drop one bagel into water.
If it floats within 10 seconds, the dough is ready.
If it sinks, let it proof longer. - Cold Ferment for Better Flavor by refrigerating overnight
- For a chewier crust, boil the bagels for 40–45 seconds per side.
- Try honey, molasses, or maple syrup in your water bath
Save or Print the Recipe
Have you tried this sourdough bagel recipe? Did you use fresh-milled flour or all-purpose? Tell me below!
The Best Sourdough Bagels
Ingredients
Bagel Dough
- 1/4 cup butter melted and cooled slightly
- 2 tablespoons honey
- 1/2 tablespoon fine salt
- 1/2 cup active sourdough starter bubbly and risen
- 1 1/4 cups room-temperature water
- 2 cups fresh-milled hard red wheat flour
- 2 cups unbleached all-purpose flour
- 2 tablespoons sunflower lecithin optional, for softer crumb
- Ingredients — Water Bath & Topping
- 1 teaspoon baking soda
- 1/4 cup coconut sugar or brown sugar or honey
Toppings and Egg wash
- sesame seeds poppy seeds, coarse salt, everything bagel seasoning, or leave plain
- 1 egg beaten with 1 tablespoon water for egg wash or milk, optional
Instructions
Feed your starter before you want to bake.
- Feed your sourdough starter 4–12 hours before mixing so it rises, looks domed, and smells mildly sweet and tangy. When you stir it, it should look airy with bubbles. This “active” starter helps bagels rise and taste great.
Combine Ingredients
- In a large bowl, whisk together the melted butter, honey, salt, sourdough starter, and water. The liquid should look milky and smooth with no streaks of honey. If butter clumps, it was too hot—keep whisking until it blends in.
- Add the flour (choose either the main formula or the swap) and the lecithin. Stir with a sturdy spoon or mix on low until a shaggy, rough dough forms and you no longer see dry flour. The dough will look lumpy and a little scrappy—this is okay.
Rest the dough (autolyse light).
- Let the dough sit for 10 minutes. This rest helps the flour soak up the water. After resting, the dough will feel less sticky and easier to knead.
- Knead with a stand mixer on low-medium speed for 8–10 minutes, or knead by hand for 12–15 minutes. Bagel dough should feel firm and tight, not soft like sandwich bread. It should look smooth like a balloon and spring back when you press it.
- Check the dough feel.
- Pinch a small piece and stretch it—if it makes a thin, stretchy “window” without tearing right away, you are close. If it tears quickly, knead 1–2 minutes more. The dough should hold its shape in a ball and not slump.
- First rise (bulk fermentation).
- Place the dough in a lightly oiled bowl, cover, and let it rise at room temperature until it looks puffy and has grown by about 50–75%. This may take 3–5 hours, depending on room temperature and starter strength. It will feel lighter when you lift it.
- For deeper sourdough flavor and easier shaping, cover the bowl and refrigerate the dough for 8–12 hours or overnight. Cold dough is firmer, which makes shaping neat bagels simple. You can skip this if you’re short on time.
- Turn the dough onto an unfloured or very lightly floured counter. Cut into 8 equal pieces (use a scale if you have one). Each piece should look like a small puck, about the size of your palm.
- Working with one piece at a time, cup your hand over it and drag in small circles on the counter to create surface tension. The ball should look smooth on top with a sealed bottom seam. Repeat for all pieces. Rest 5 minutes.
- Use your thumb to poke a hole in the center of a dough ball. Slip two fingers in and spin the dough gently to stretch the hole to about 1.5–2 inches wide. The ring should look even all the way around. Repeat with all pieces.
- Place shaped bagels on a parchment-lined baking sheet. Cover loosely and let them proof 45–90 minutes at room temp. They should look slightly puffy and spring back slowly when gently poked. Meanwhile, preheat the oven to 425°F (218°C).
- Fill a wide pot with at least 3 inches of water and bring to a gentle boil. Stir in 1 teaspoon baking soda and 1/4 cup coconut sugar. The water should look lightly colored. Reduce heat to a steady simmer—gentle bubbles, not a hard rolling boil.
- Drop 2–3 bagels into the simmering water. They should float within seconds. Boil 20–30 seconds per side for a softer crust or 40–45 seconds per side for a chewier crust. Use a slotted spoon to flip and remove them; let water drip off.
- Place boiled bagels back on the parchment. Brush with egg wash (or milk) so toppings stick. Sprinkle sesame seeds, poppy seeds, coarse salt, or everything bagel seasoning evenly over the top. Press lightly so seeds grab.
- Bake until golden and glossy.
- Bake at 425°F for 18–22 minutes, rotating the pan halfway through. Bagels are done when they look deep golden, feel firm on the sides, and sound lightly hollow when tapped. The crust should look shiny and the bottoms should be browned.
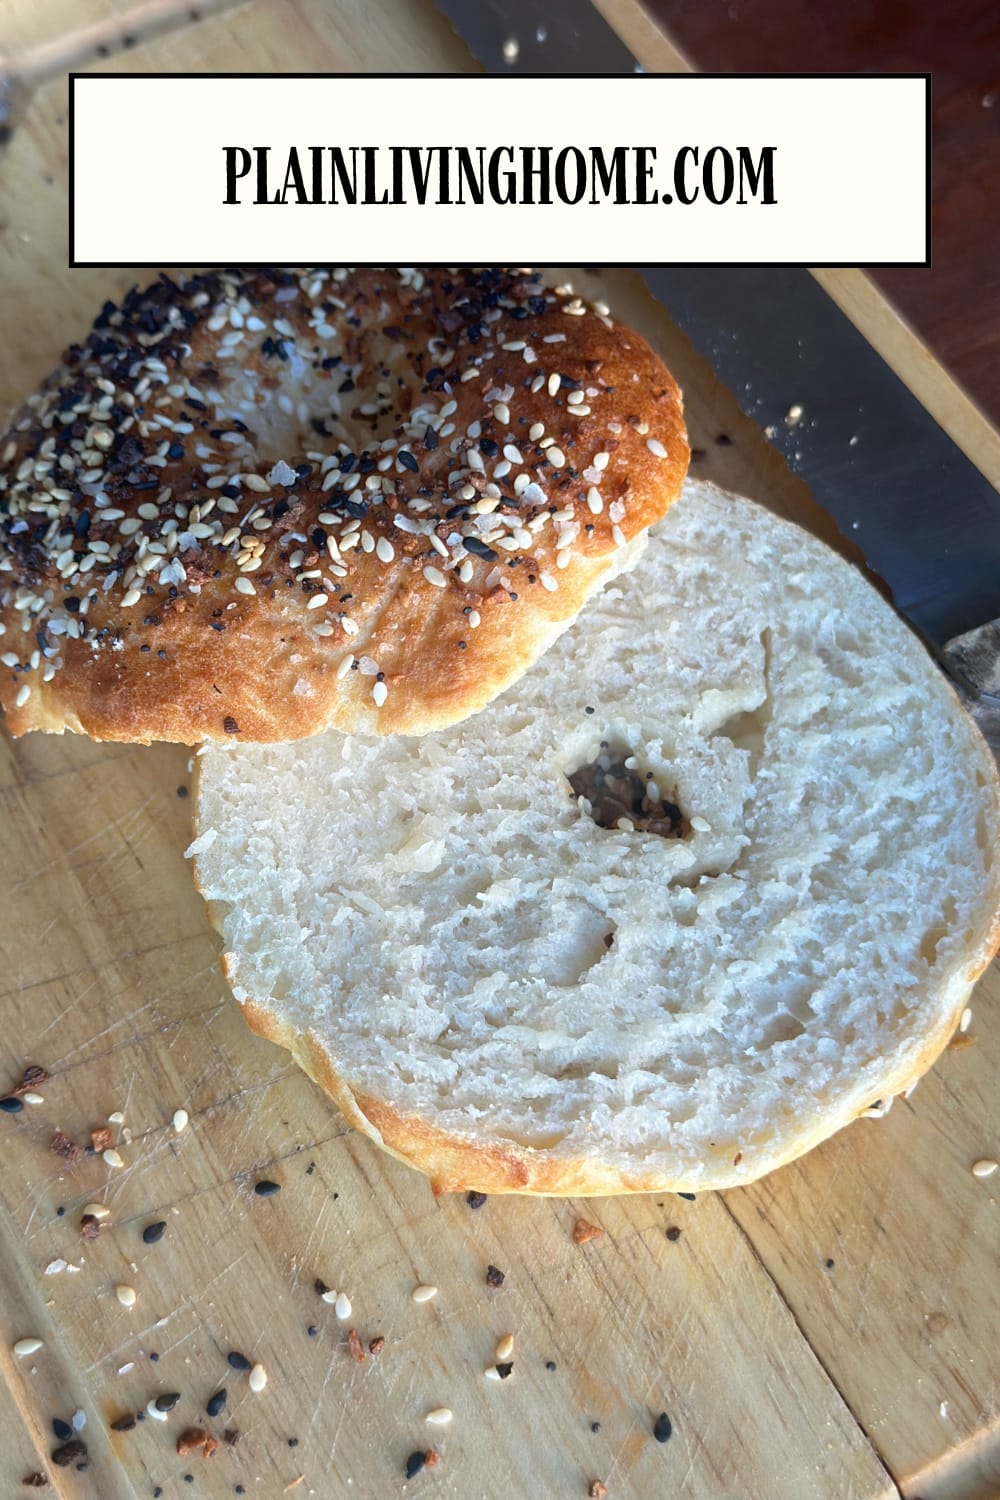
- Cool bagels on a rack for at least 15 minutes so the crumb sets. Slice and toast for a classic bagel bite. The crumb should look even with small, tight holes and the crust should chew, not crackle.
- Store and freeze.
- Keep at room temperature in a sealed bag for 2–3 days. For longer storage, slice, then freeze in a freezer bag for up to 3 months. Toast straight from frozen for the best texture.
Notes
- The tested main formula uses 280 grams fresh-milled hard red wheat flour and 240 grams unbleached all-purpose flour. Different flours absorb water differently, so substitutions may require small adjustments. Regardless of the flour used, the finished dough should feel firm, elastic and able to hold its shape.
- Lecithin helps whole-grain bagels stay soft and tall without losing chew; it is optional but helpful.
- The baking soda + coconut sugar water bath gives the classic shiny crust and bakery bagel flavor.
- Proofing times vary with room temperature and starter strength; trust the look—bagels should appear slightly puffy before boiling.
- Popular topping: Everything Bagel Seasoning.
Nutrition
About the Author

Kim is an adventurous mama of 5 who has been building new skills over 16 years of marriage. Over the past decade, she and her family have built a homestead from the ground up, starting with meat and egg chickens, growing into a large garden, and learning to preserve their harvest.
She taught herself to sew, crochet, and knit 13 years ago through books and early YouTube tutorials, and has been making handmade projects ever since.
Cooking from scratch became a necessity and a passion as her family learned to eat more nutritionally and live more frugally. She tests all of her sourdough and fresh milled flour recipes on the kids to ensure they’re delicious and nutritious.
At Plain Living, Kim shares what she’s actually lived — not theory, but the real skills she’s picked up through years of trial, error, and love for her family and home.

Sourdough bagels are one of my absolute favorite things to make and eat!! Perfect for breakfast prep!
Emily, I’m so happy to see you here on the blog 🙂 I love to make a double batch of bagels for busy mornings so the kids can just grab them and go. They freeze really well too!
Sourdough bagels are one of my absolute favorite things to make and eat!! Perfect for breakfast prep!
Seriously the best sourdough bagels ever! I love to pair mine with a delicious cream cheese!
Seriously the best sourdough bagels ever! I love to pair mine with a delicious cream cheese!
Hey Dee ❤️ thanks for your comment! I love cream cheese with my bagels too. I’ll have to work on a homemade cream cheese recipe 😉
I can’t wait to try these! They look delicious 😋
Grace:) thank you for your comment!! I really think you will love how chewy and fluffy they turn out.
This recipe turns out so good everything. We have tried the fresh milled flour version, and I even used all fresh milled flour without any all purpose, and it still always turns out chewy and fluffy and delicious. My family devours these bagels.